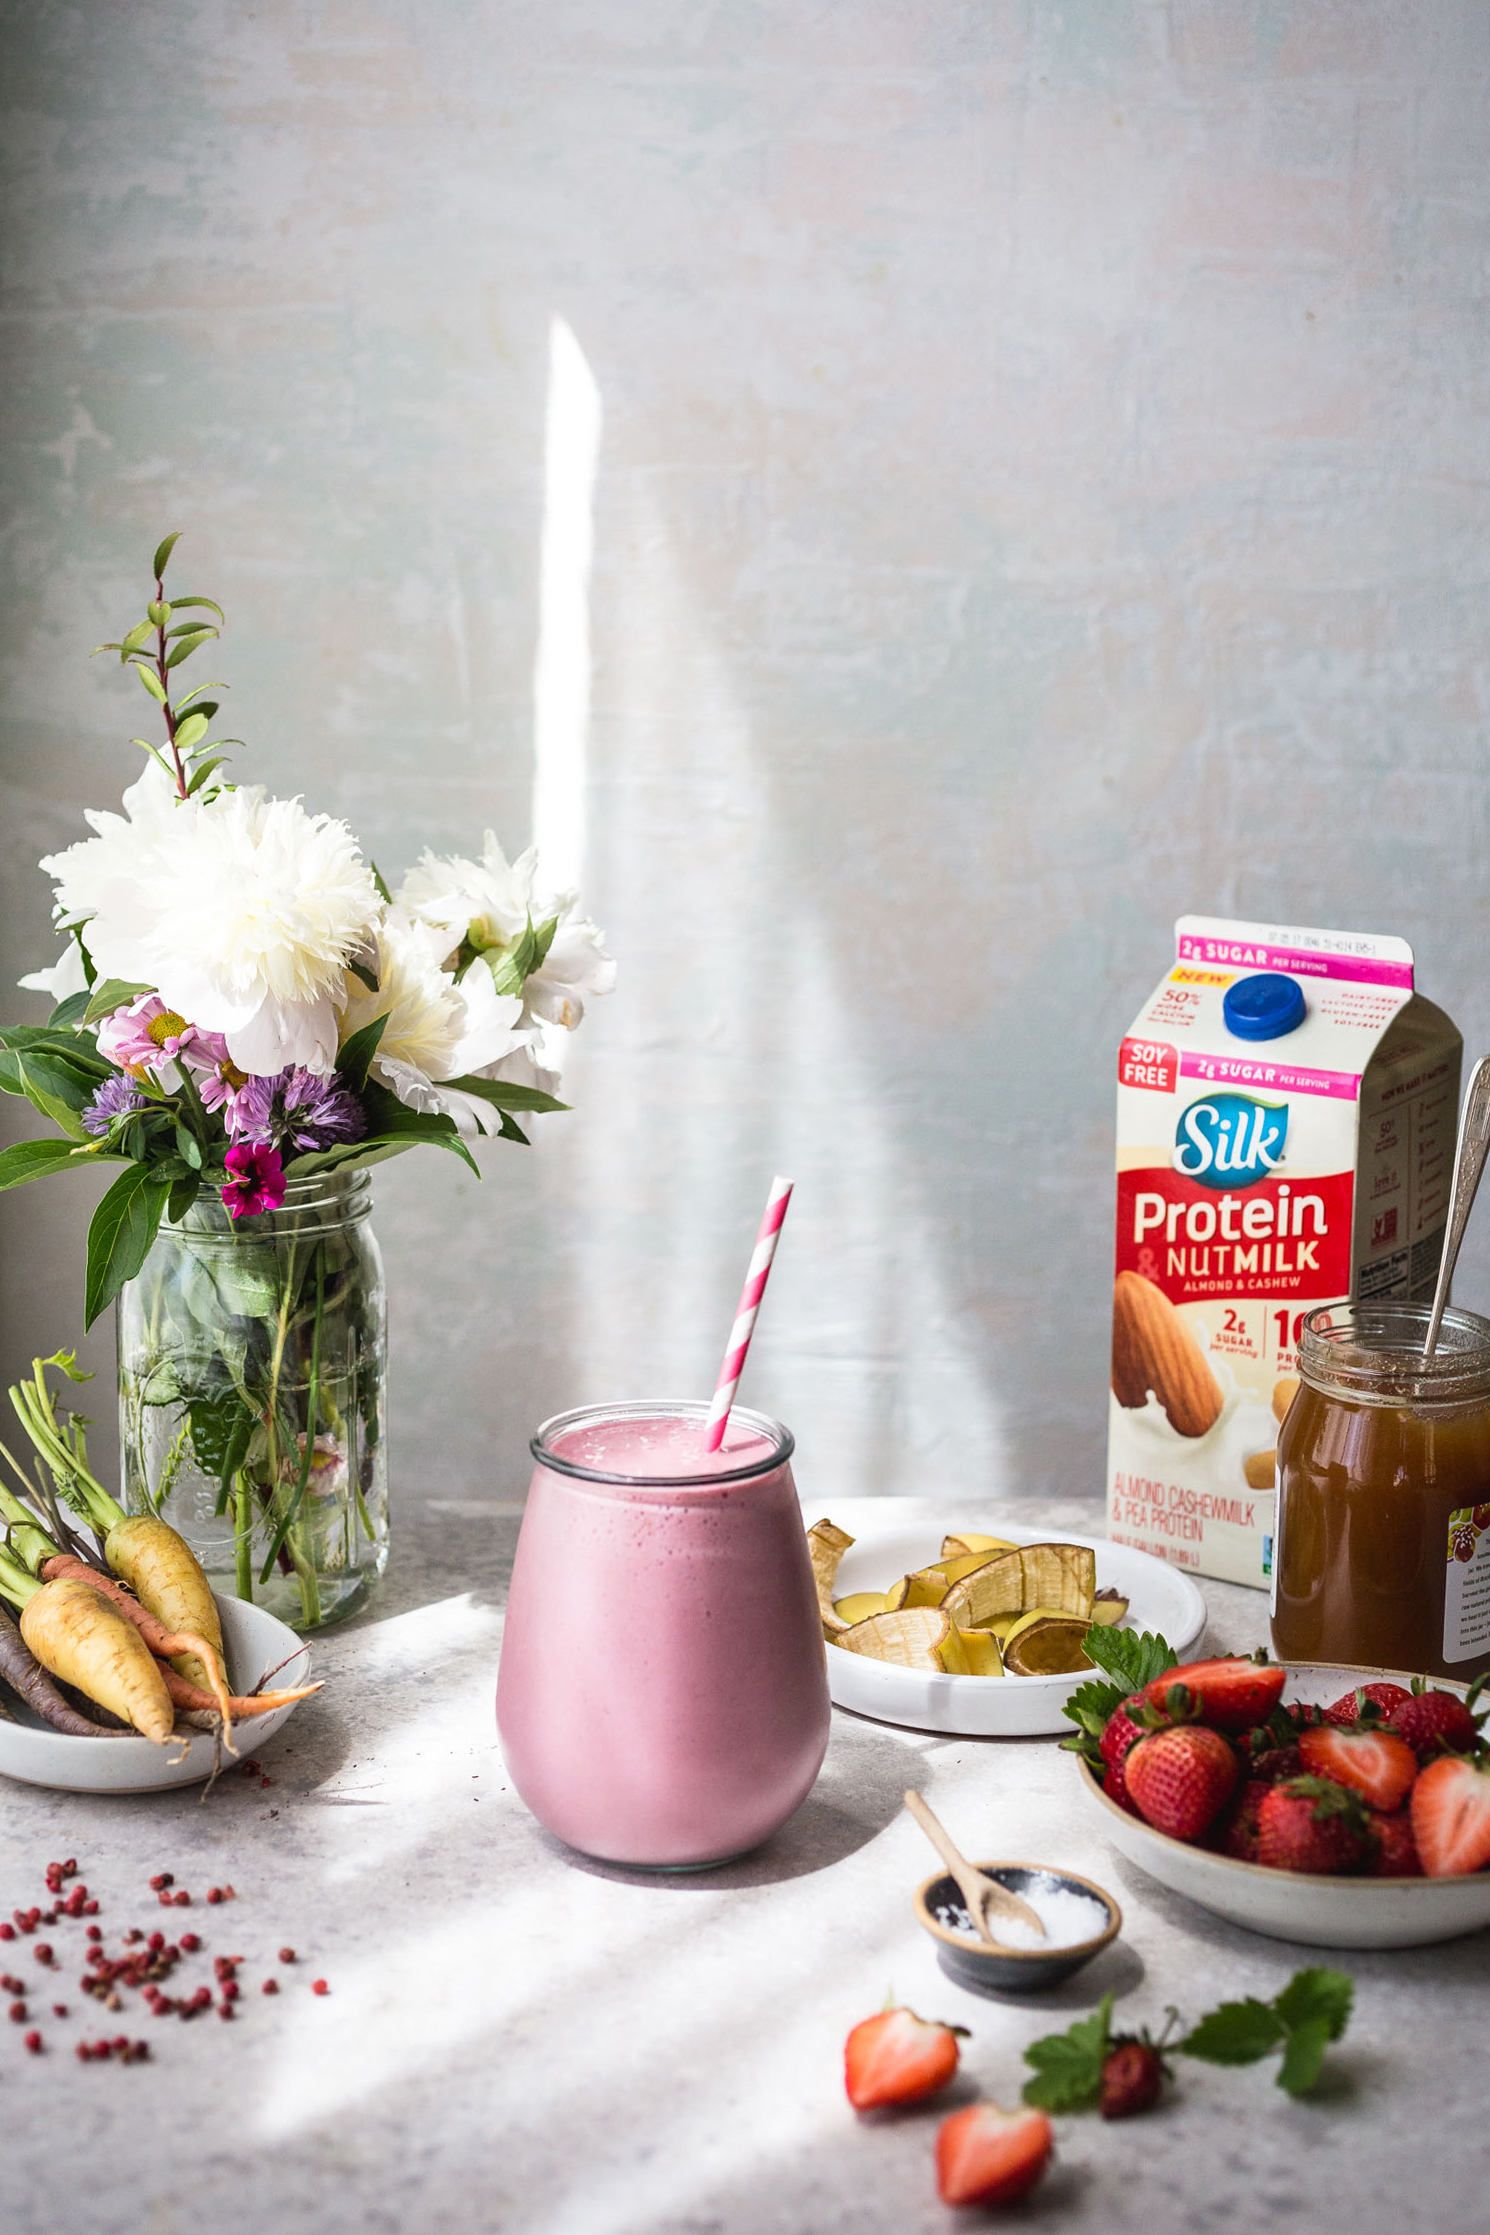
This Strawberry Pink Peppercorn Protein Smoothie recipe is great as a filling breakfast or post workout dr[...]

This Strawberry Pink Peppercorn Protein Smoothie recipe is great as a filling breakfast or post workout dr[...]
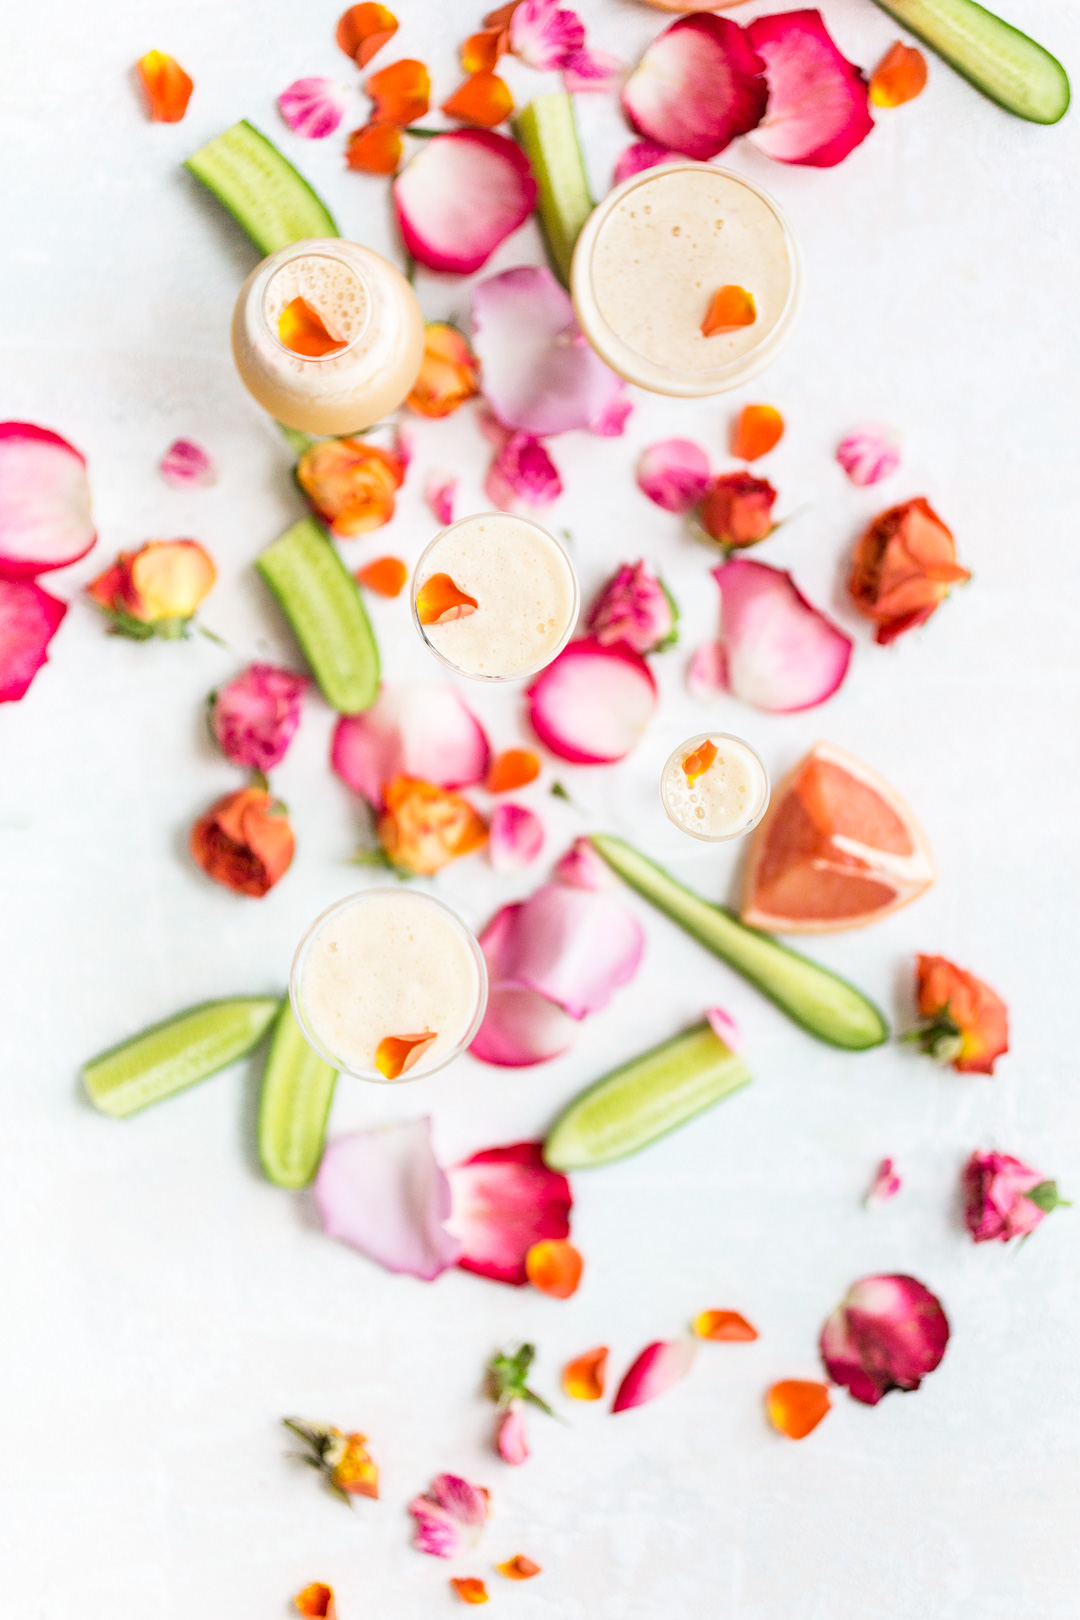
Pink Grapefruit Cucumber Rose Skin Quencher recipe from Lily Diamond's new cookbook, Kale & Caramel, i[...]
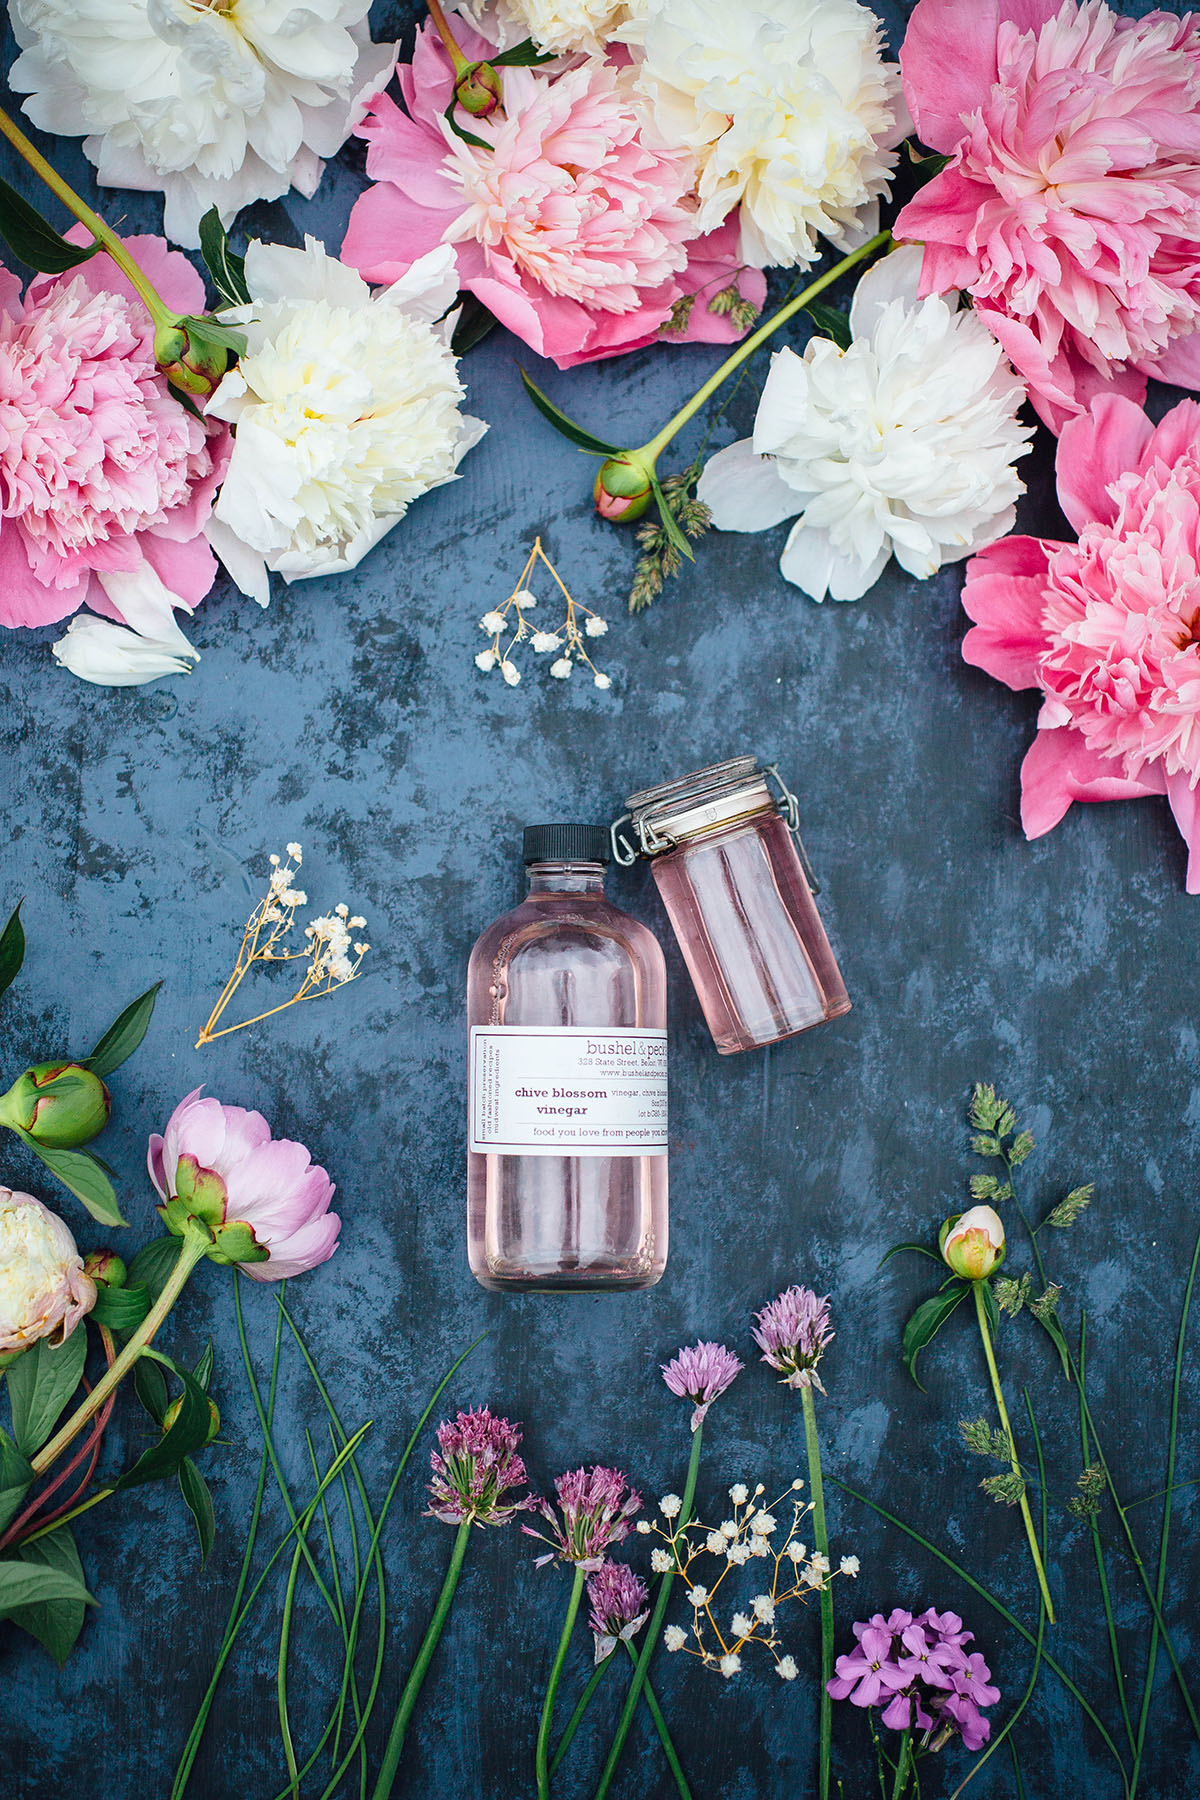
For today's Simple Sunday feature, we are talking all about how to make Chive Blossom Vinegar and 5 ways to[...]
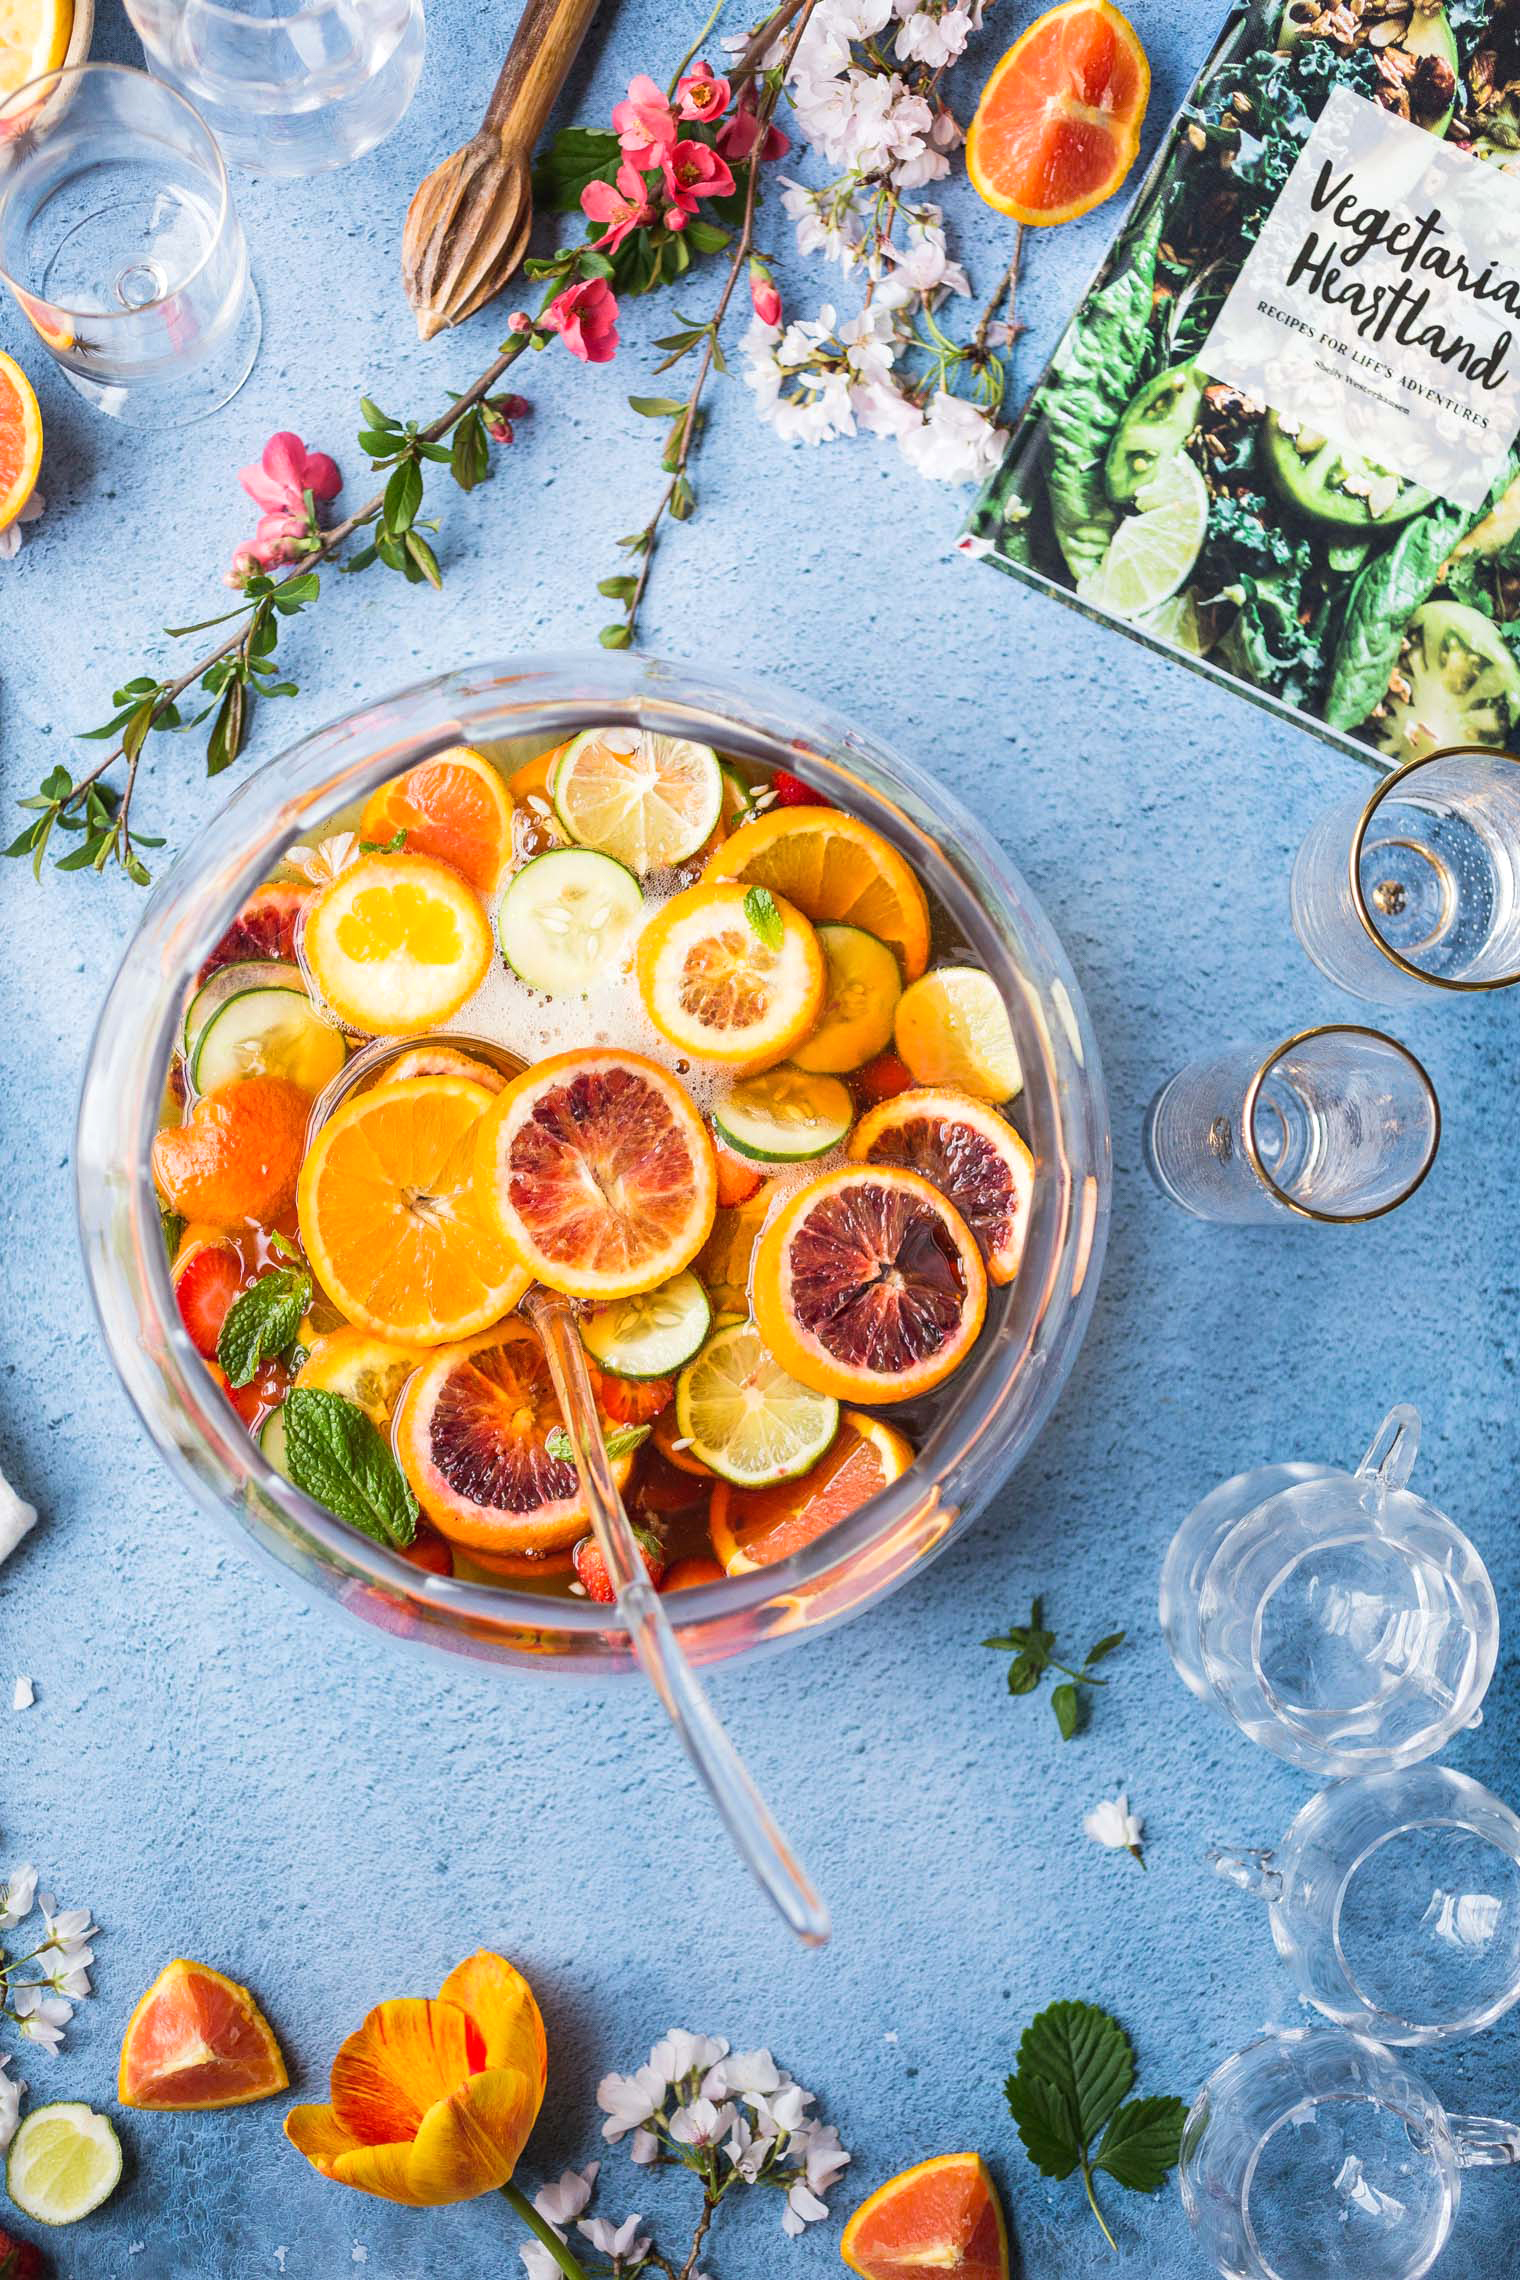
Finally, it's pre-order time, baby! Vegetarian Heartland started as a spark of an idea in April 2014 and[...]
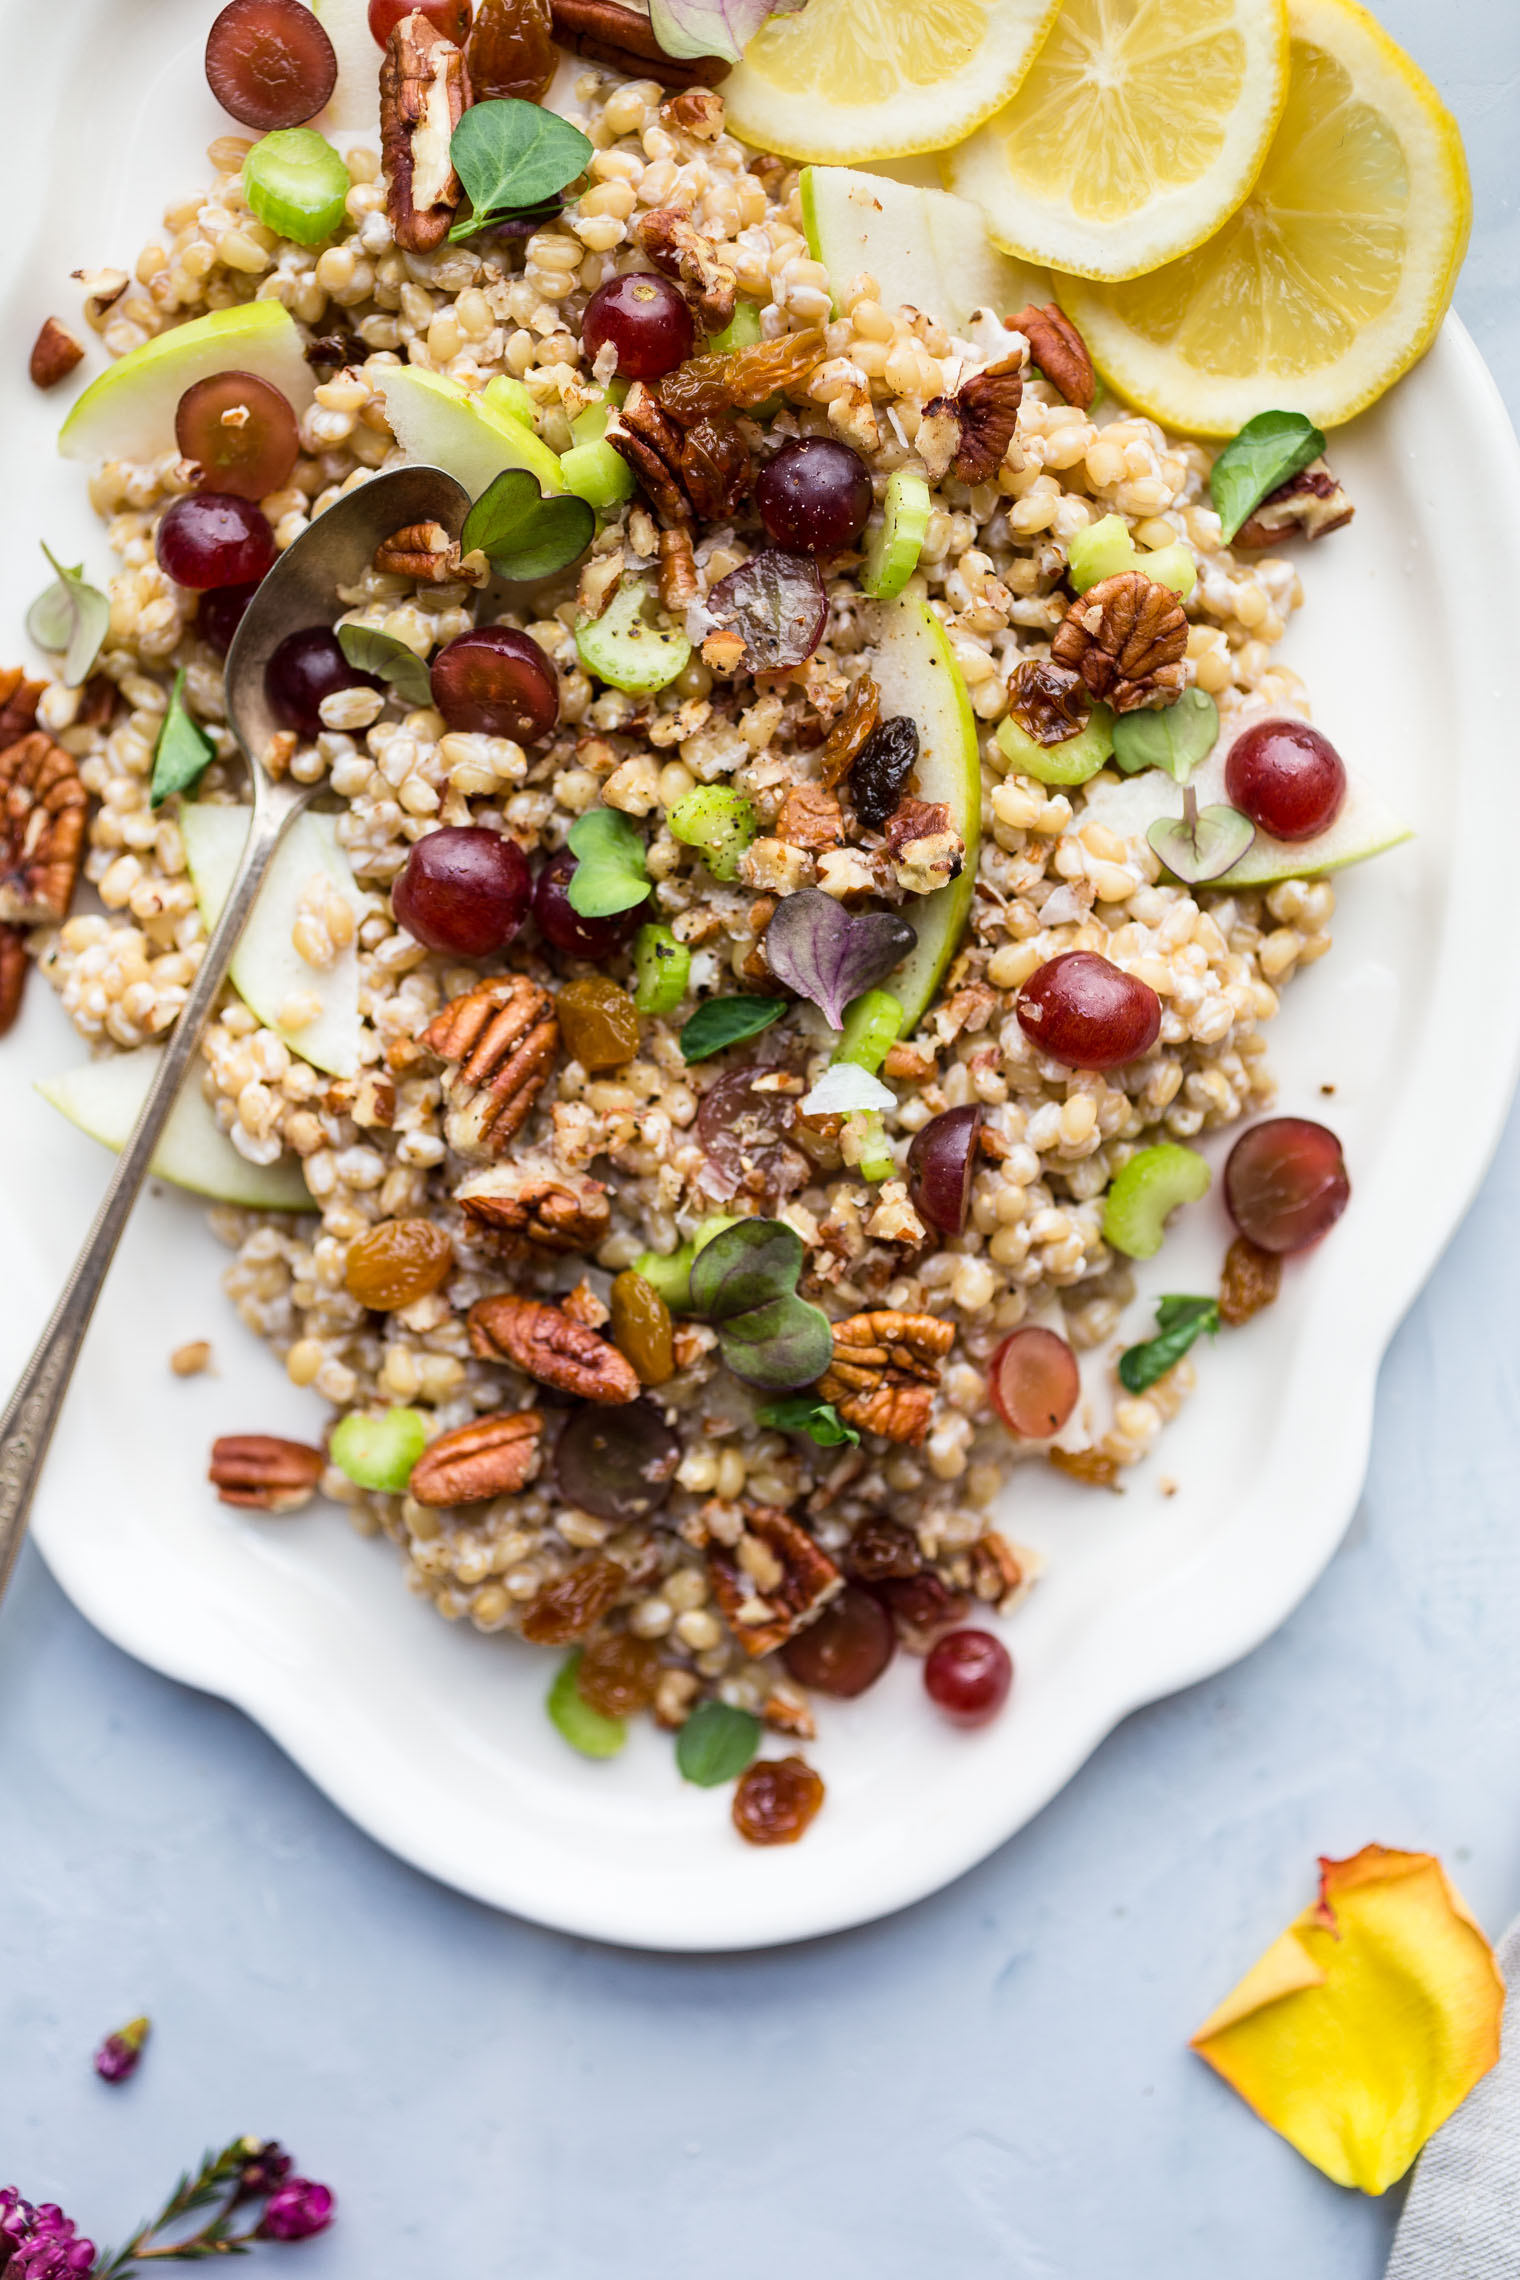
This Vegan Waldorf Wheatberry Salad is the perfect simple recipe for a filling lunch or side at dinner. #T[...]
This spicy Buffalo White Bean Hummus is the perfect protein-packed afternoon snack or spread for any meal.[...]
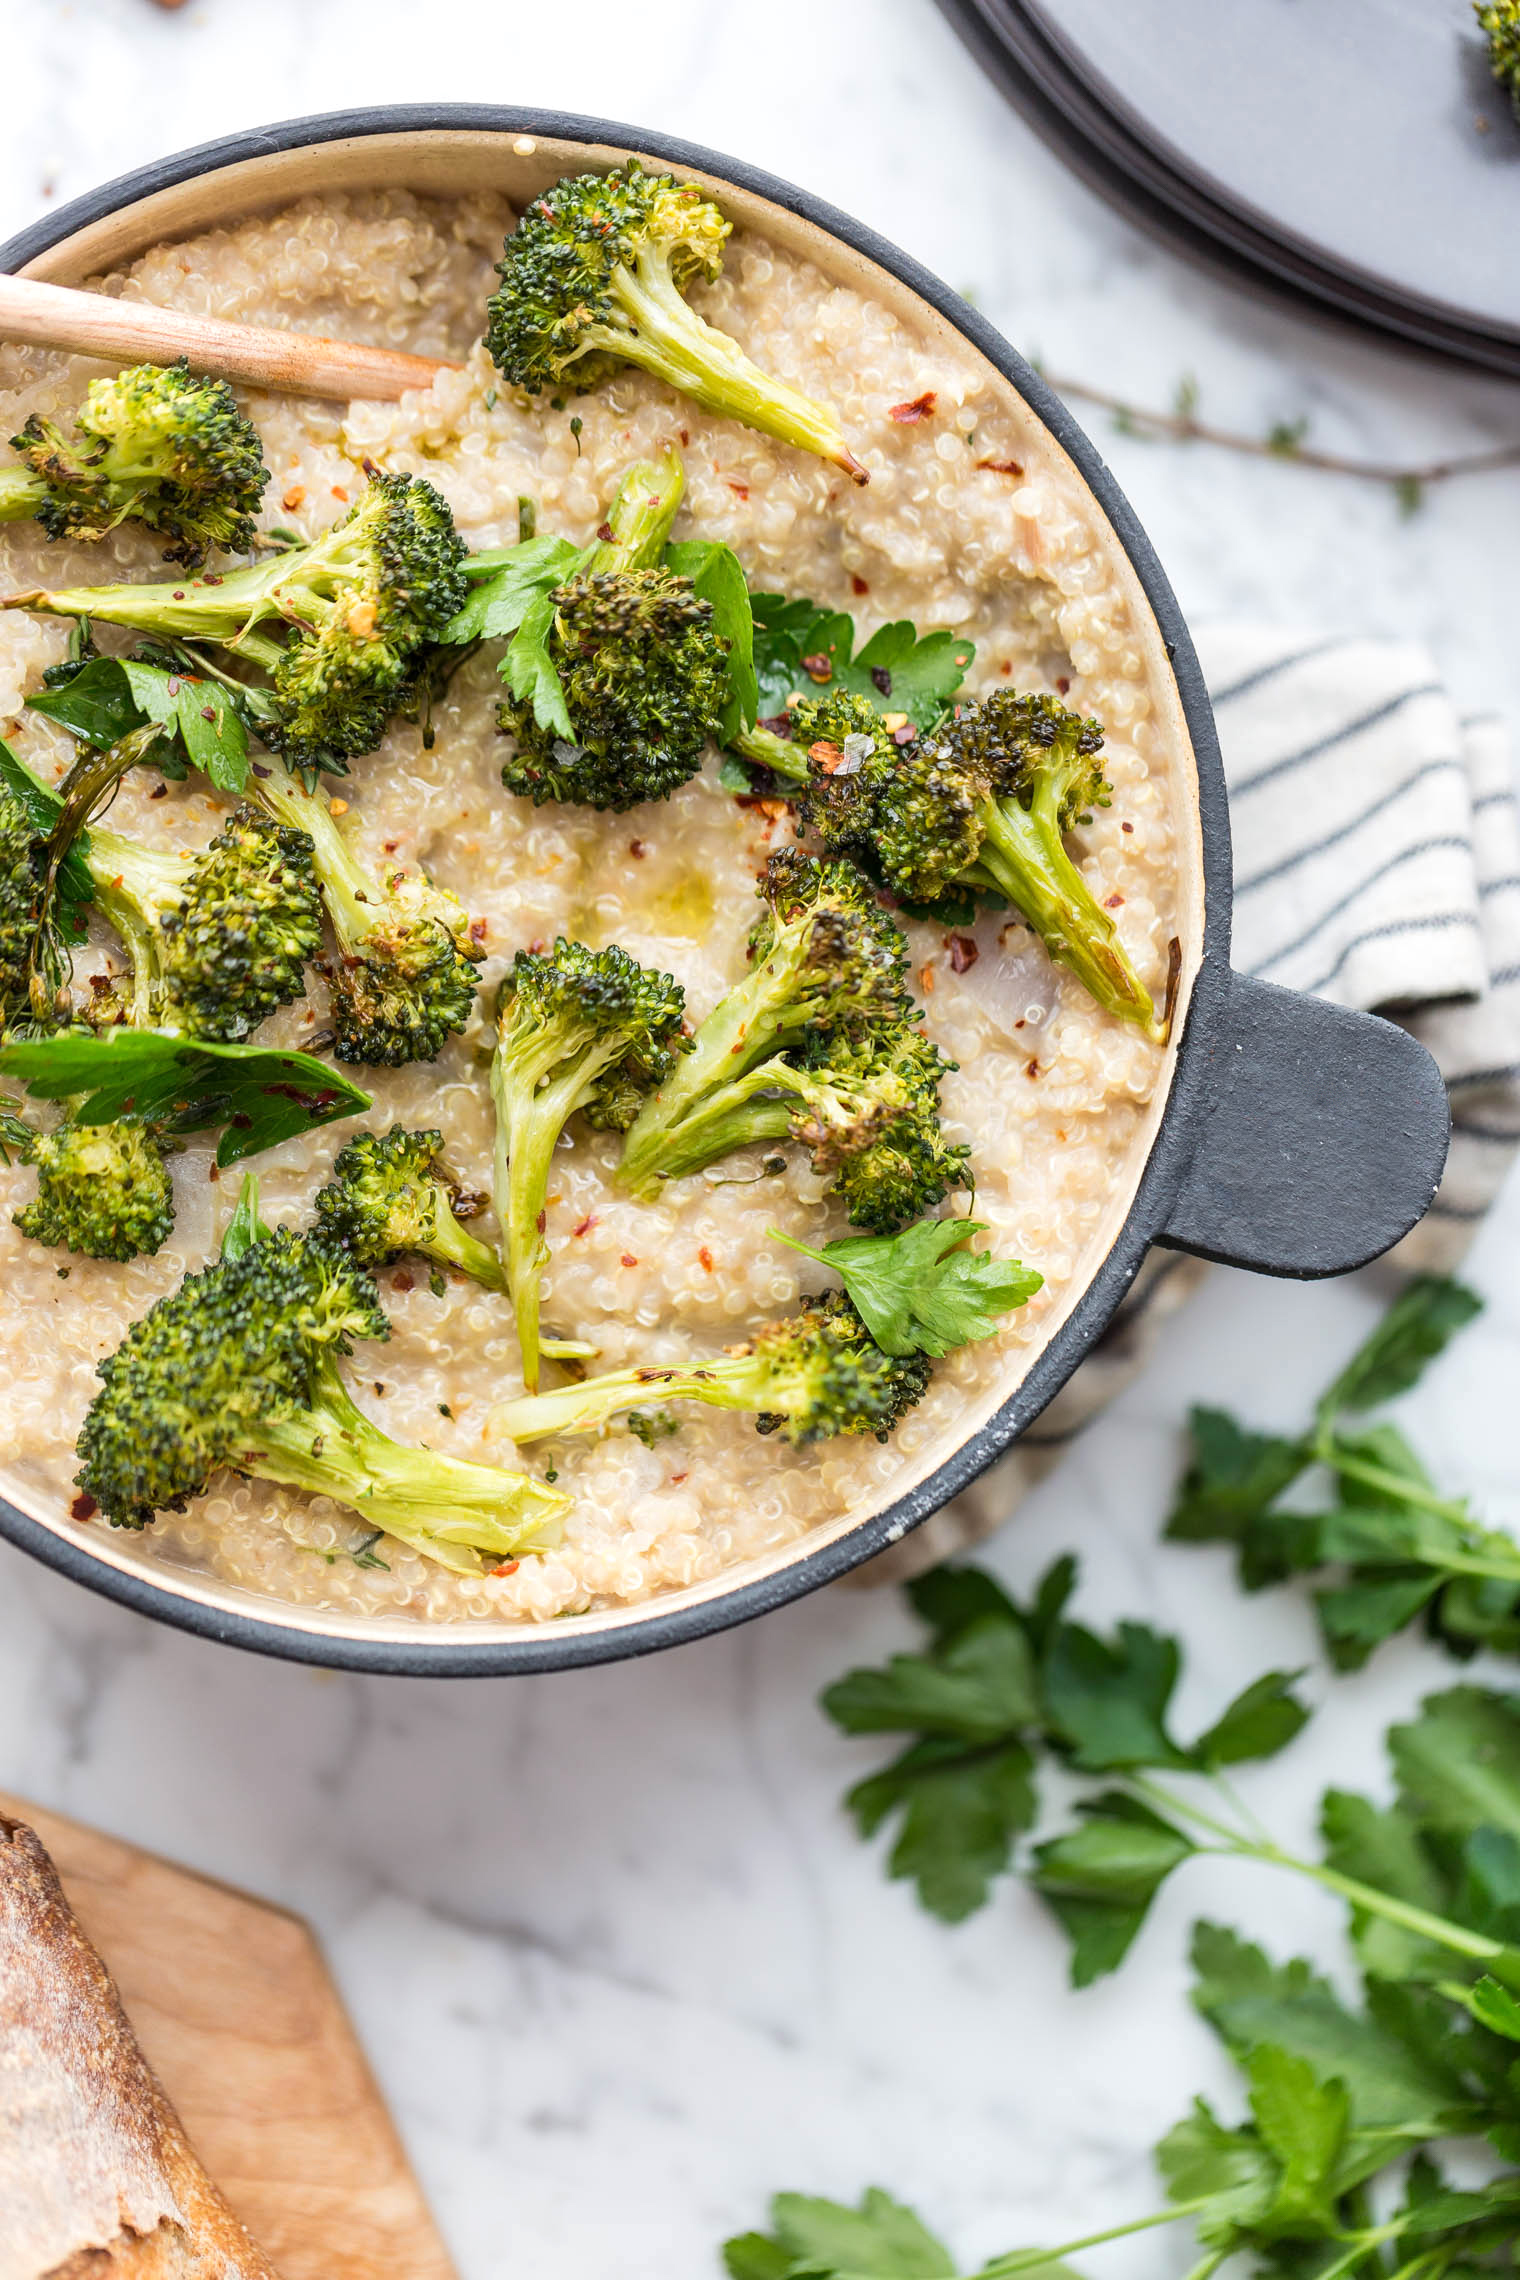
This Creamy Quinoa and White Bean Risotto with Crispy Brassica Florets is from The First Mess cookbook. Th[...]
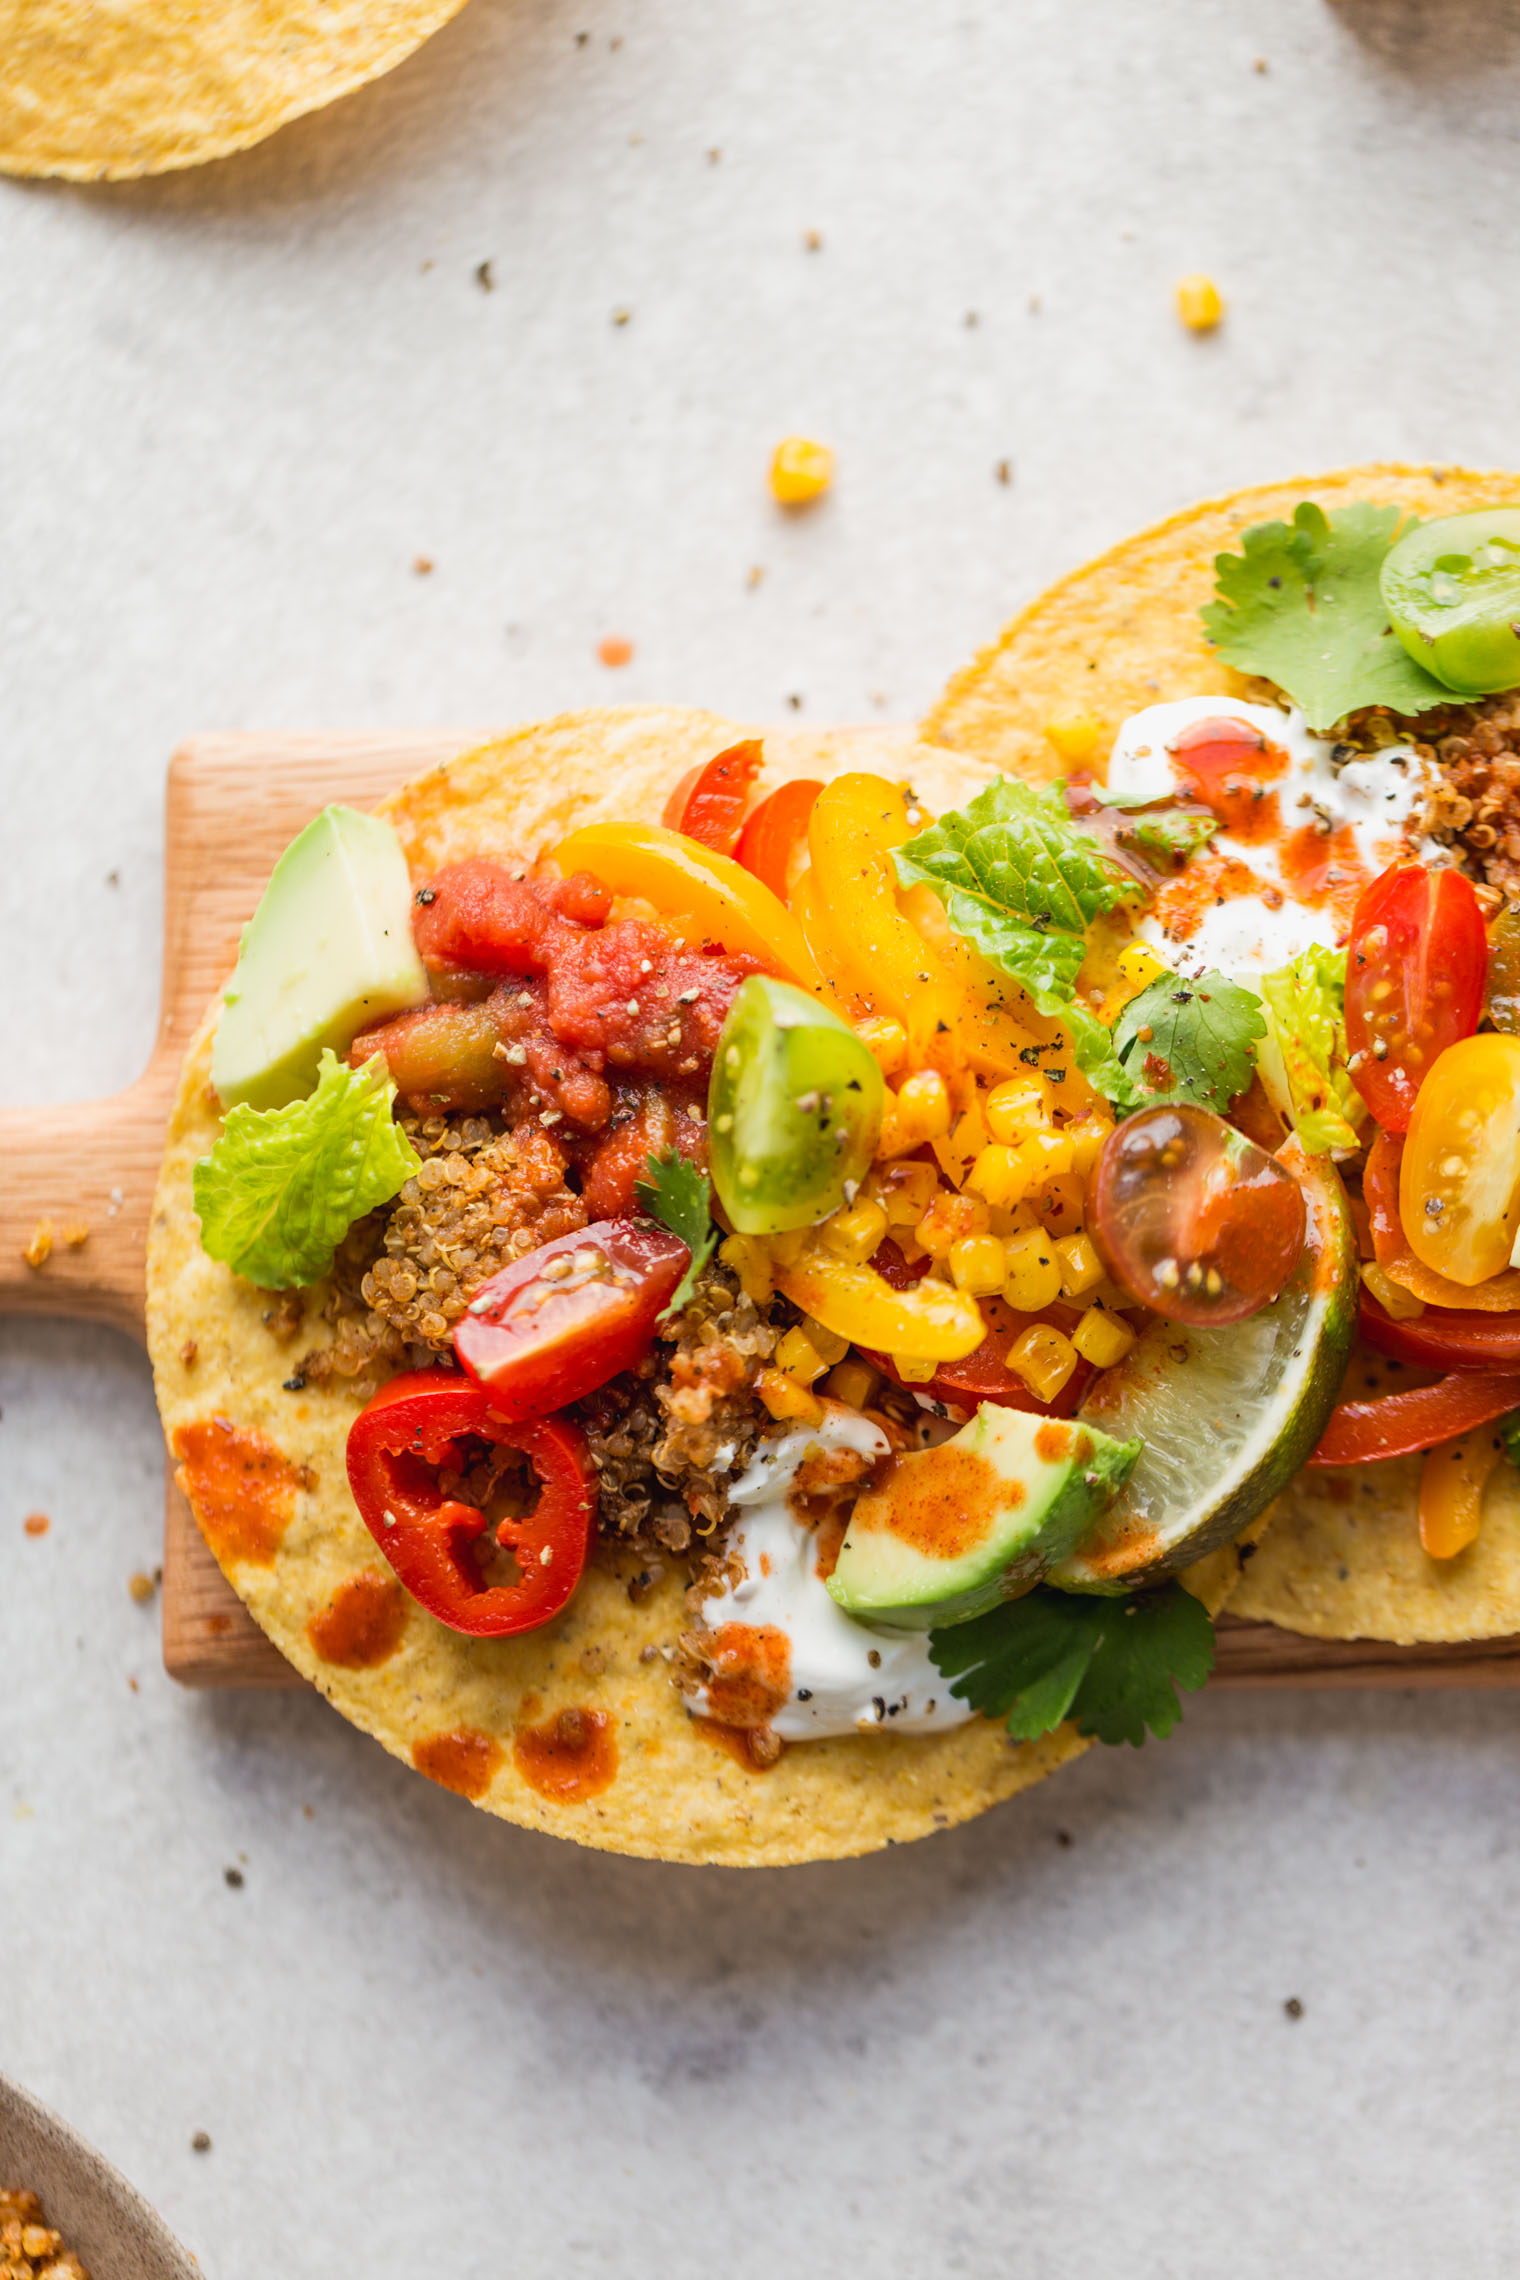
This Vegetarian Quinoa Taco Meat Tostadas recipe is a quick and simple meat-free weeknight main entree. Th[...]

This simple two-ingredient Cranberry Orange Champagne Mimosa (plus garnish) cocktail is perfect for holida[...]
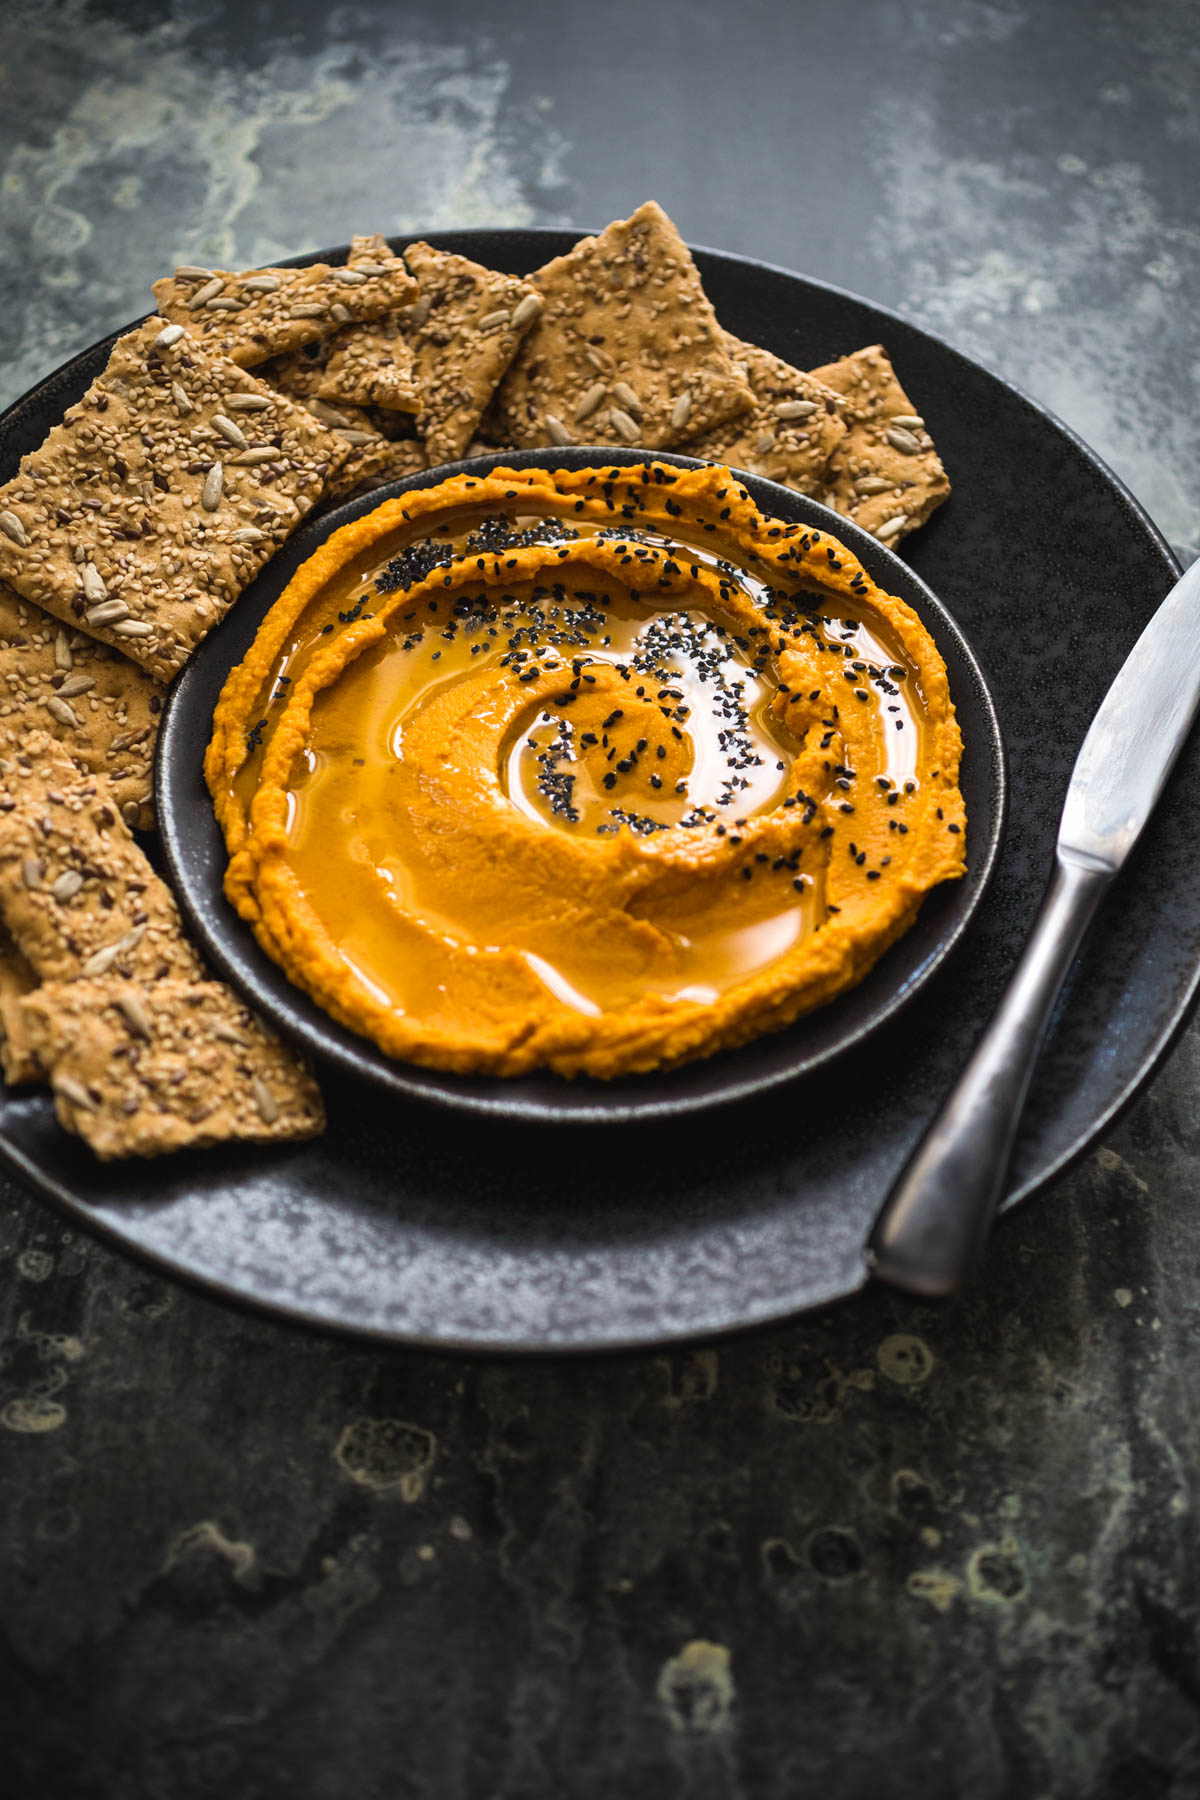
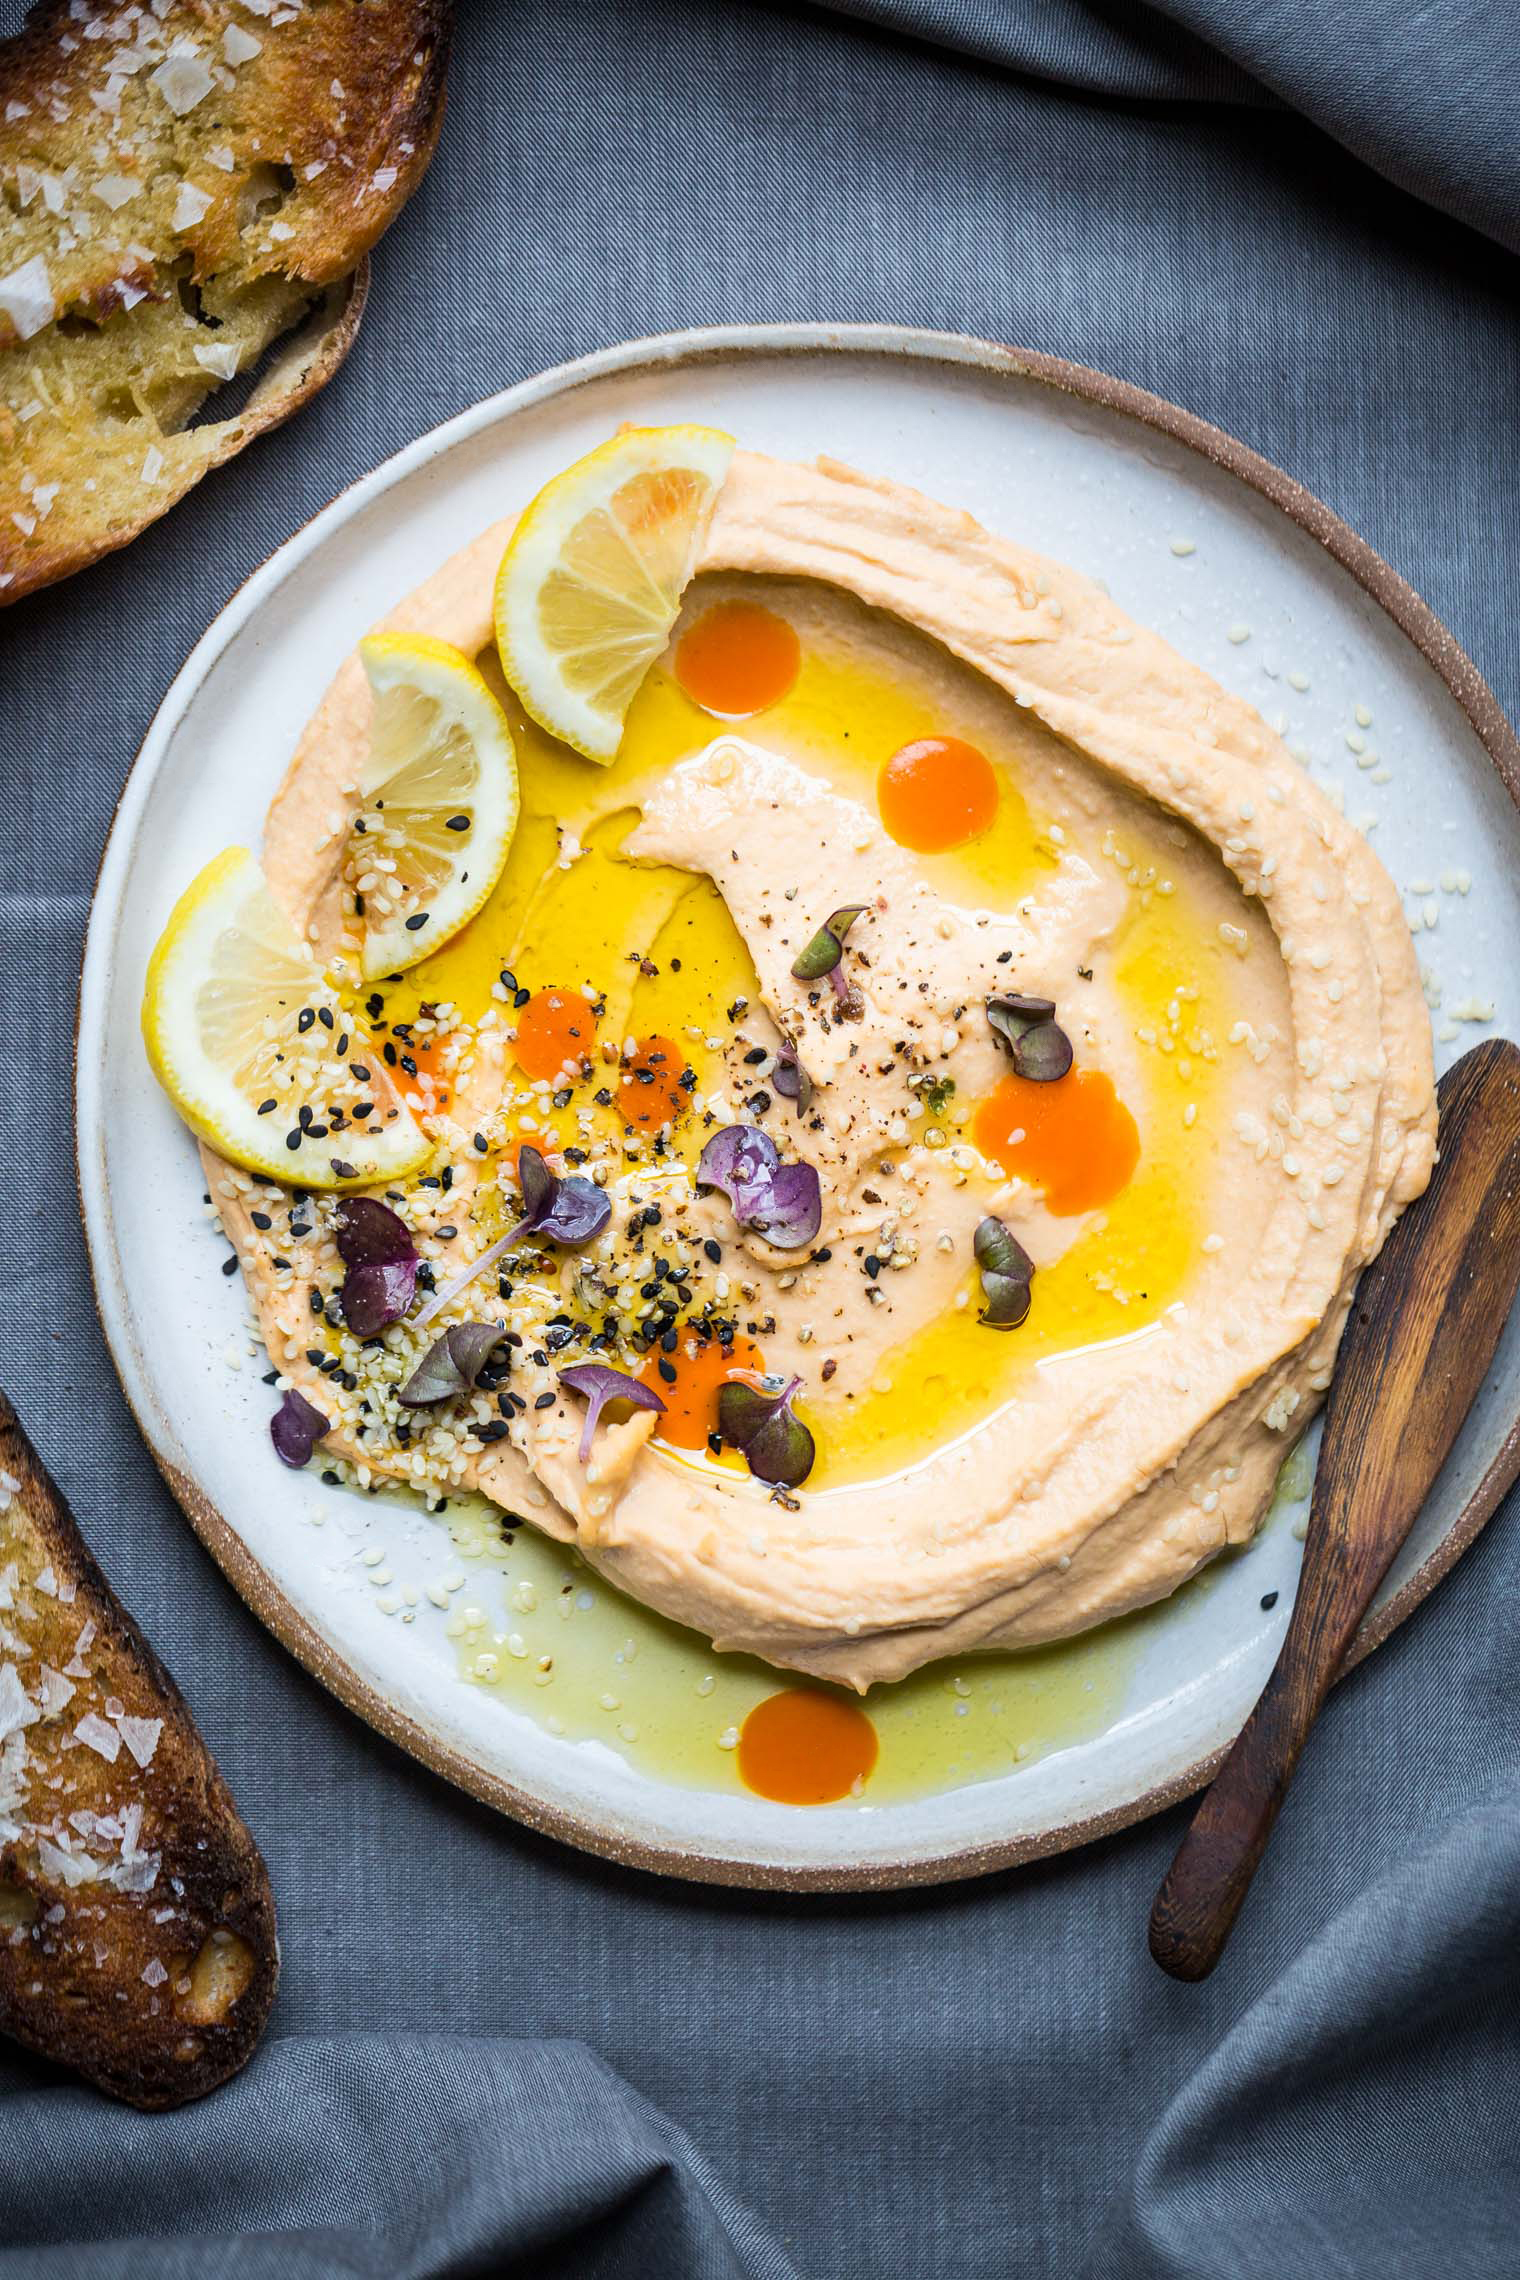
This Smoky Pumpkin & Black Sesame Seed Hummus is the perfect fall appetizer or an easy dinner with a s[...]
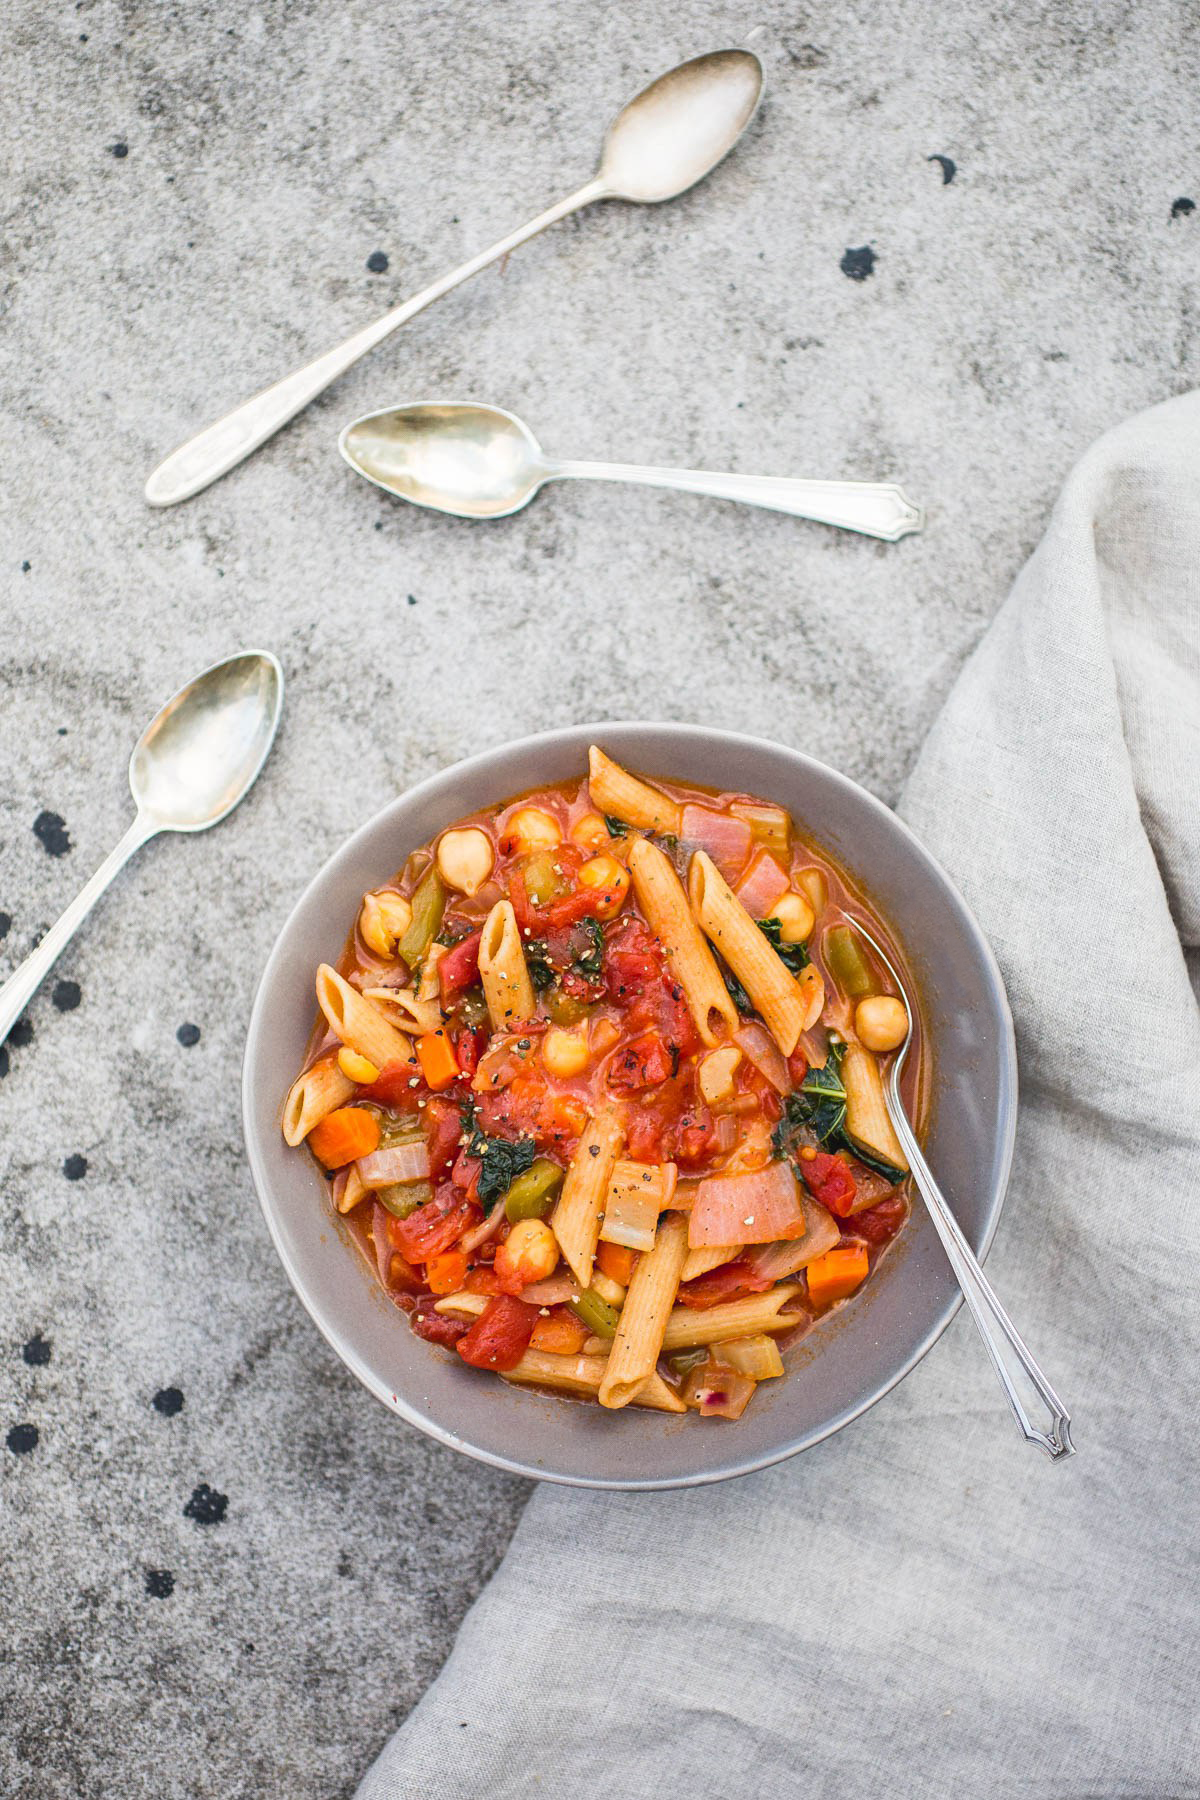
This Chickpea Tomato Minestrone is chocked full of fresh vegetables and pasta which makes it a filling and f[...]
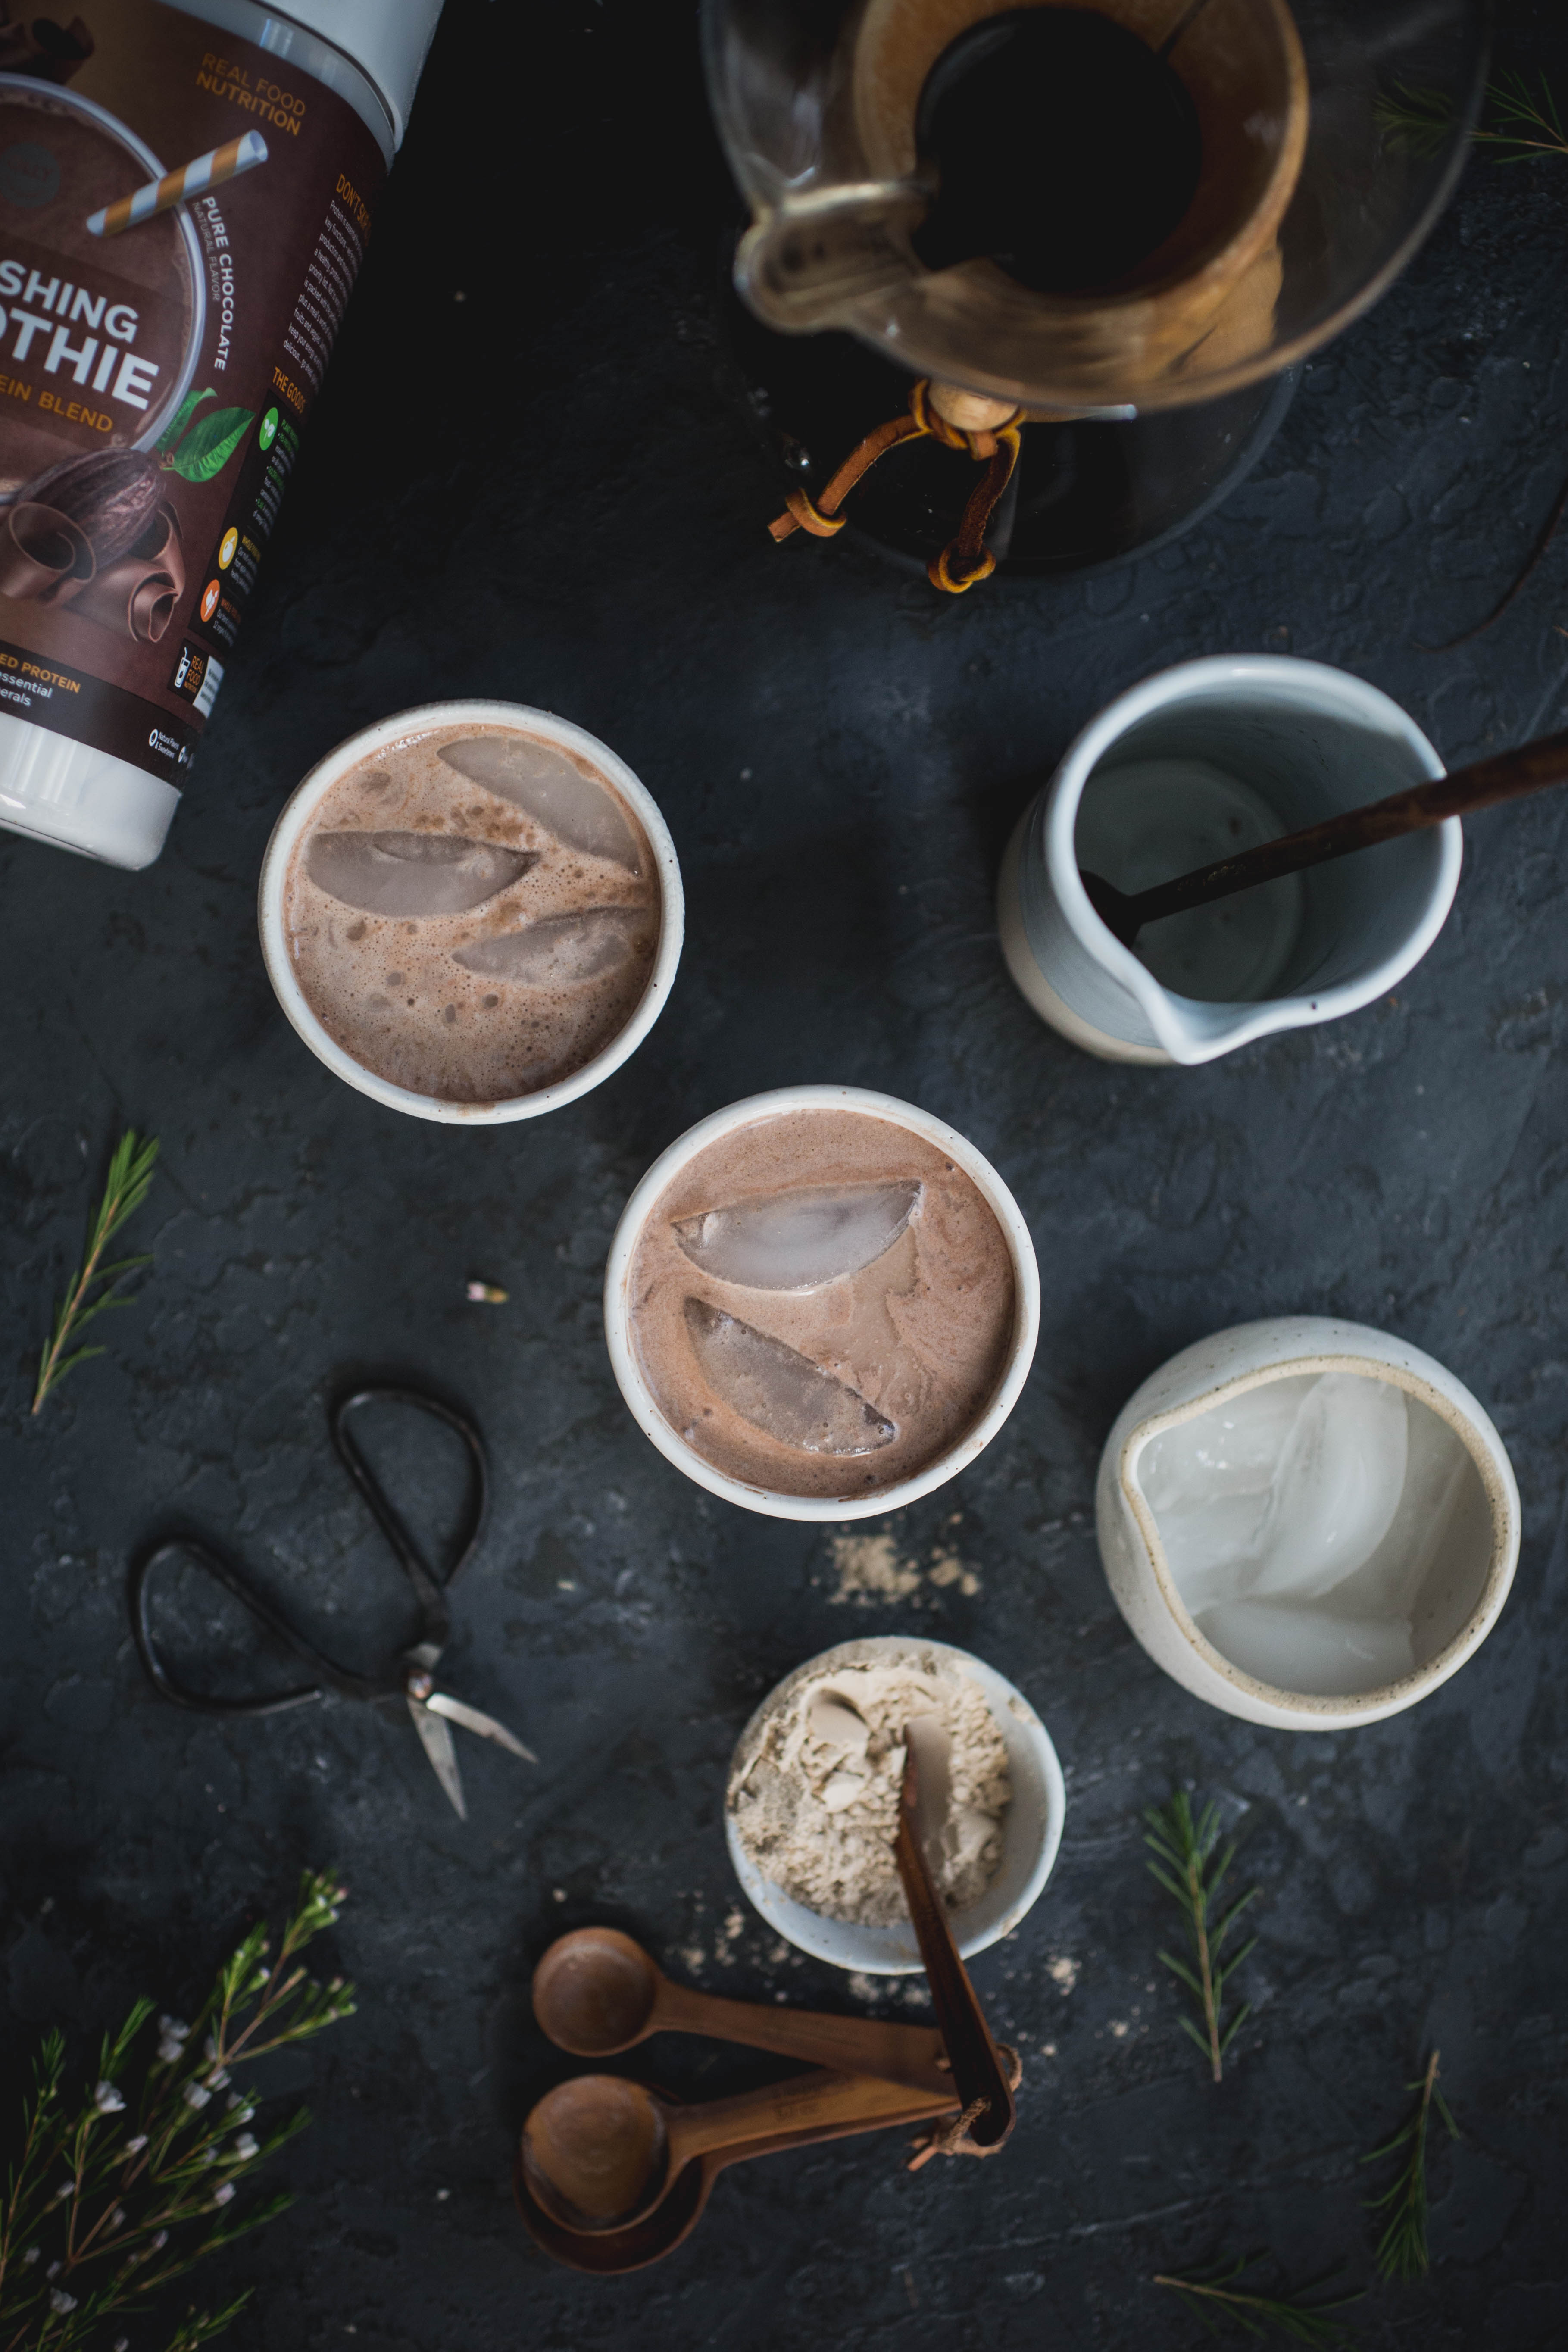
This Iced Cocoa Coffee Smoothie is the perfect morning or afternoon booster with iced coffee, blended date[...]

This Bakery Style Berry Vegan Muffins Recipe is loaded with strawberries, blueberries, and raspberries. Thes[...]
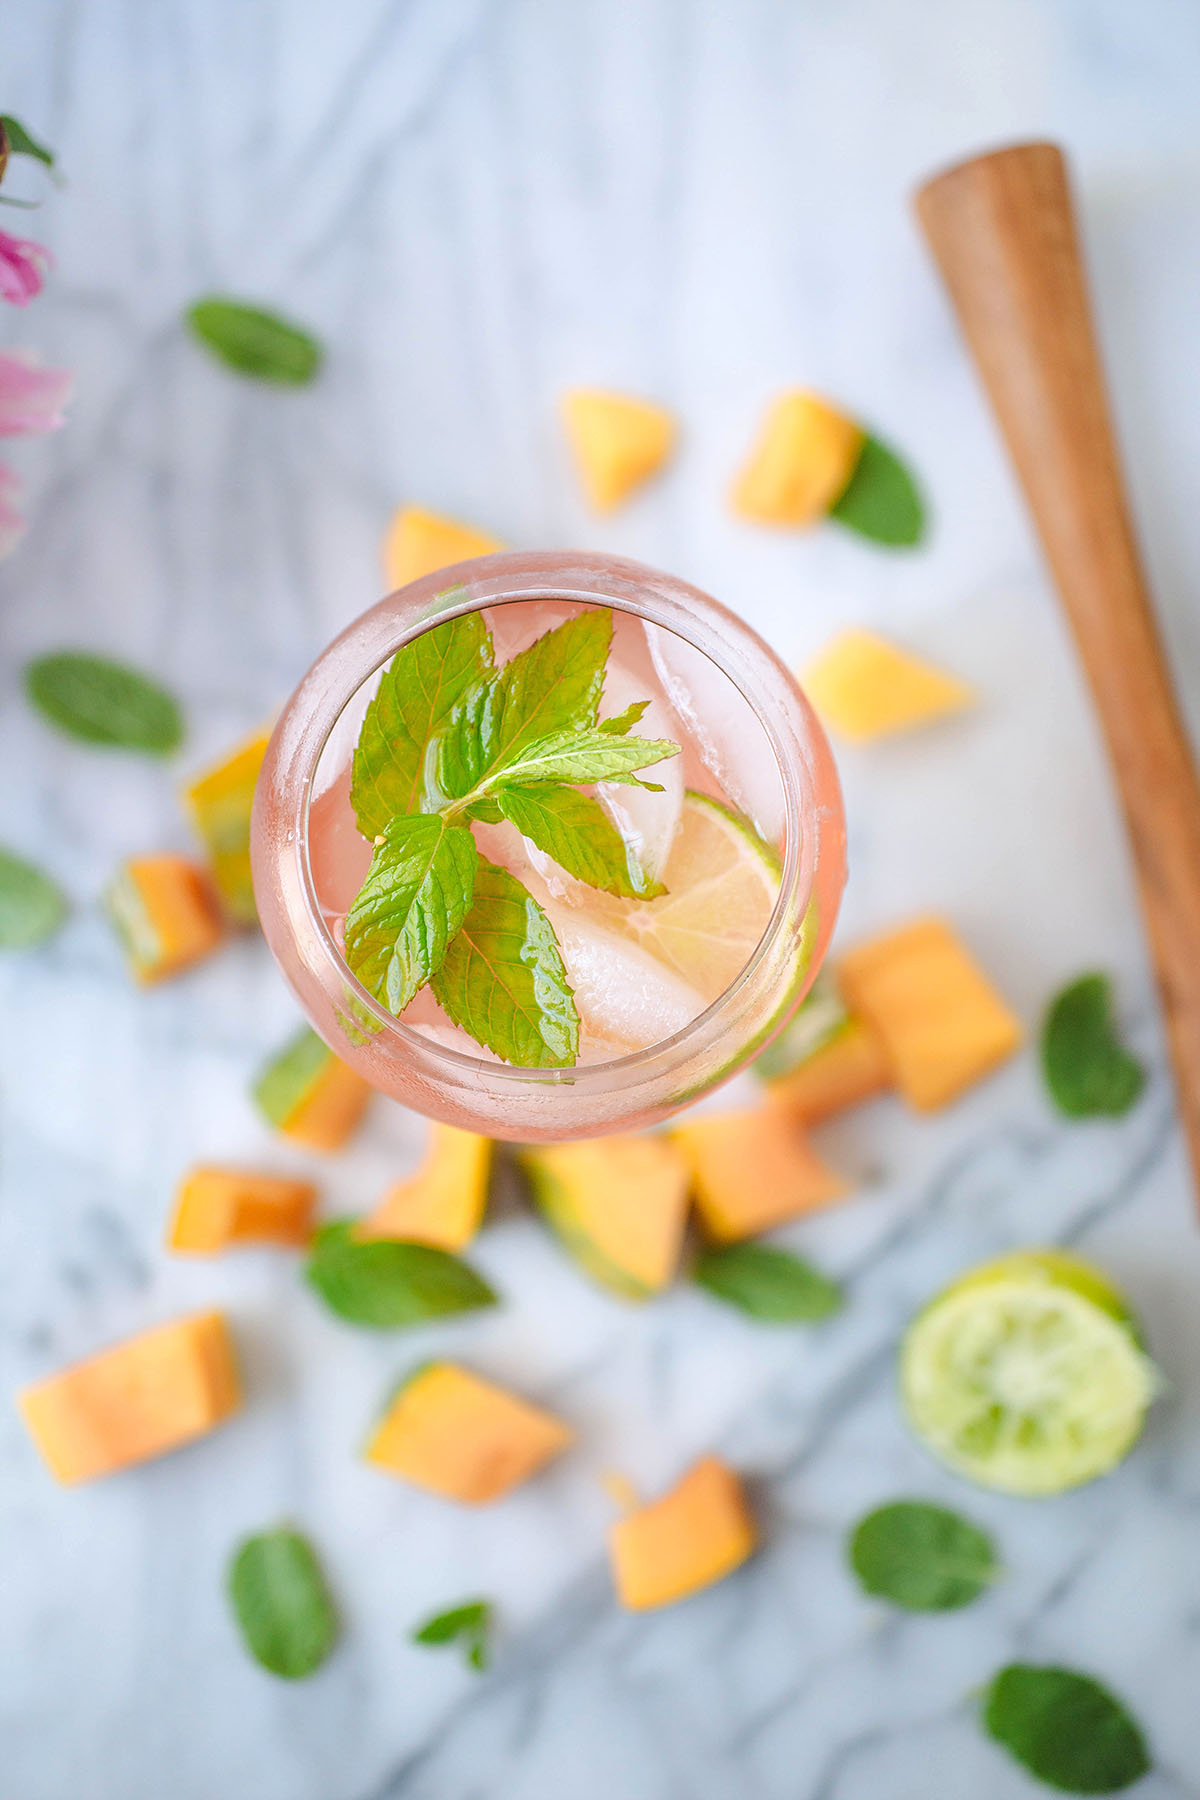
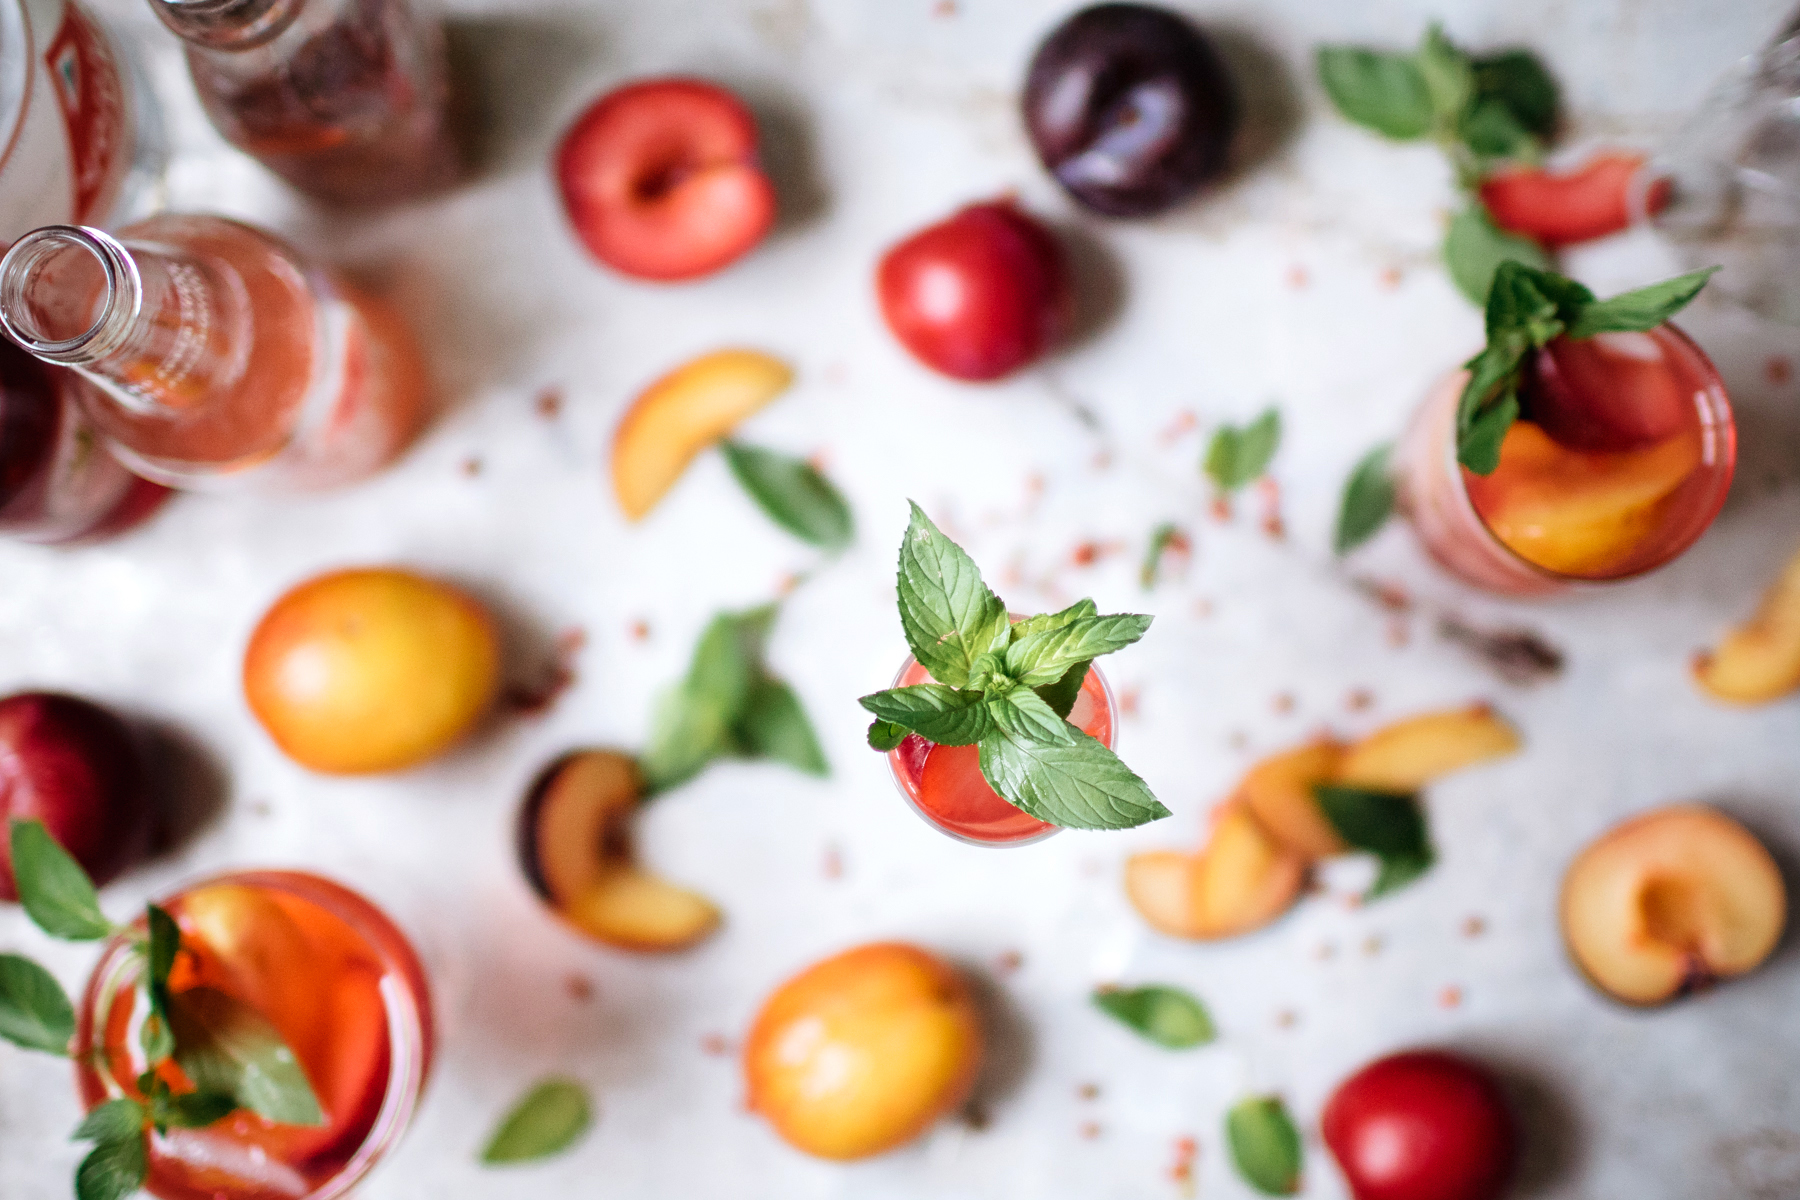
This rosé spritzer is a tropical spritz cocktail perfect for a humid summer evening on the porch or for si[...]
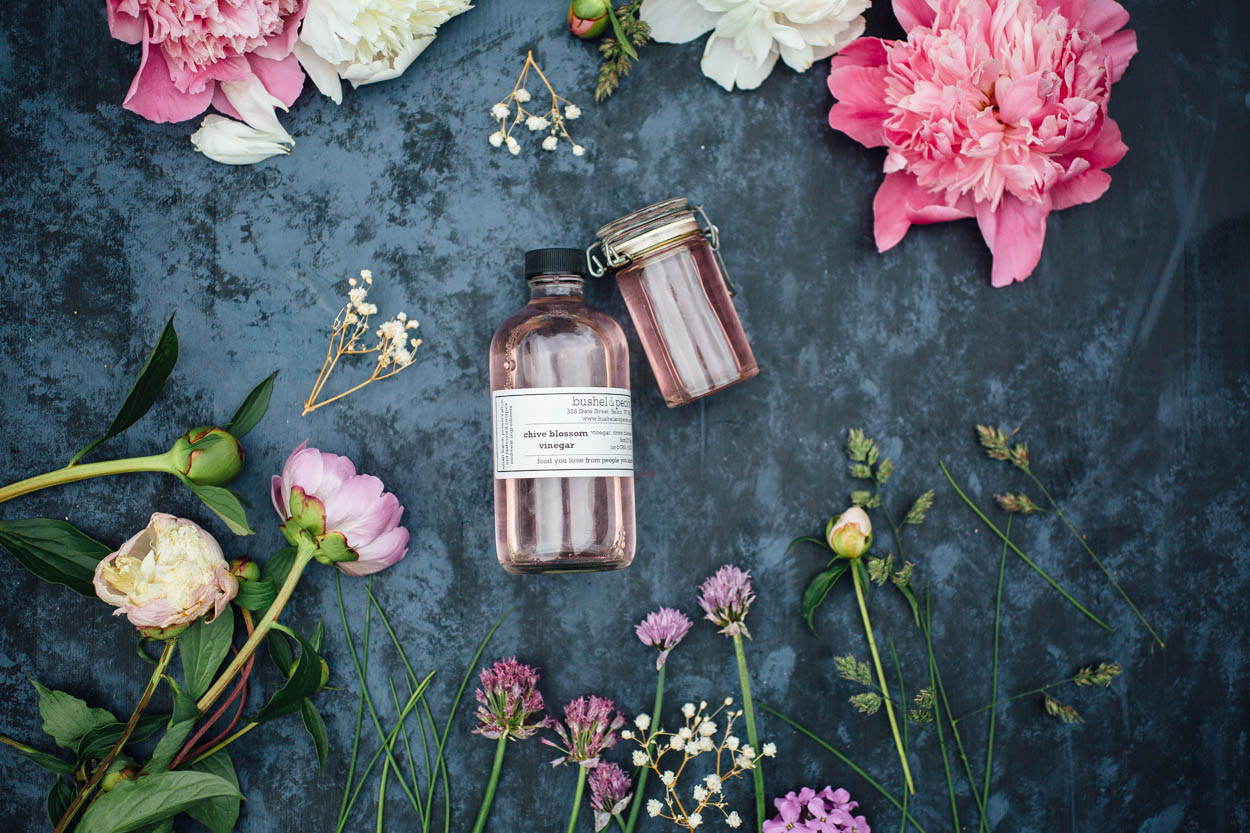
This two-ingredient Homemade Chive Blossom Vinegar is so simple that it's hard to even call it a recipe. T[...]
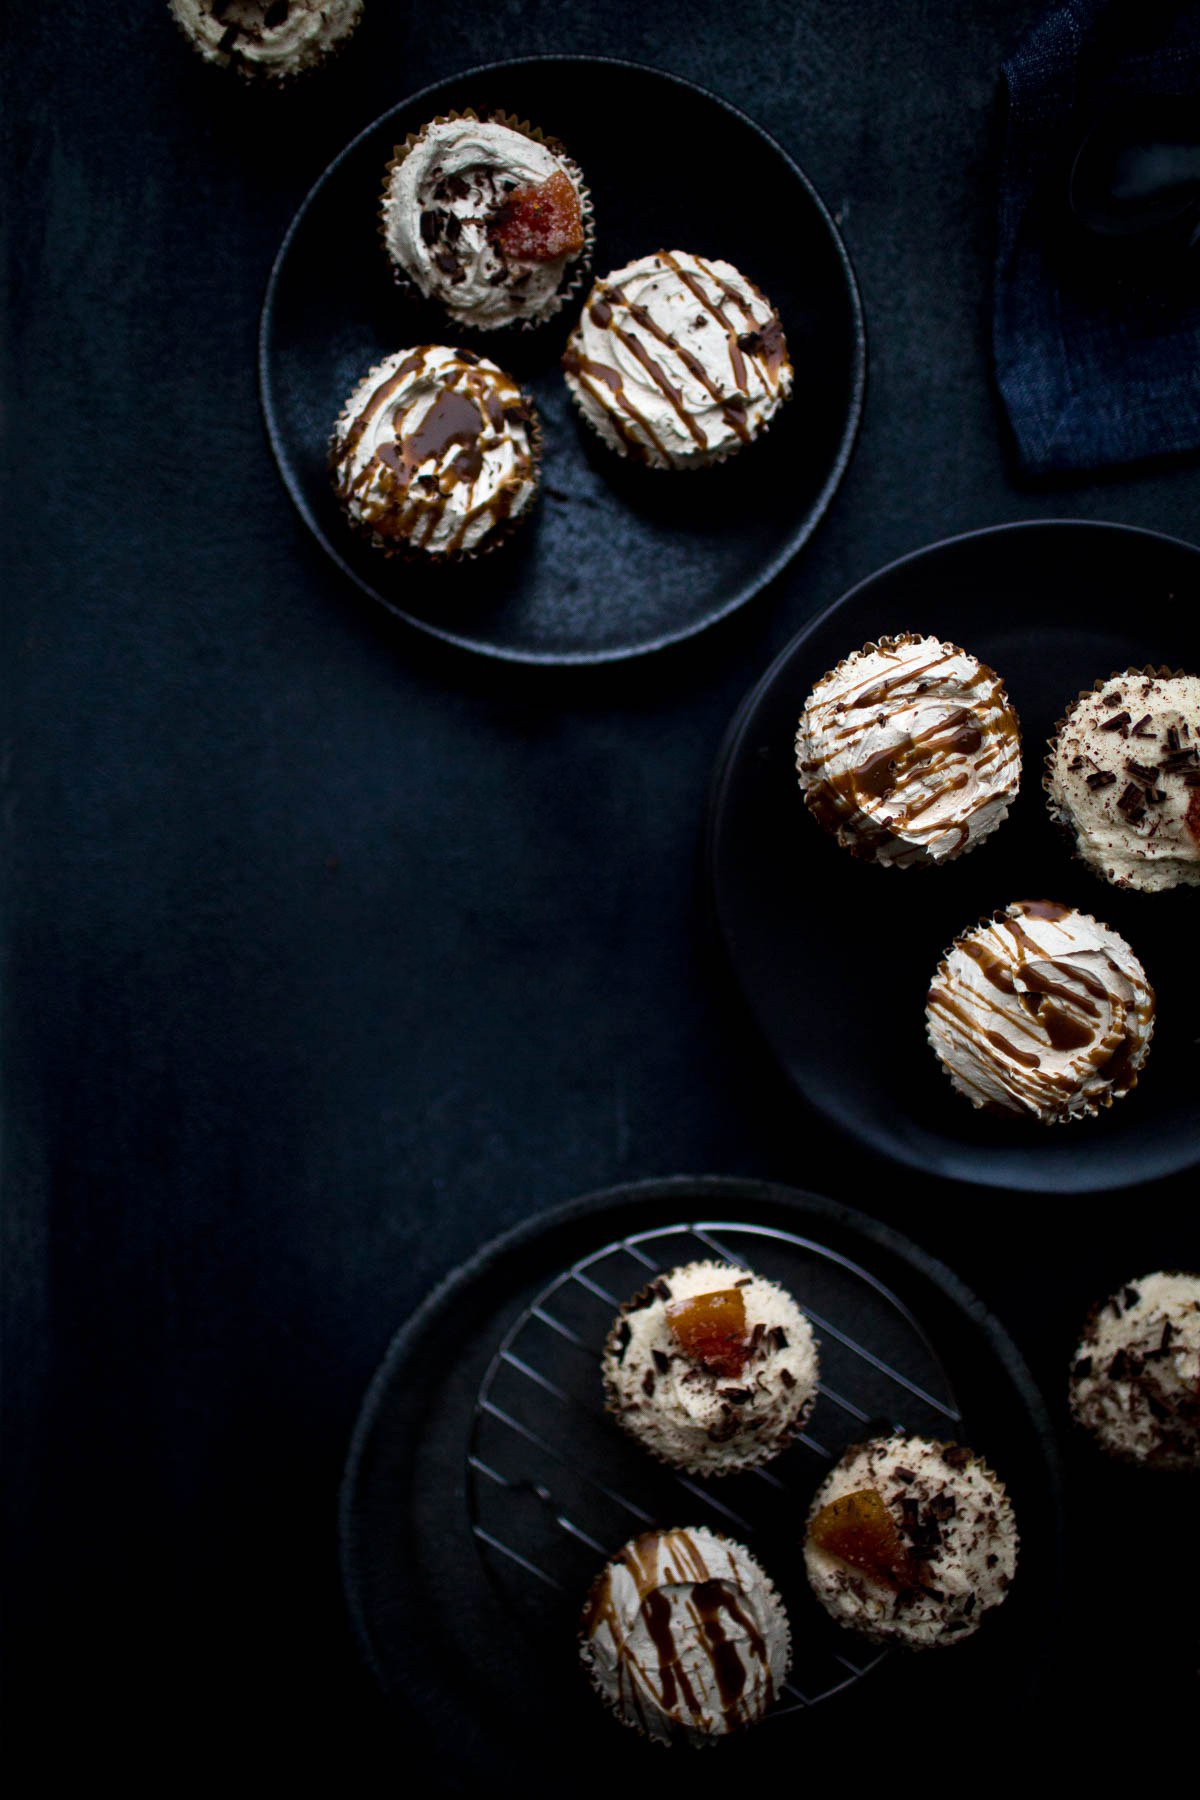
These Vegan Chocolate Grapefruit and Dulce de Leche Cupcakes for the perfect vegan treat for any celebrati[...]
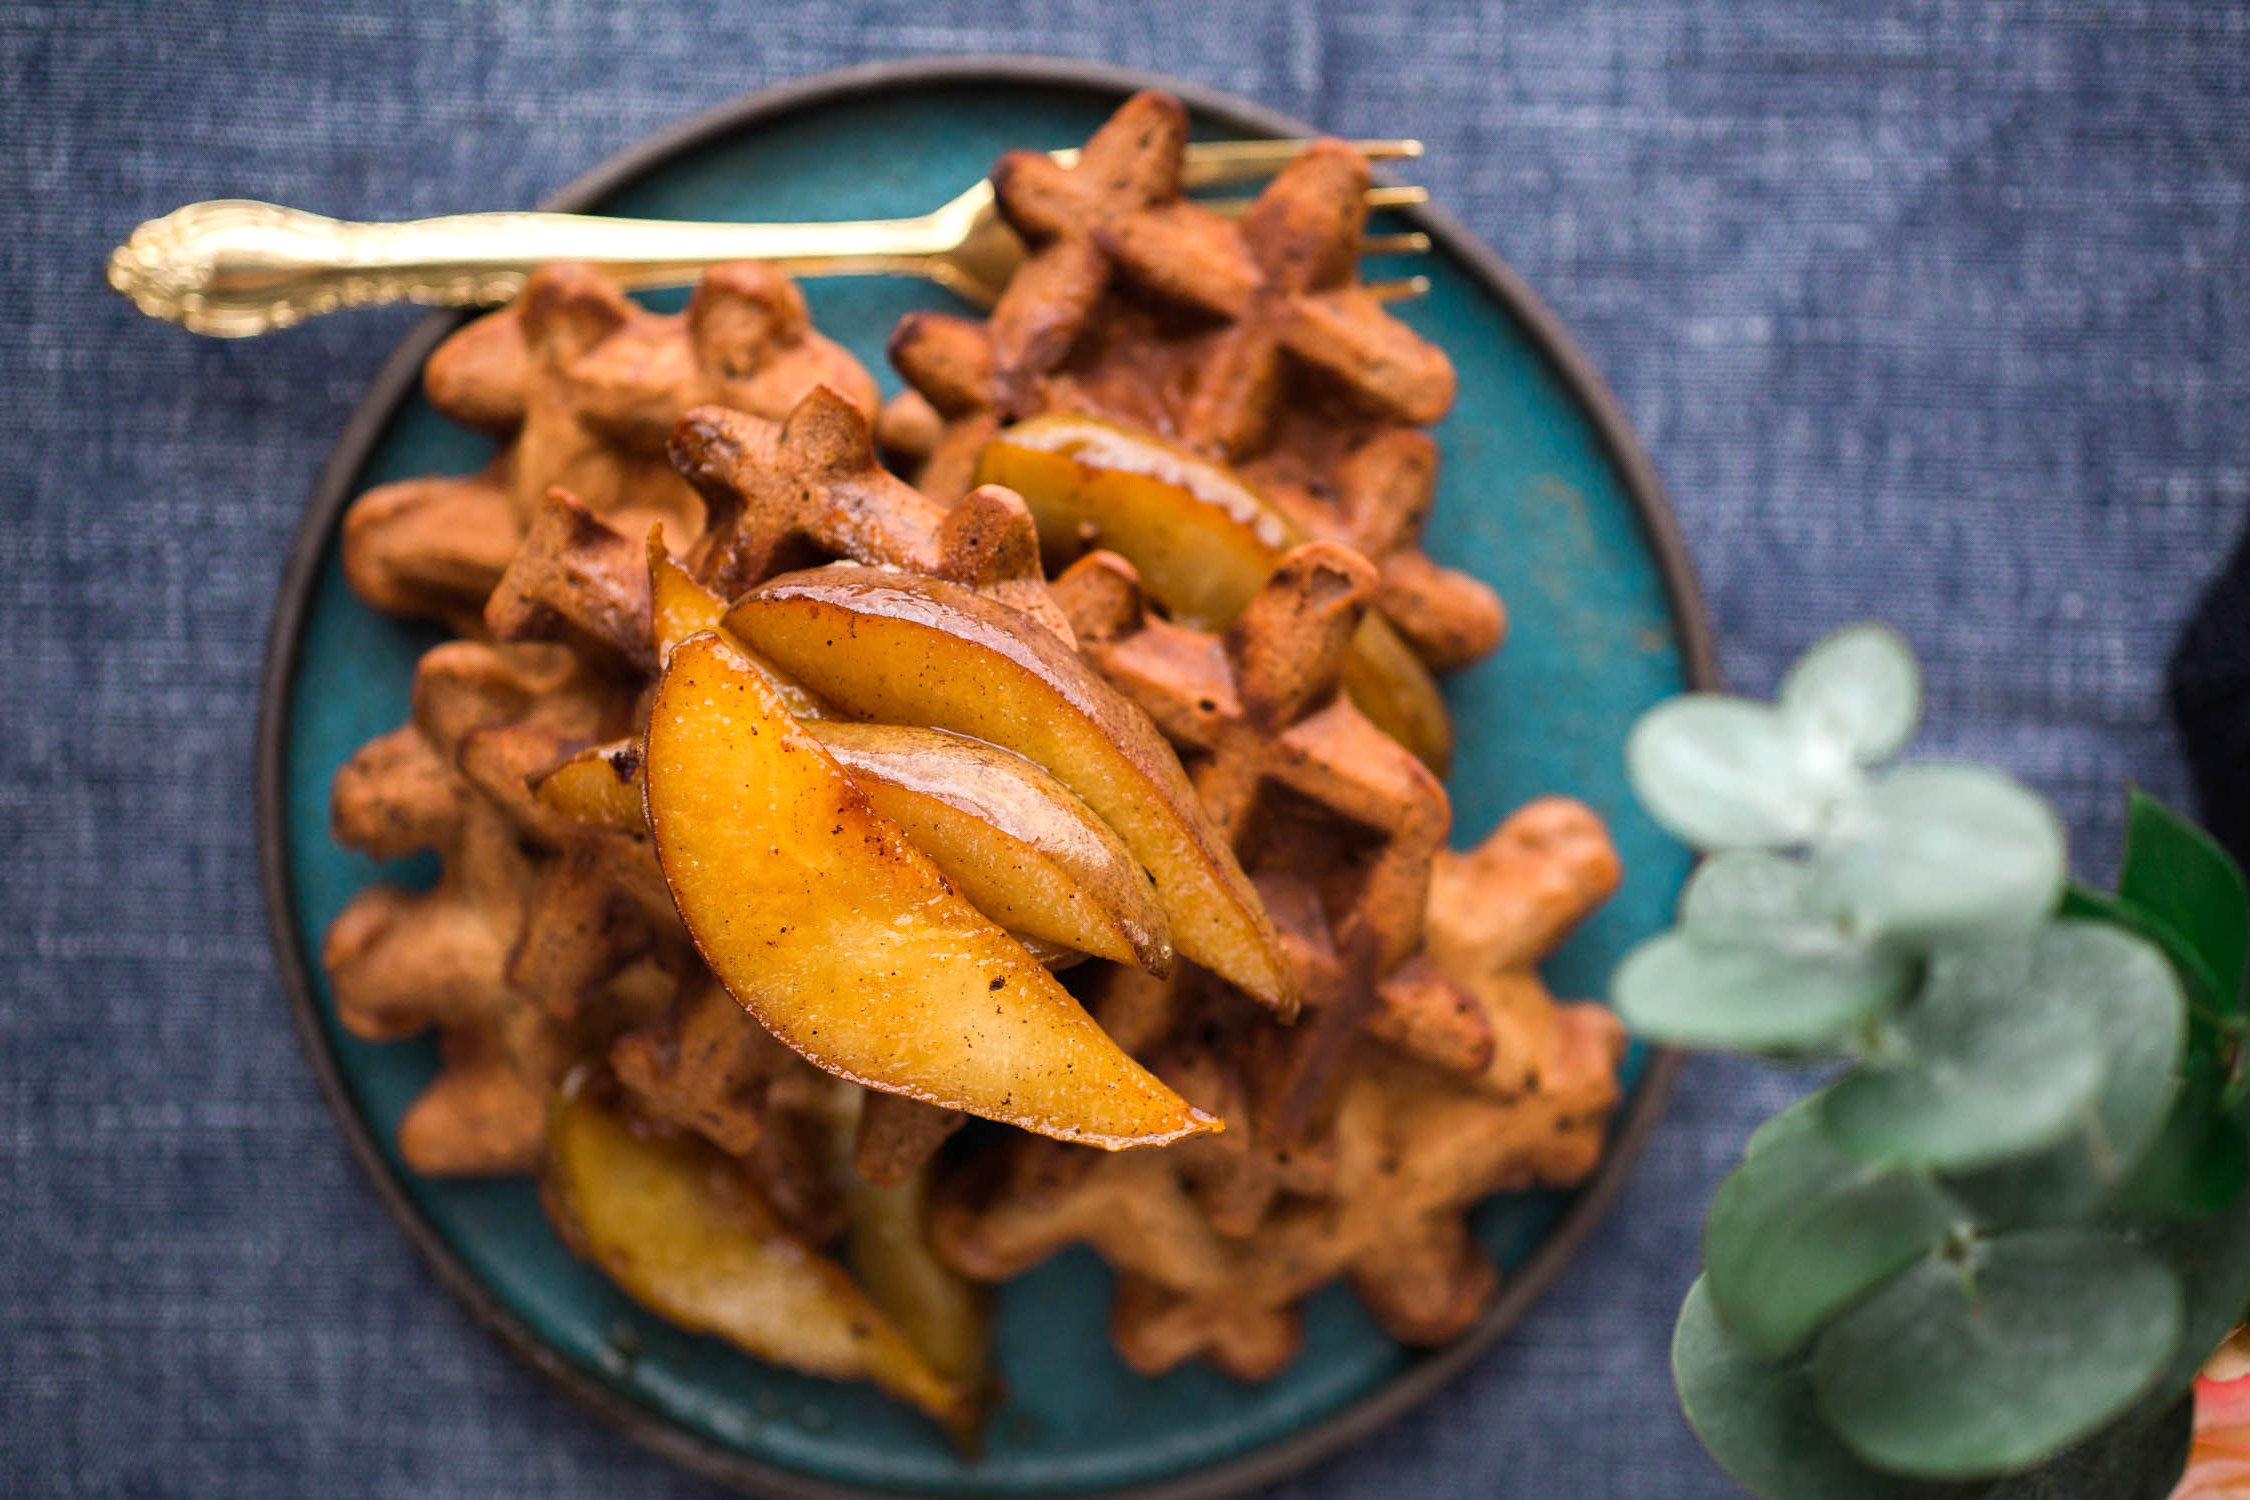
This Vegan Cocoa Waffles With Caramelized Pears recipe is slightly sweet and pairs perfectly with your mor[...]
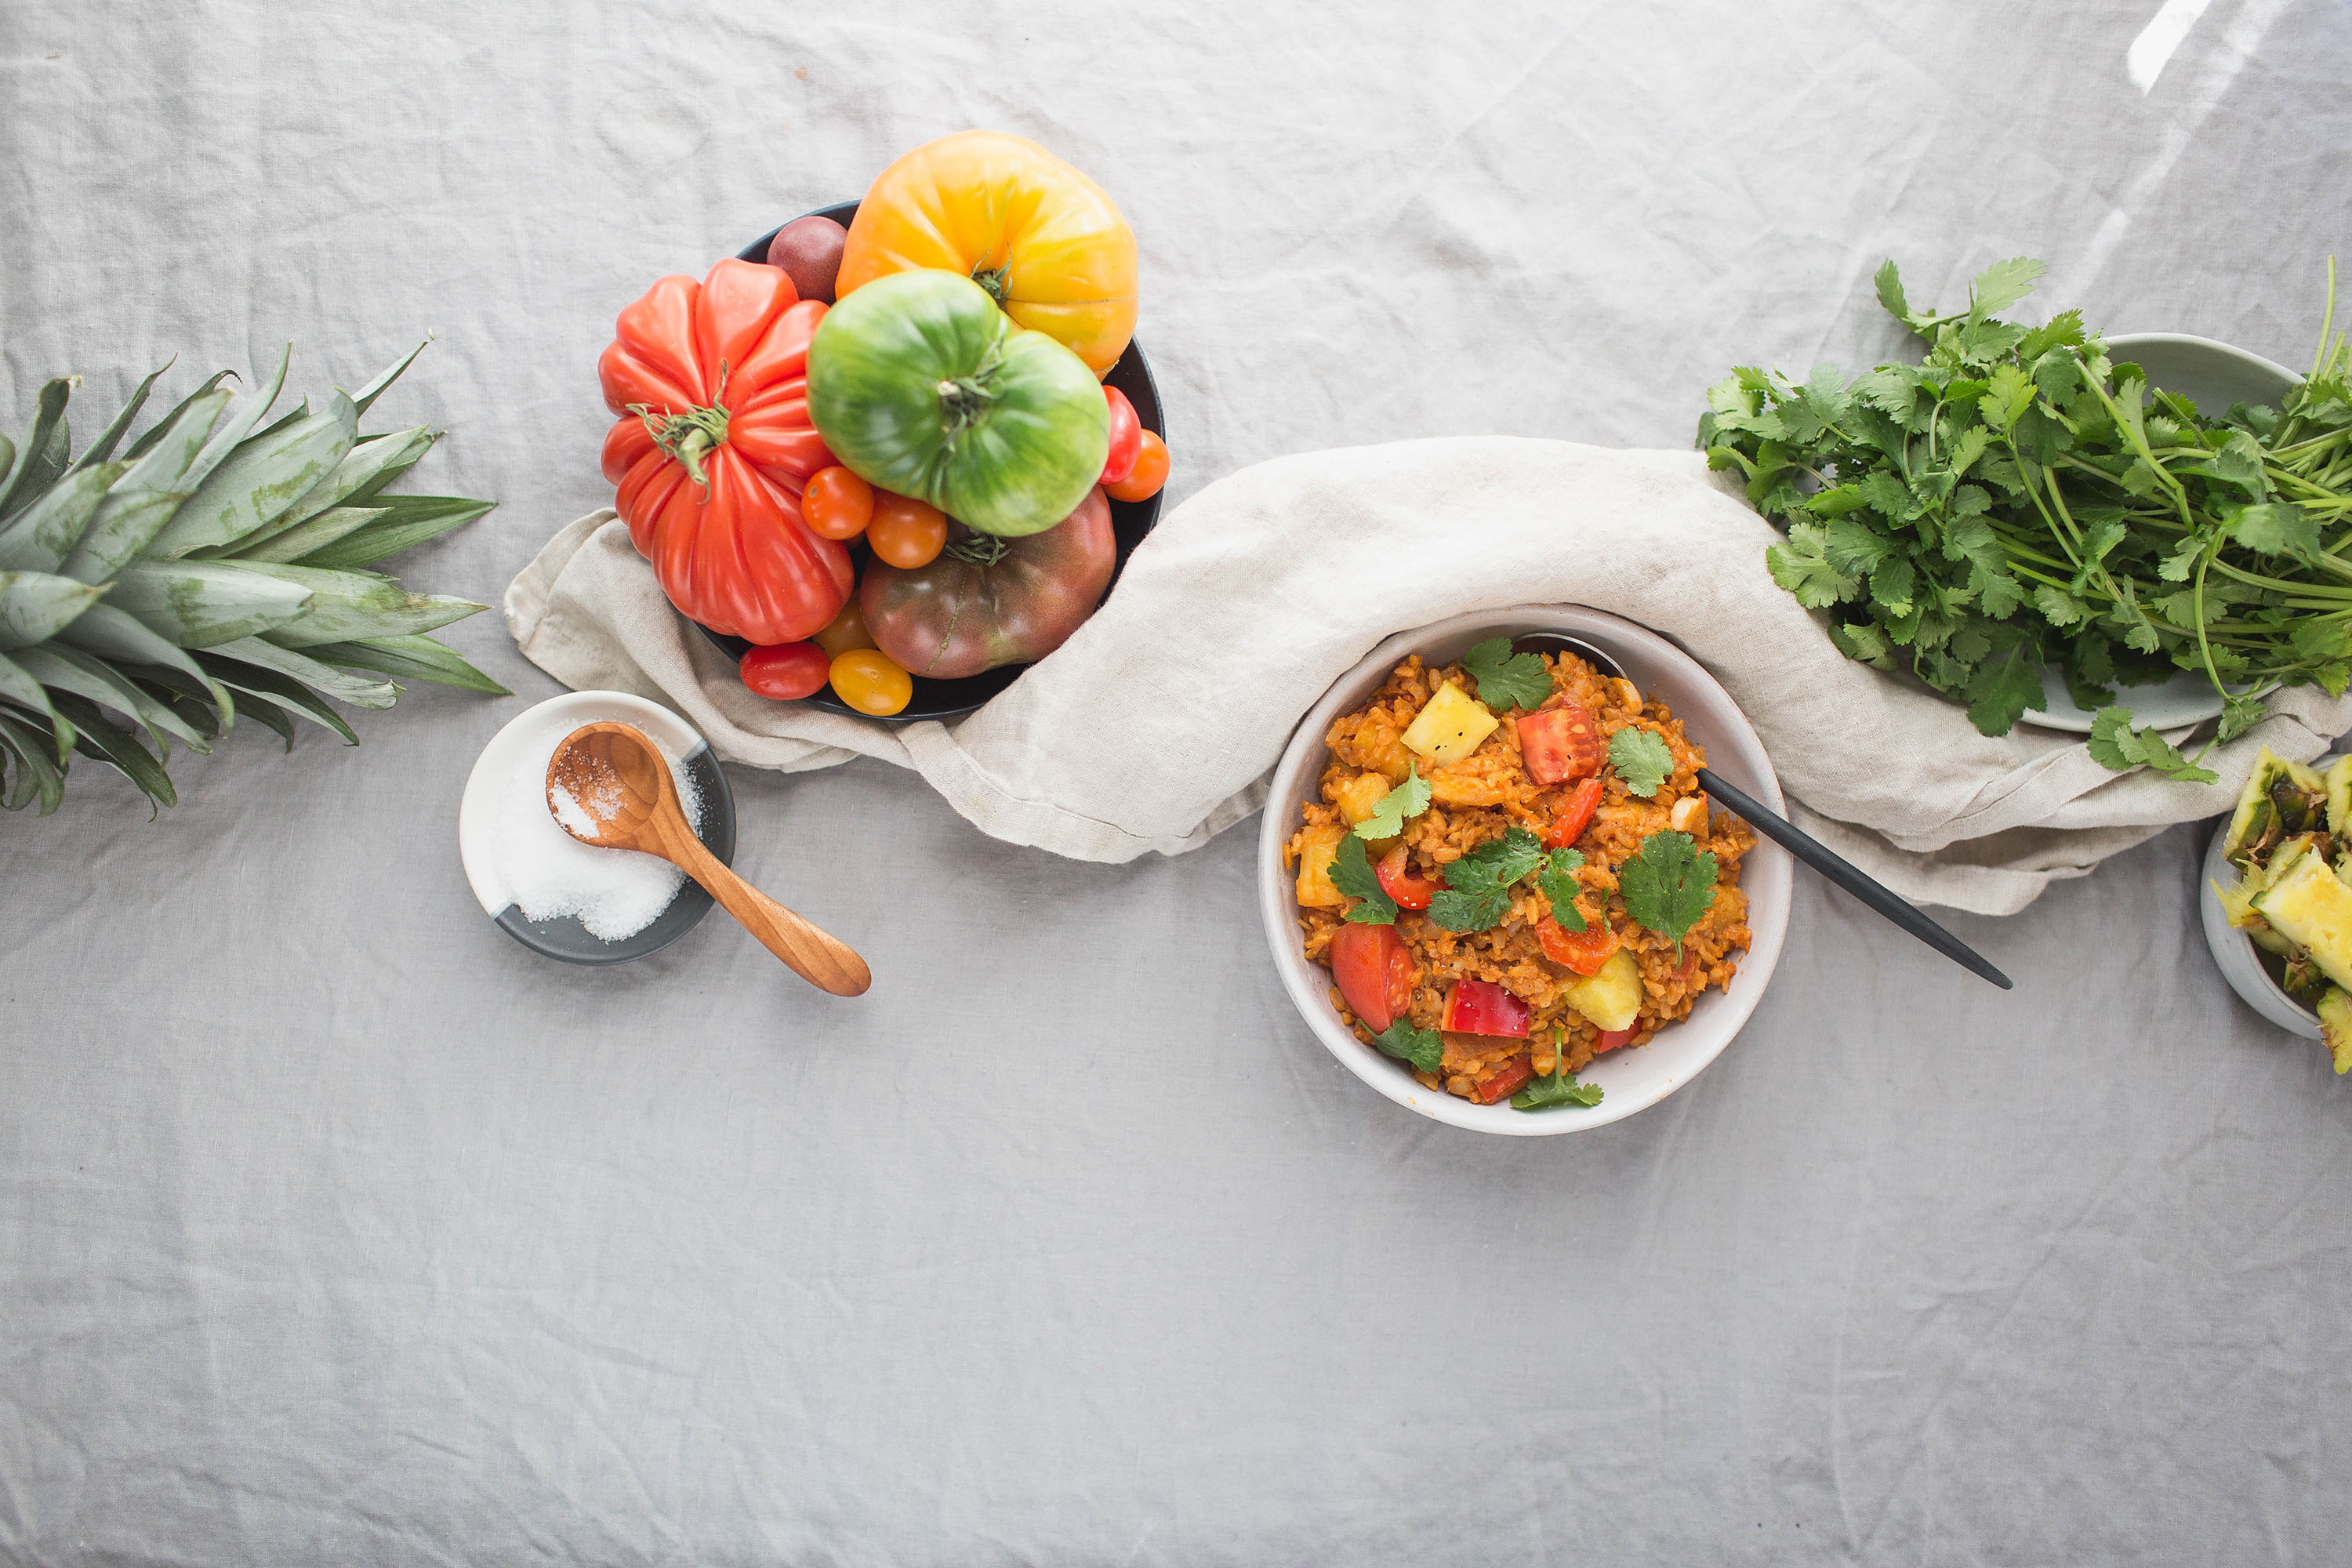
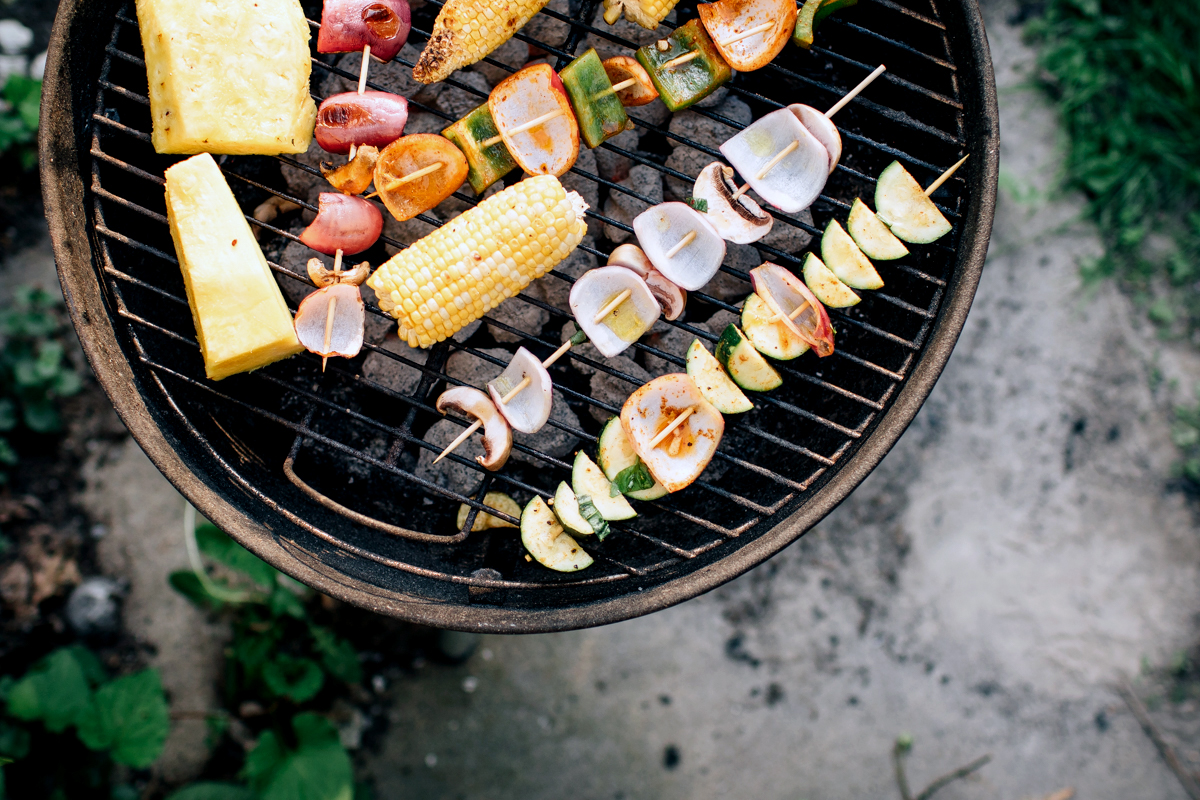
This Sweet and Sour Tempeh Rice Rice recipe is a vibrantly flavorful tropical main dish that is both vege[...]
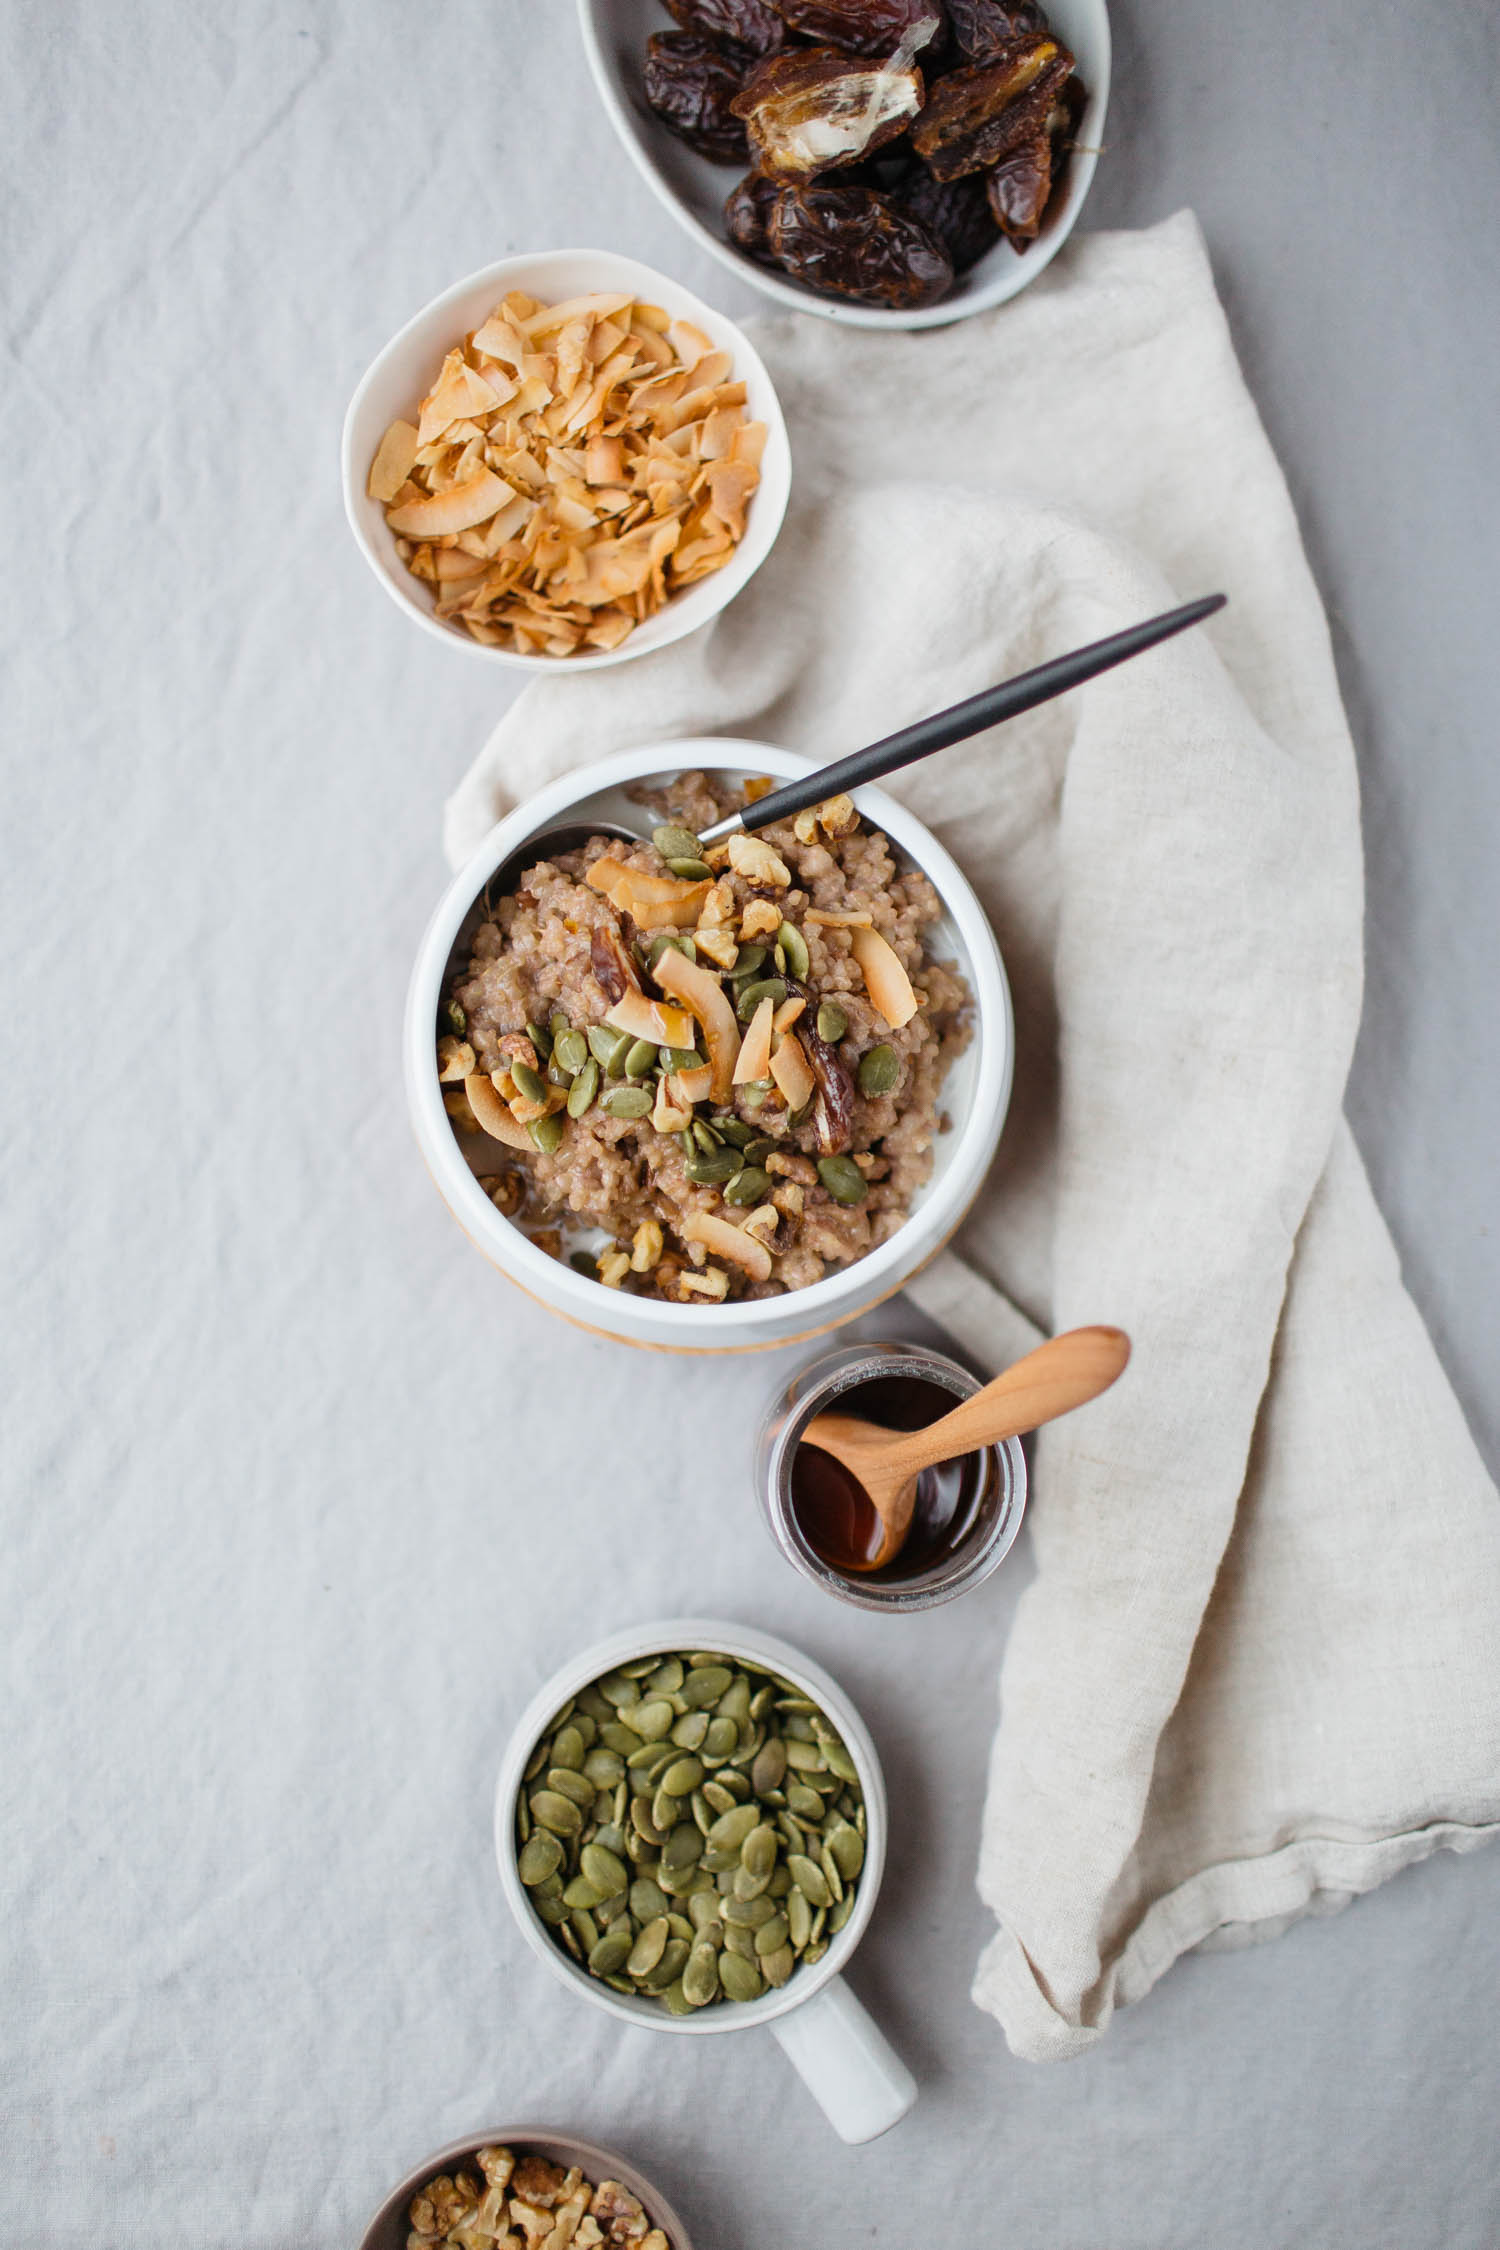
This Two-Grain Coconut Date Porridge is simple and nourishing one pot breakfast full of heart healthy mix-[...]
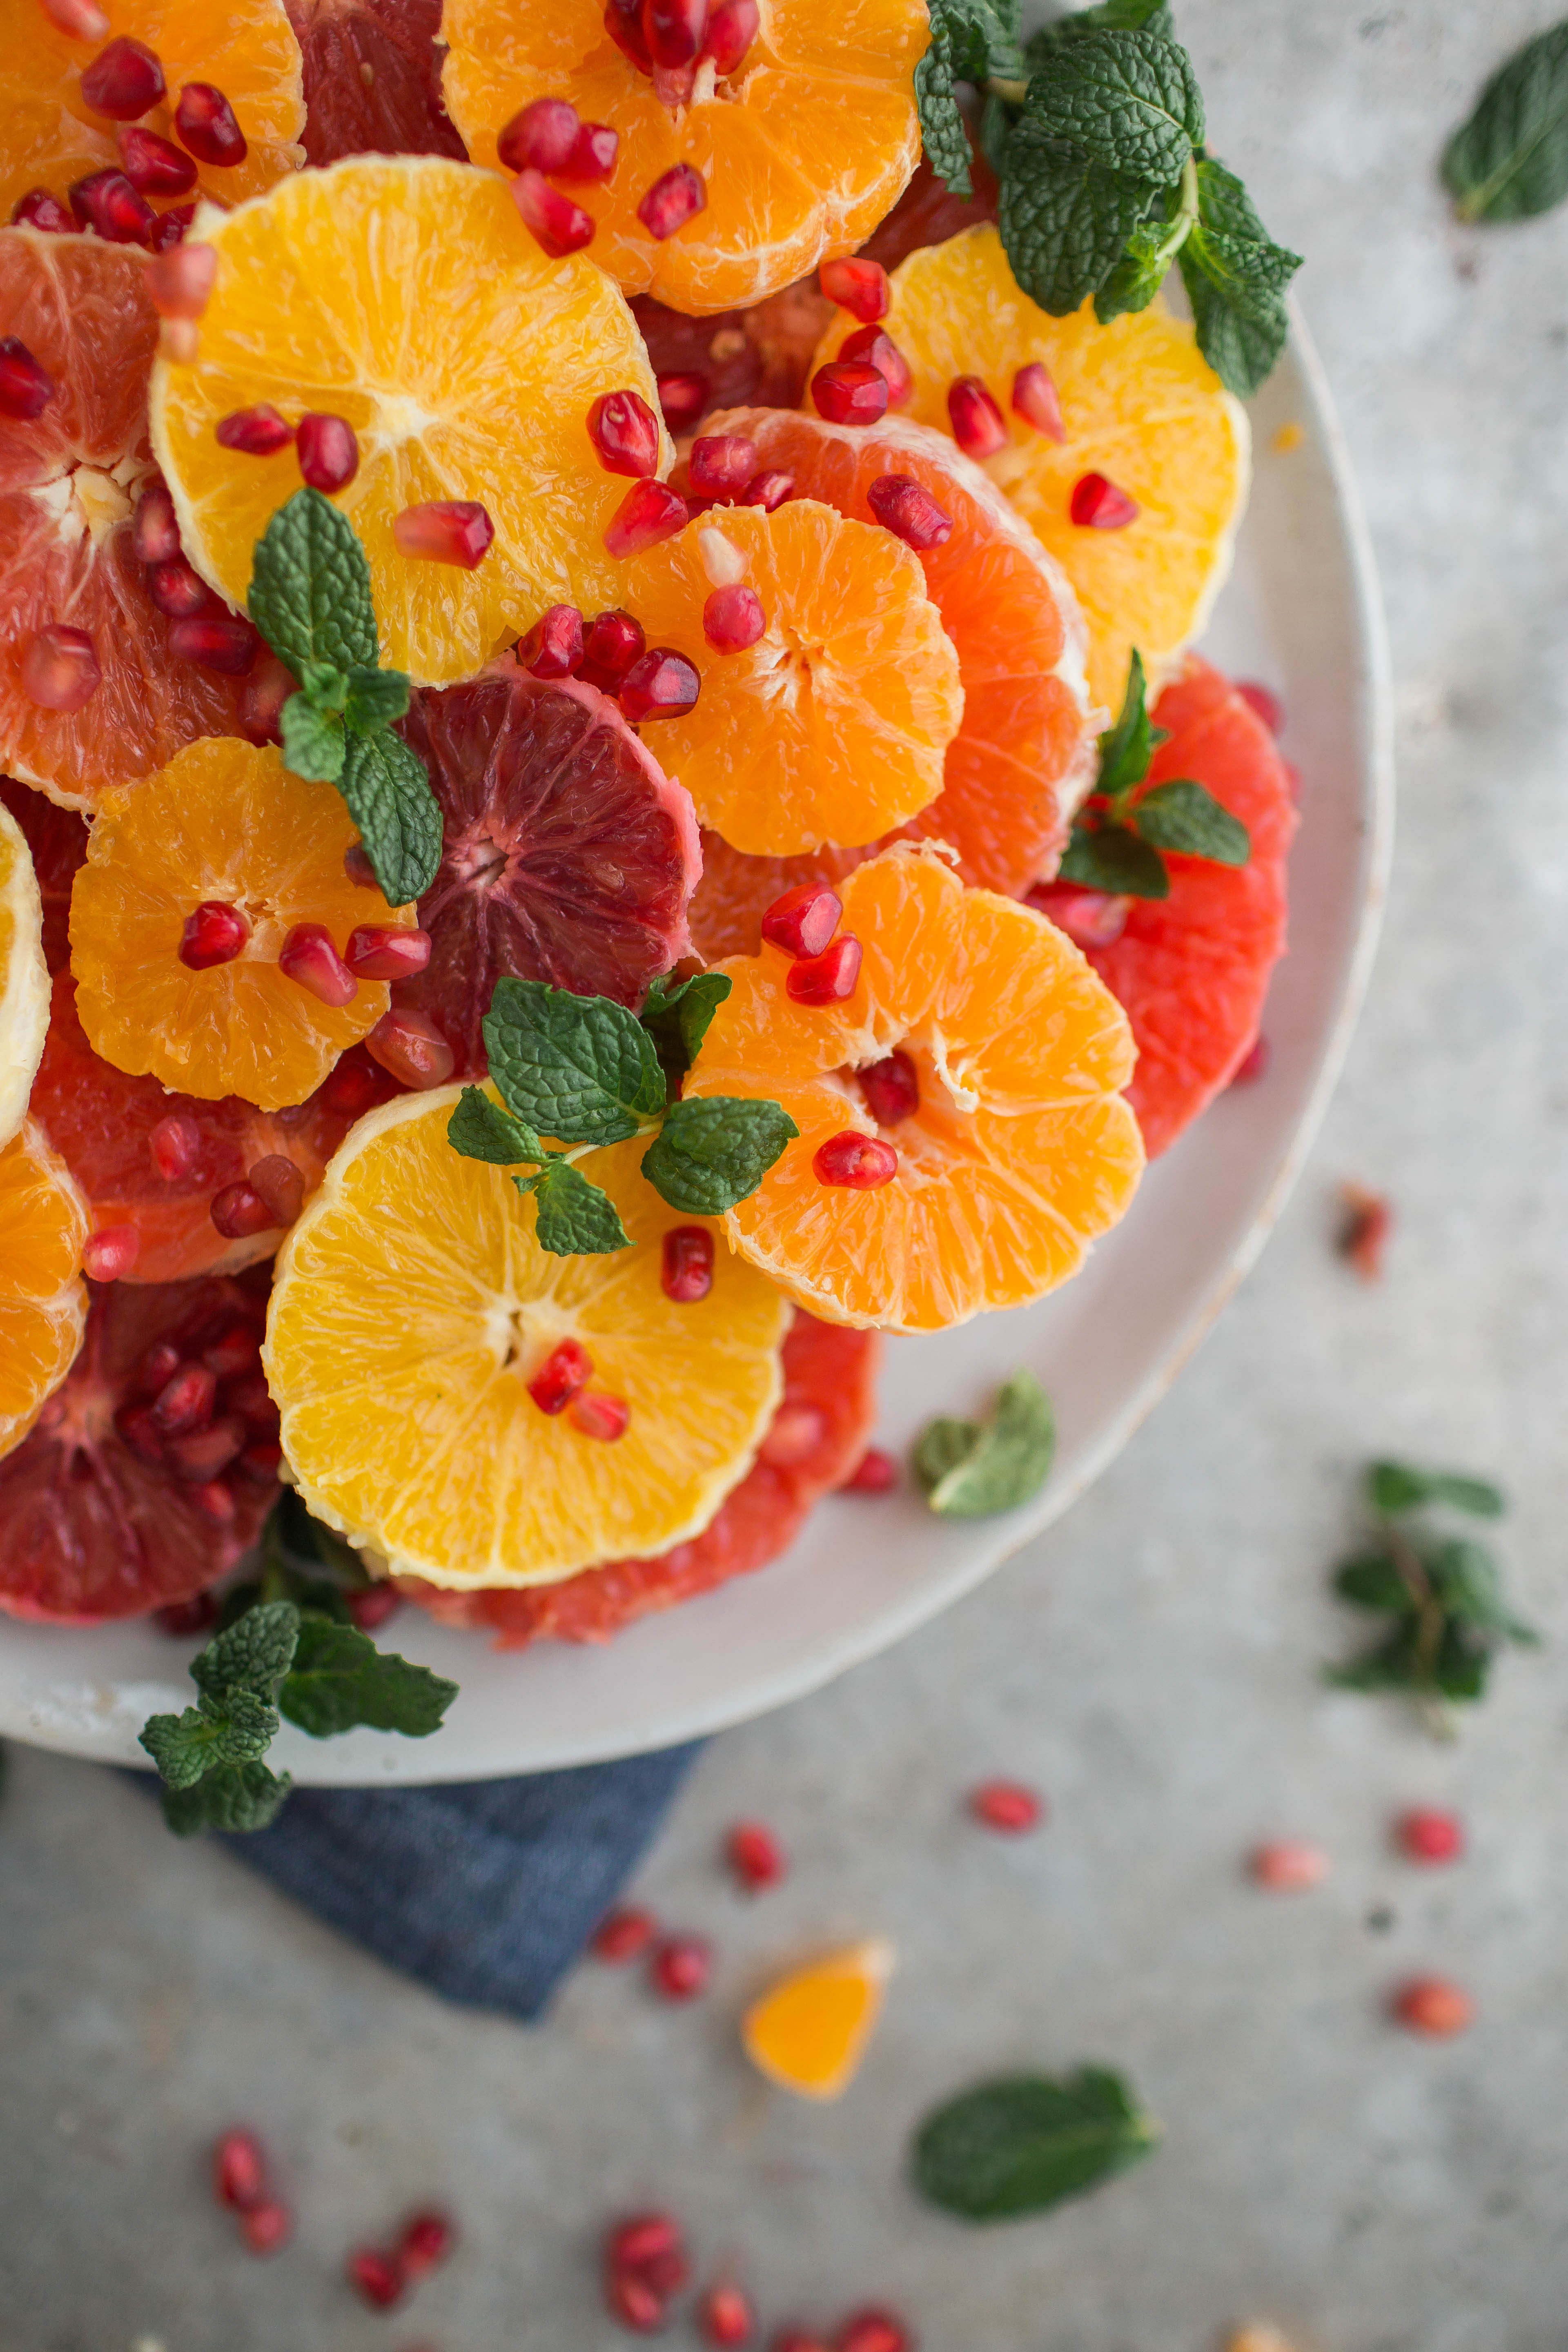
A tart and juice four ingredient Citrus and Pomegranate fruit salad to cure your winter blues. Firs[...]
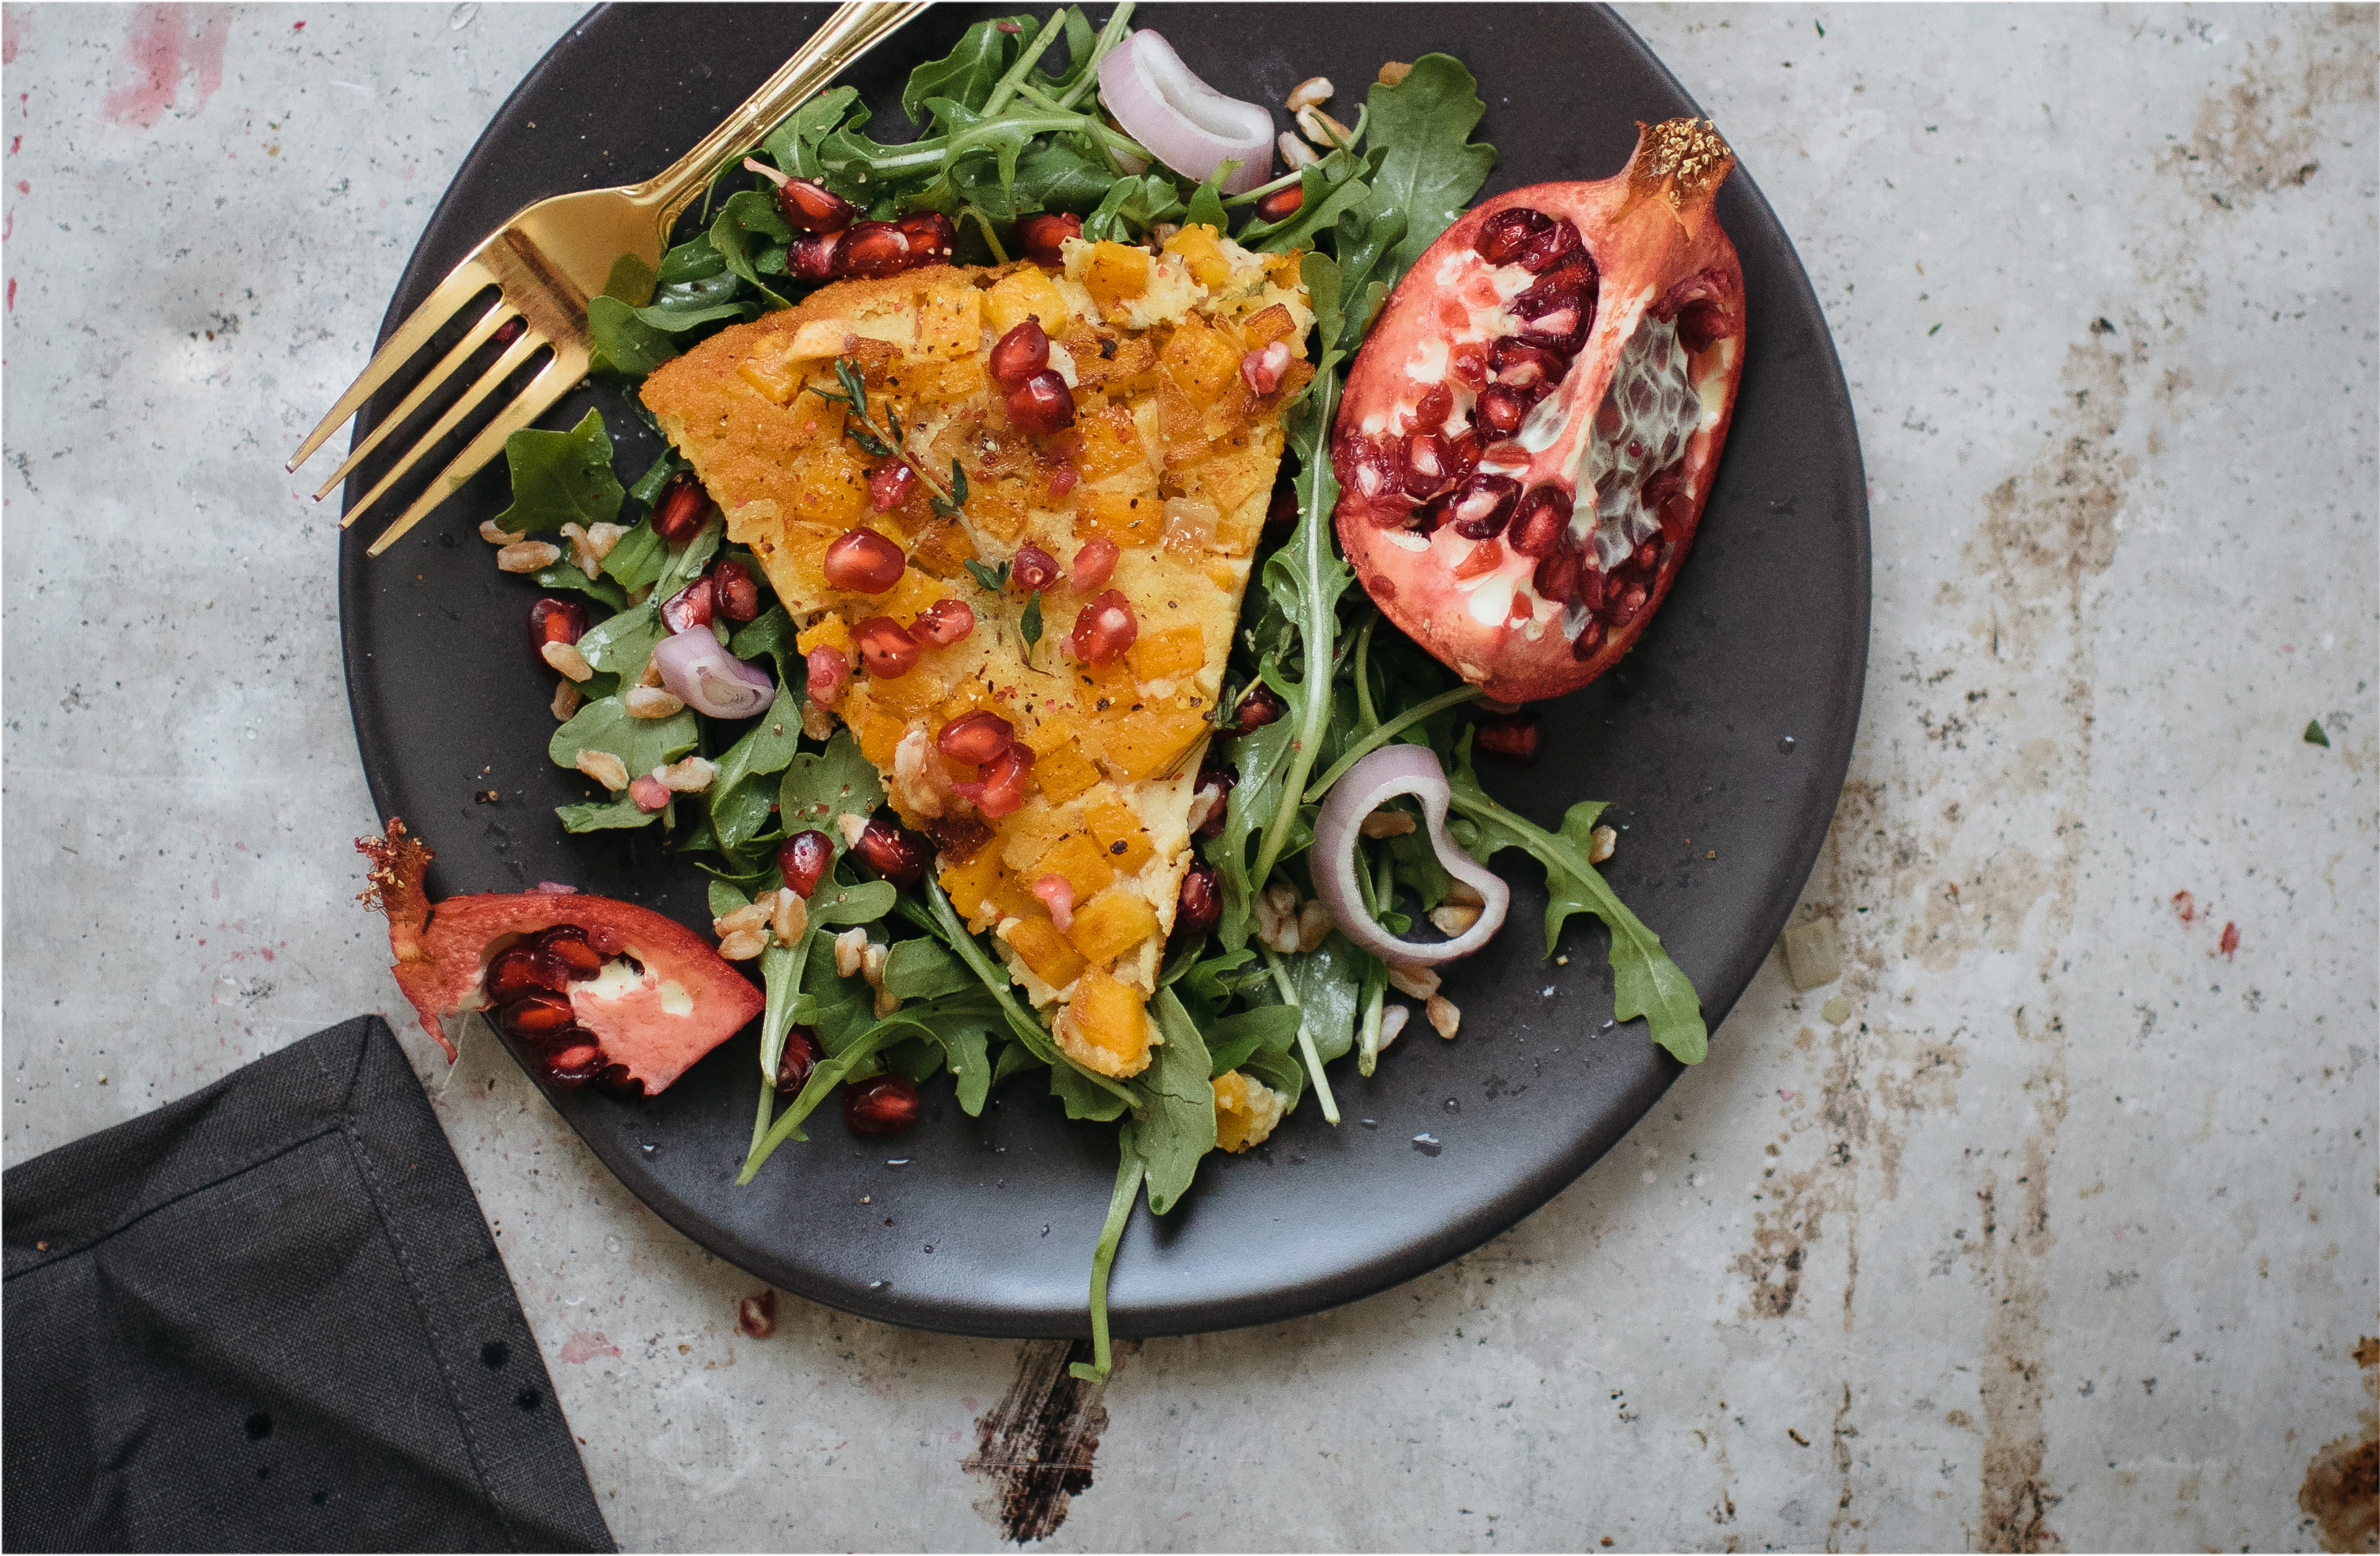
Let's talk about this Cornbread, Brussels Sprouts, Sweet Potato, & Pomegranate Stuffing. Can you b[...]
You know you have an amazing friend when she'll fly halfway across the country to help ease your stres[...]
Blogiversary (did I seriously just use that term?), we meet again. This time around it's VV turning fo[...]
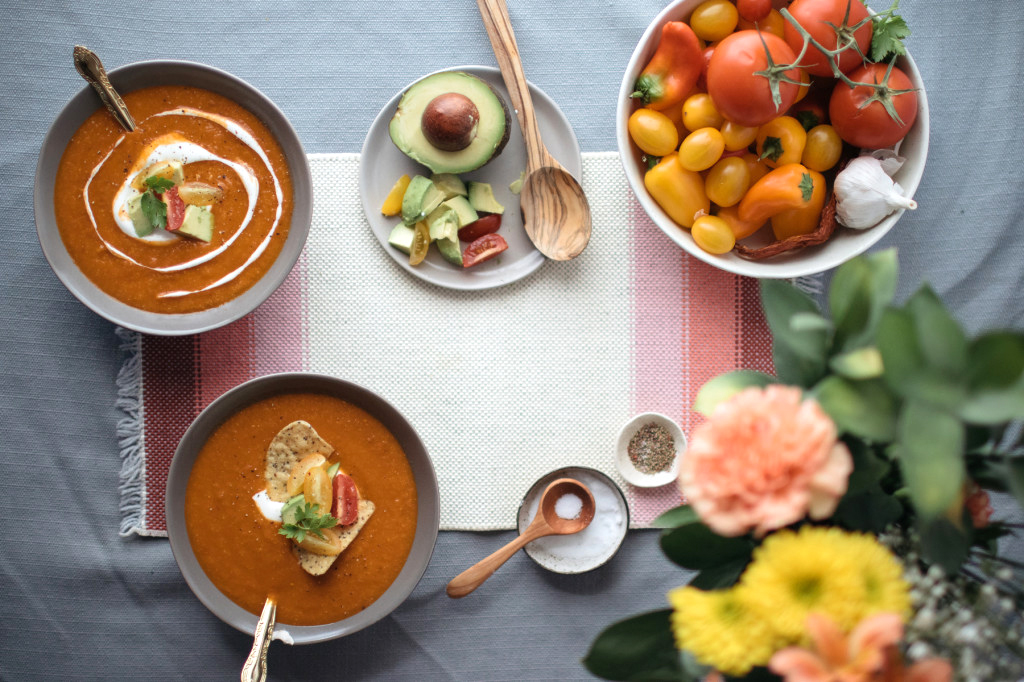
It's getting to be that time of year where all the produce is so fresh and abundant but it's also so[...]
read more[...]