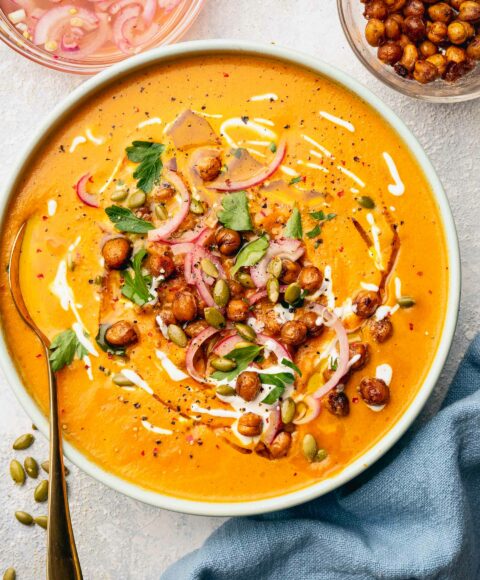
This Curried Carrot Soup with Maple Roasted Chickpeas soup is a vibrant winter vegetarian recipe. The base i[...]
This Curried Carrot Soup with Maple Roasted Chickpeas soup is a vibrant winter vegetarian recipe. The base i[...]
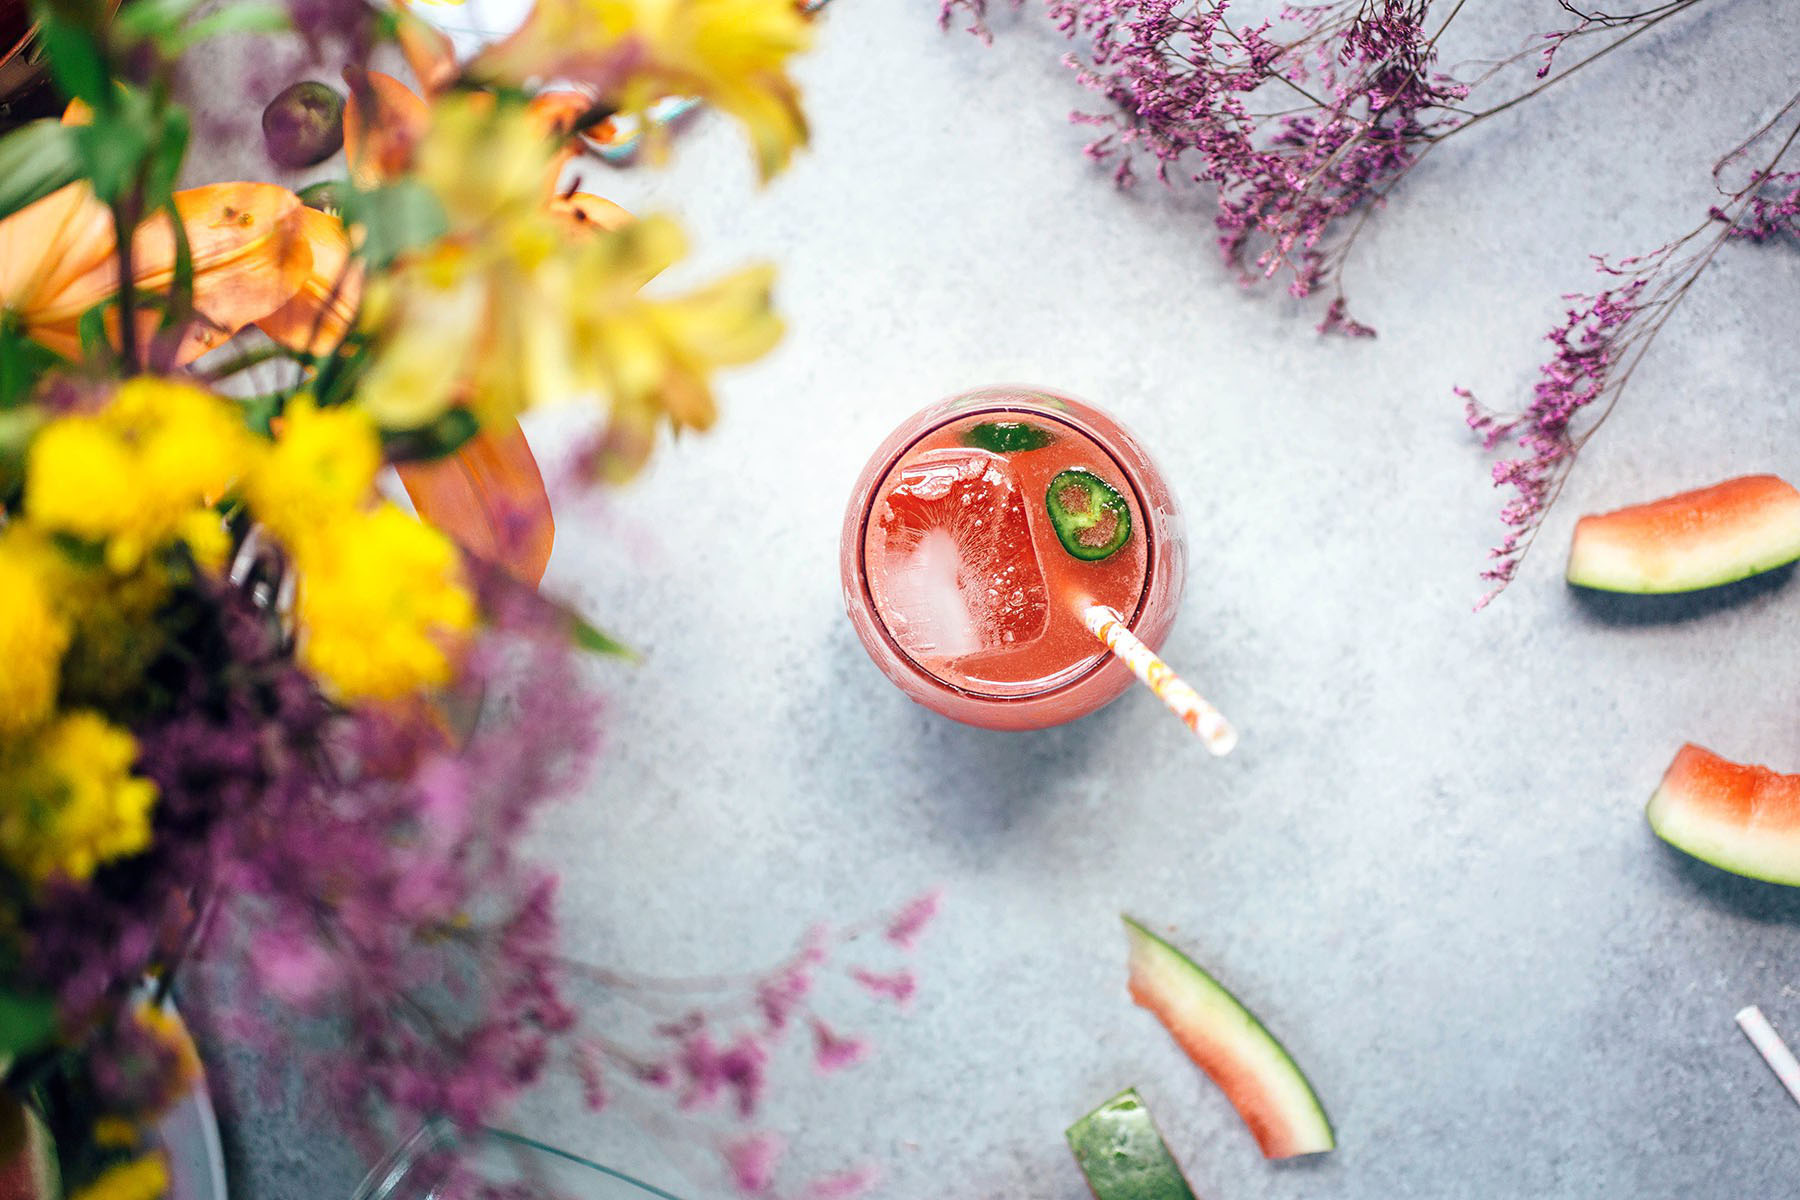
This homemade sweet and spicy watermelon soda is the perfect fizzy non-alcoholic drink recipe to quench[...]
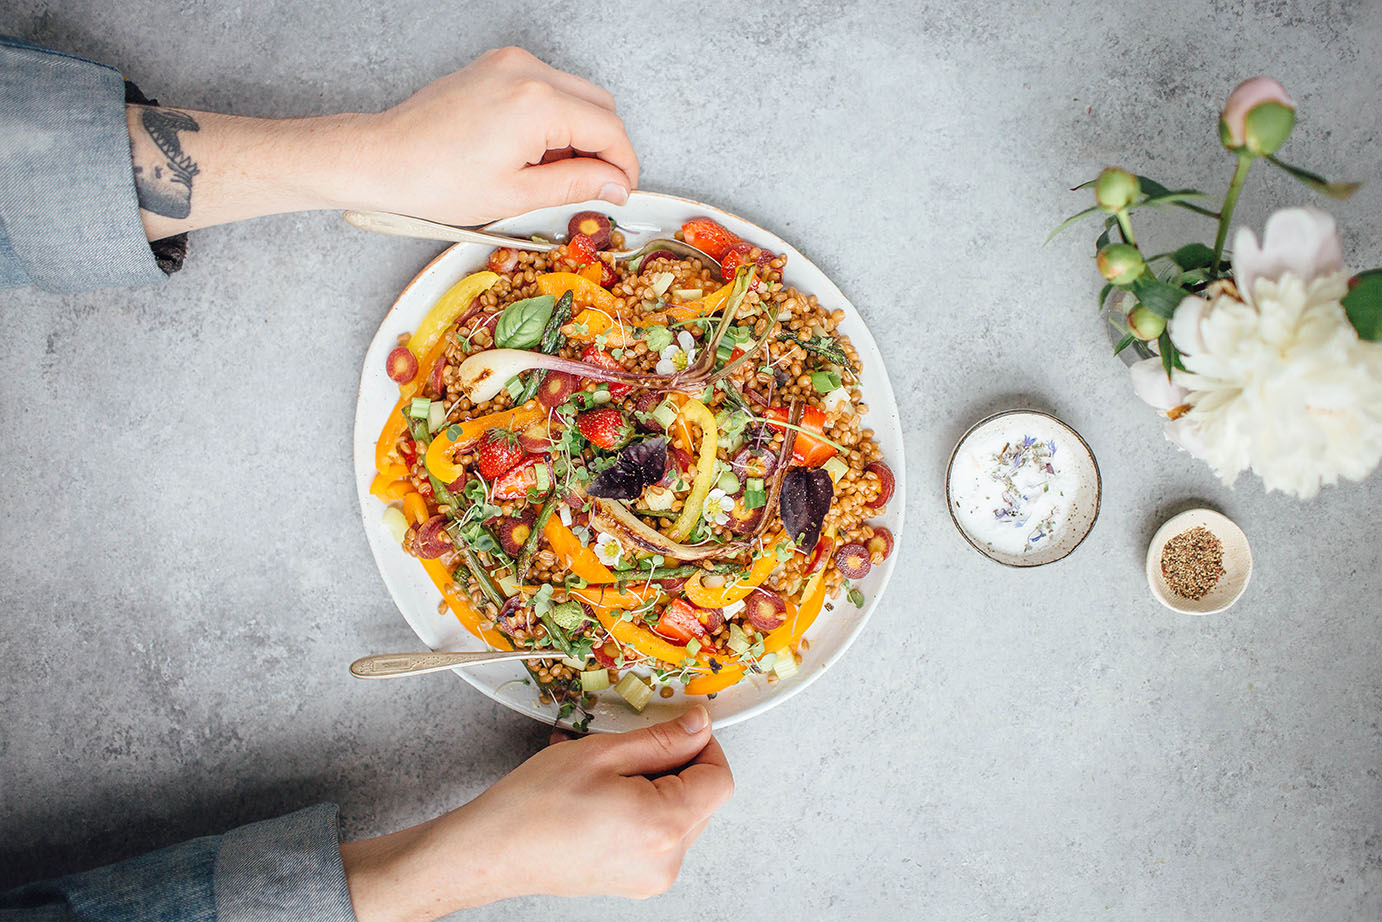
This Vegetarian Spring Wheat Berry Salad is bursting with fresh spring produce which is nestled between che[...]
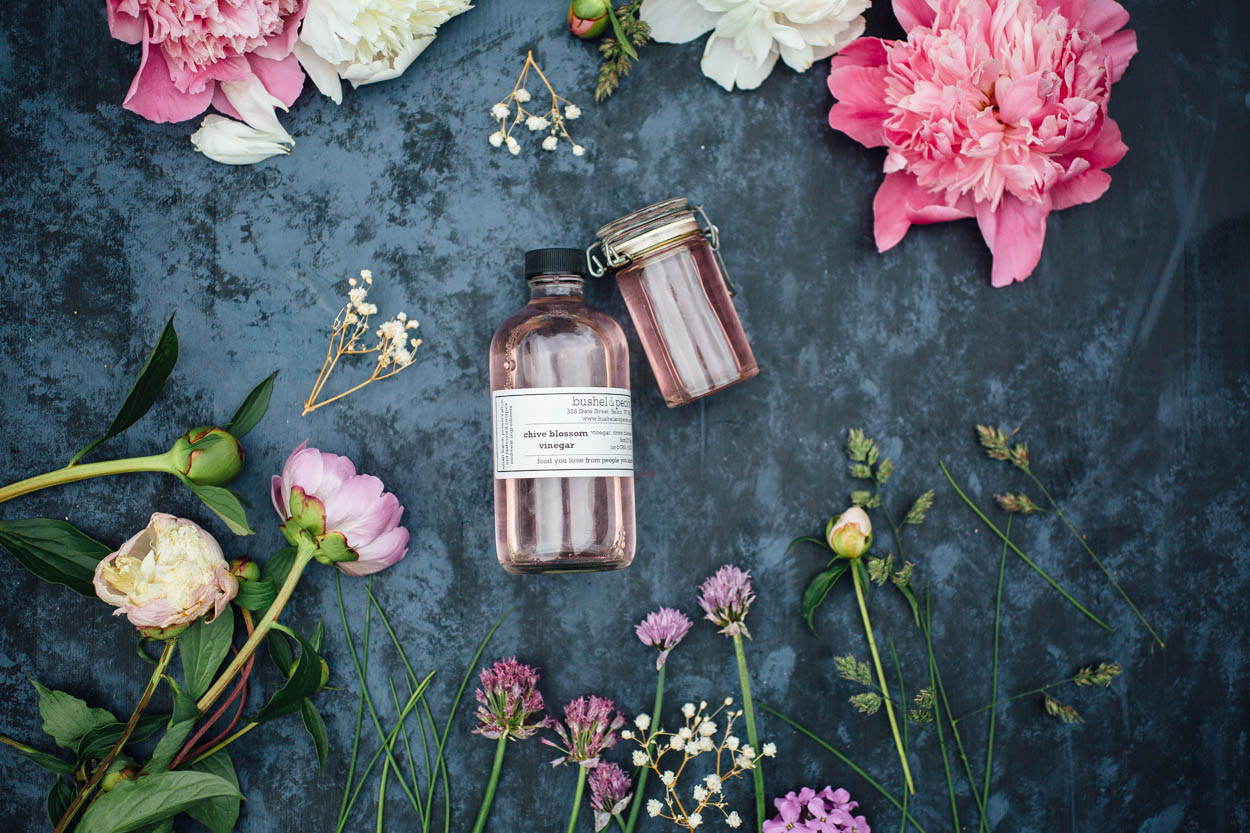
This two-ingredient Homemade Chive Blossom Vinegar is so simple that it's hard to even call it a recipe. T[...]
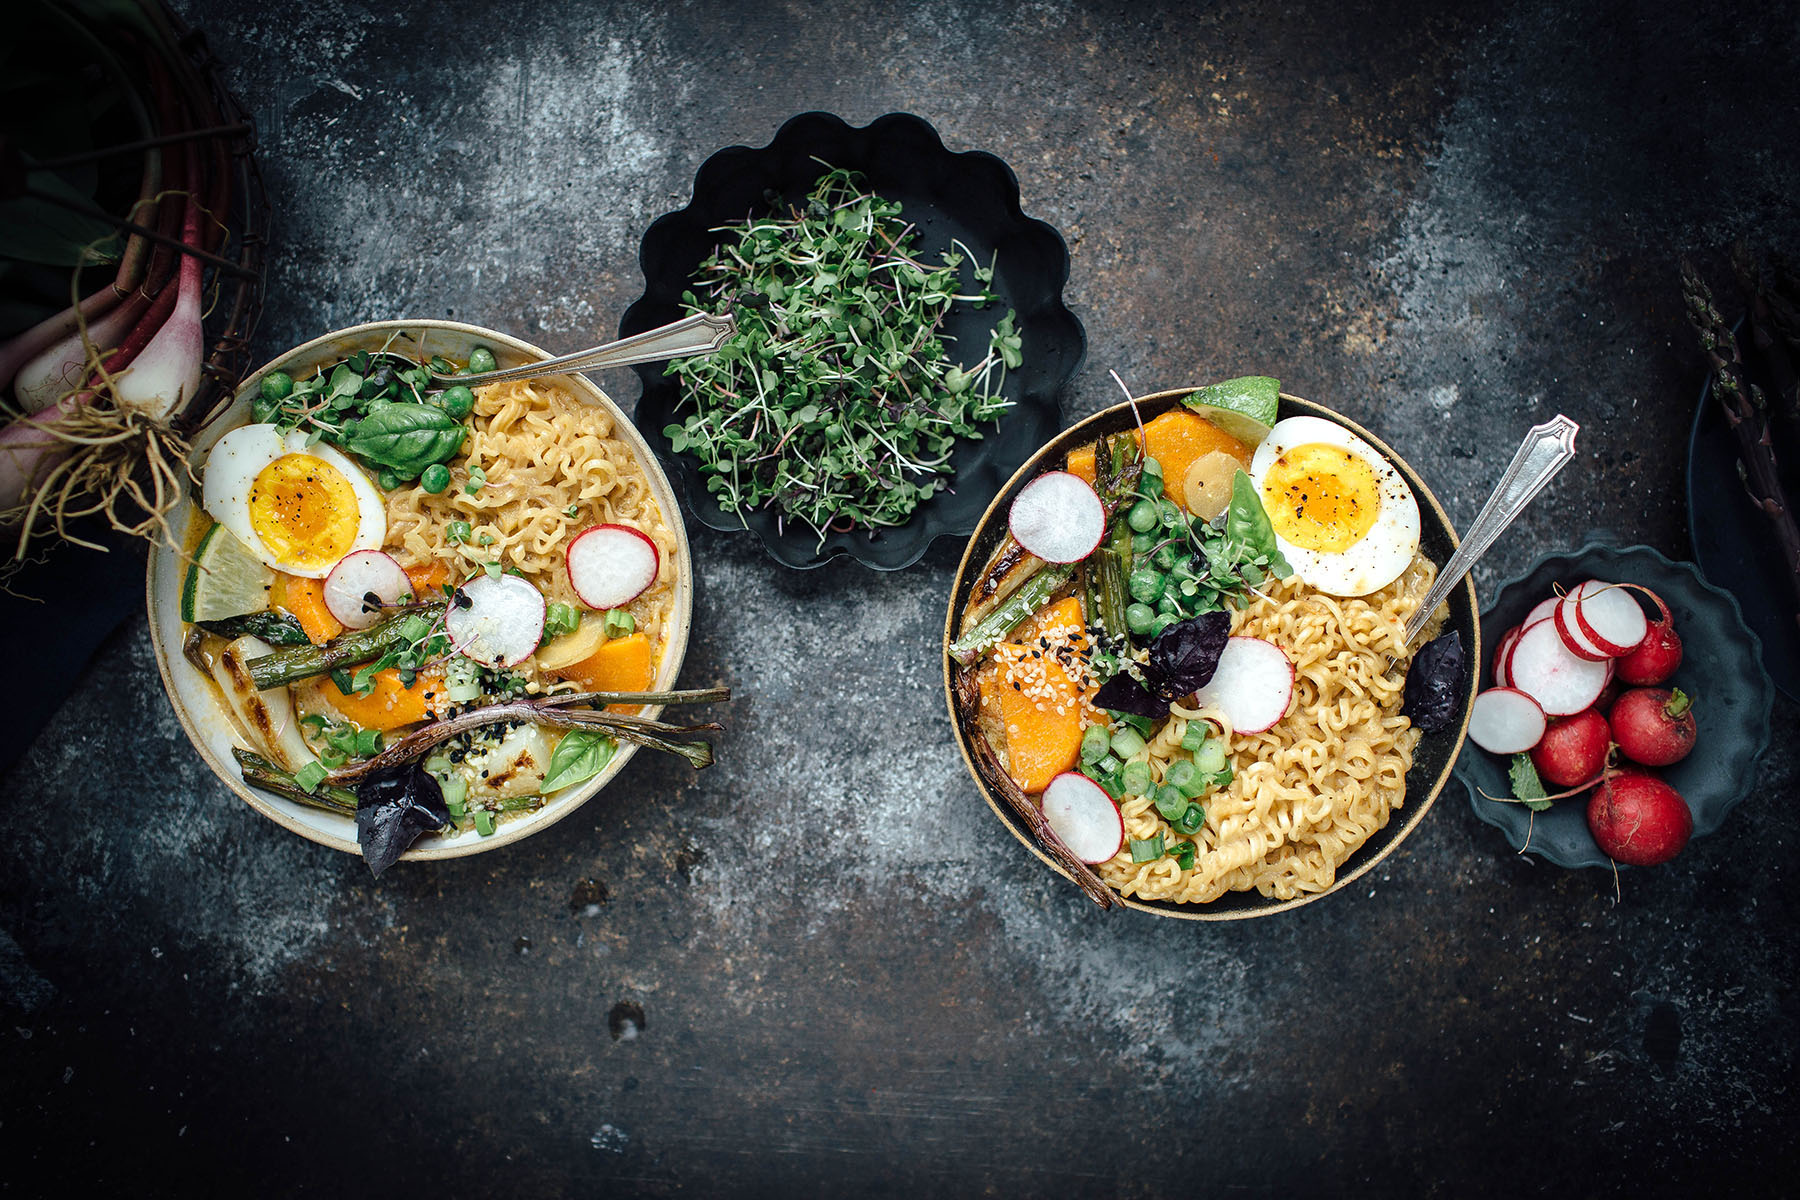
This recipe for Vegetarian Spring Curry Ramen is the perfect comfort food on a rainy spring day. A curry b[...]
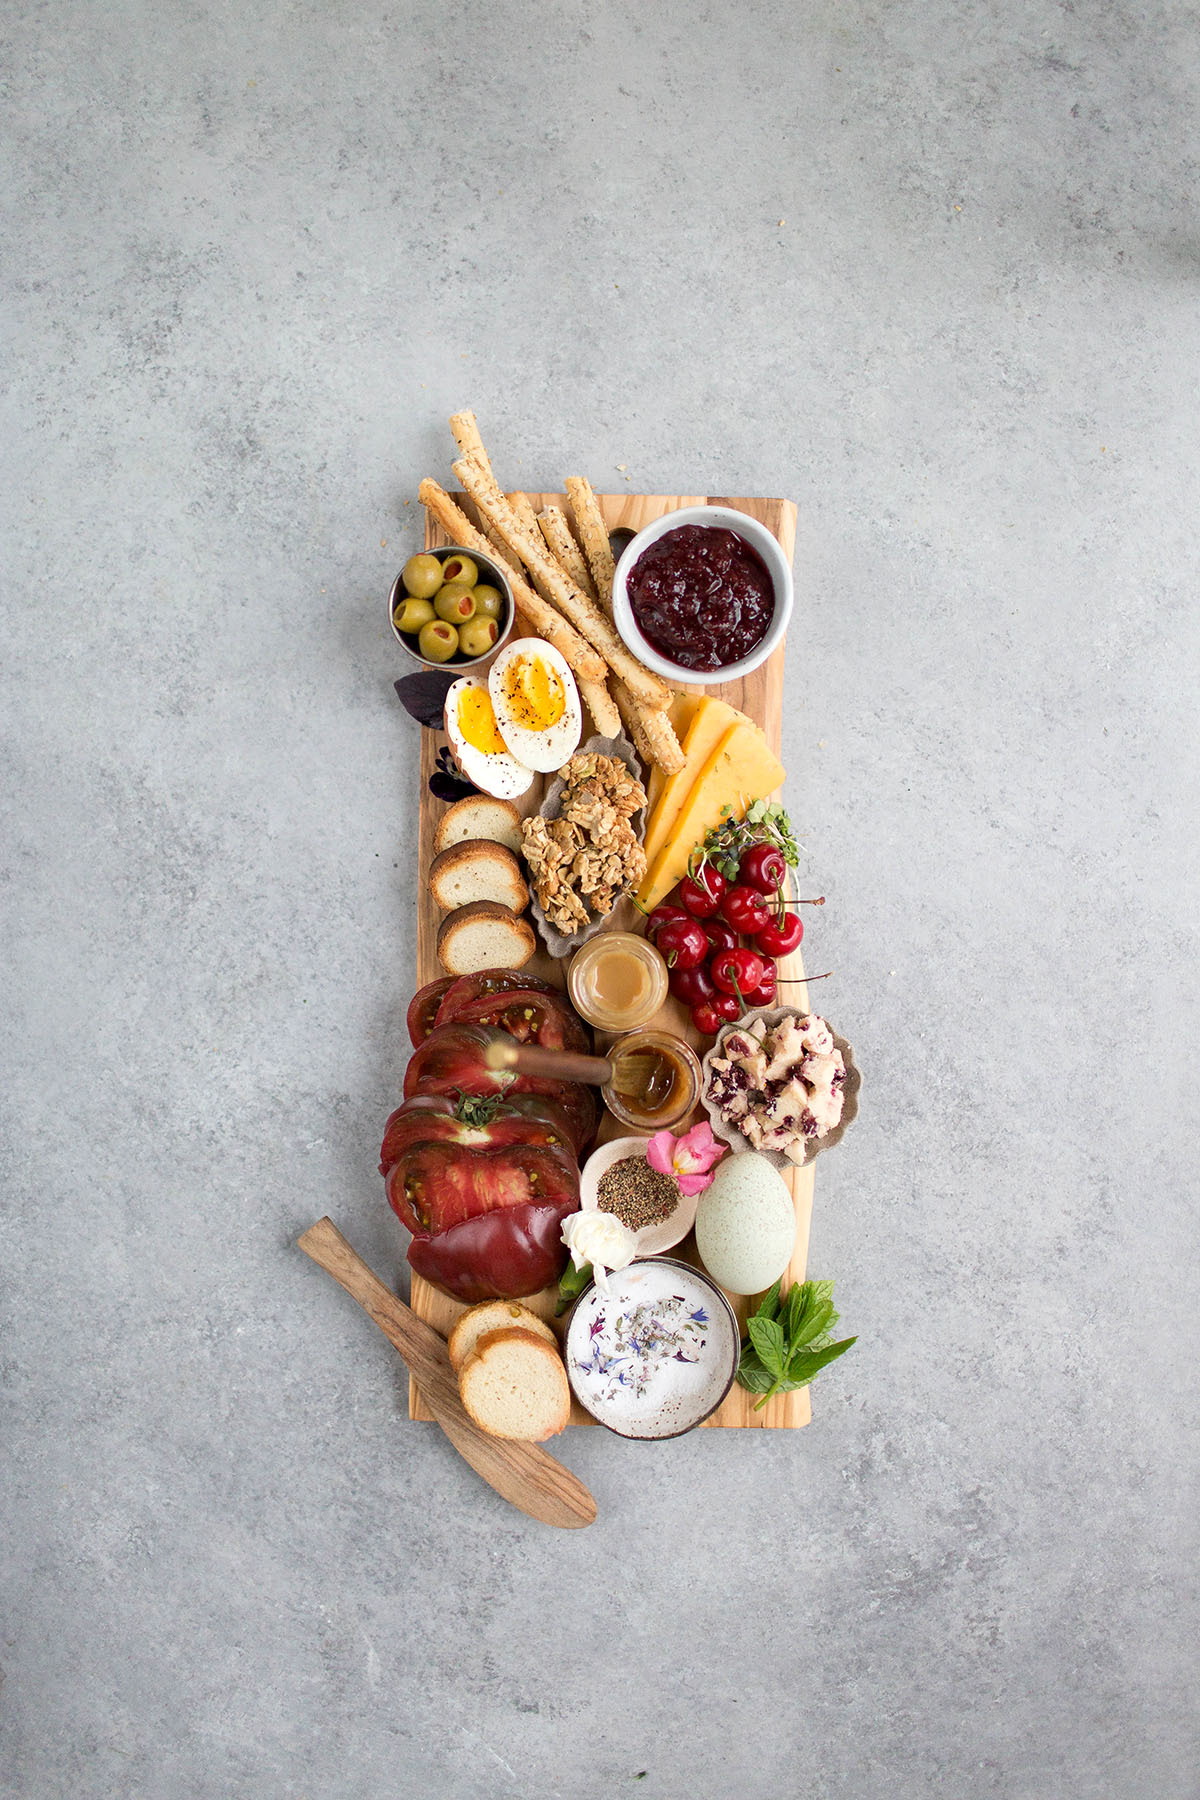
A free form Anything-Goes Breakfast Cheese Board recipe designed to outline what a breakfast cheese board[...]
I had all these plans to make tacos and ice cream and fizzy floats over the weekend but then it rained; it[...]
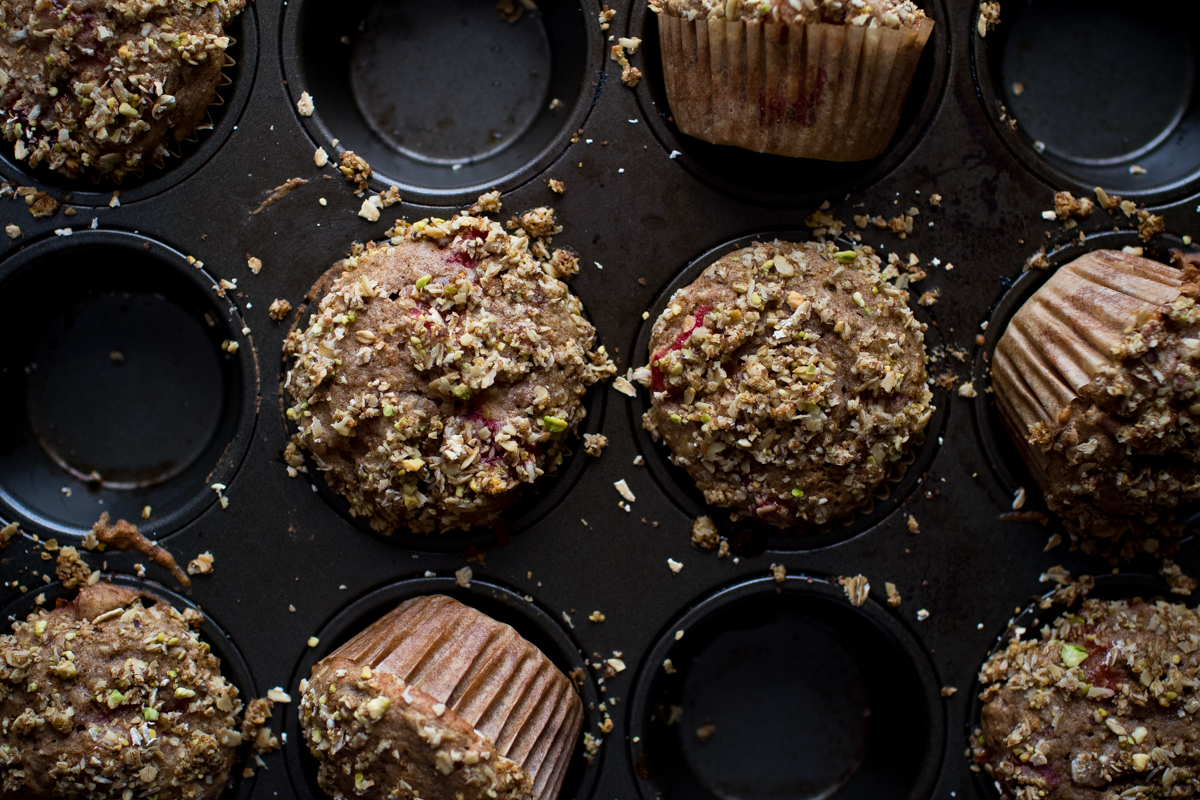
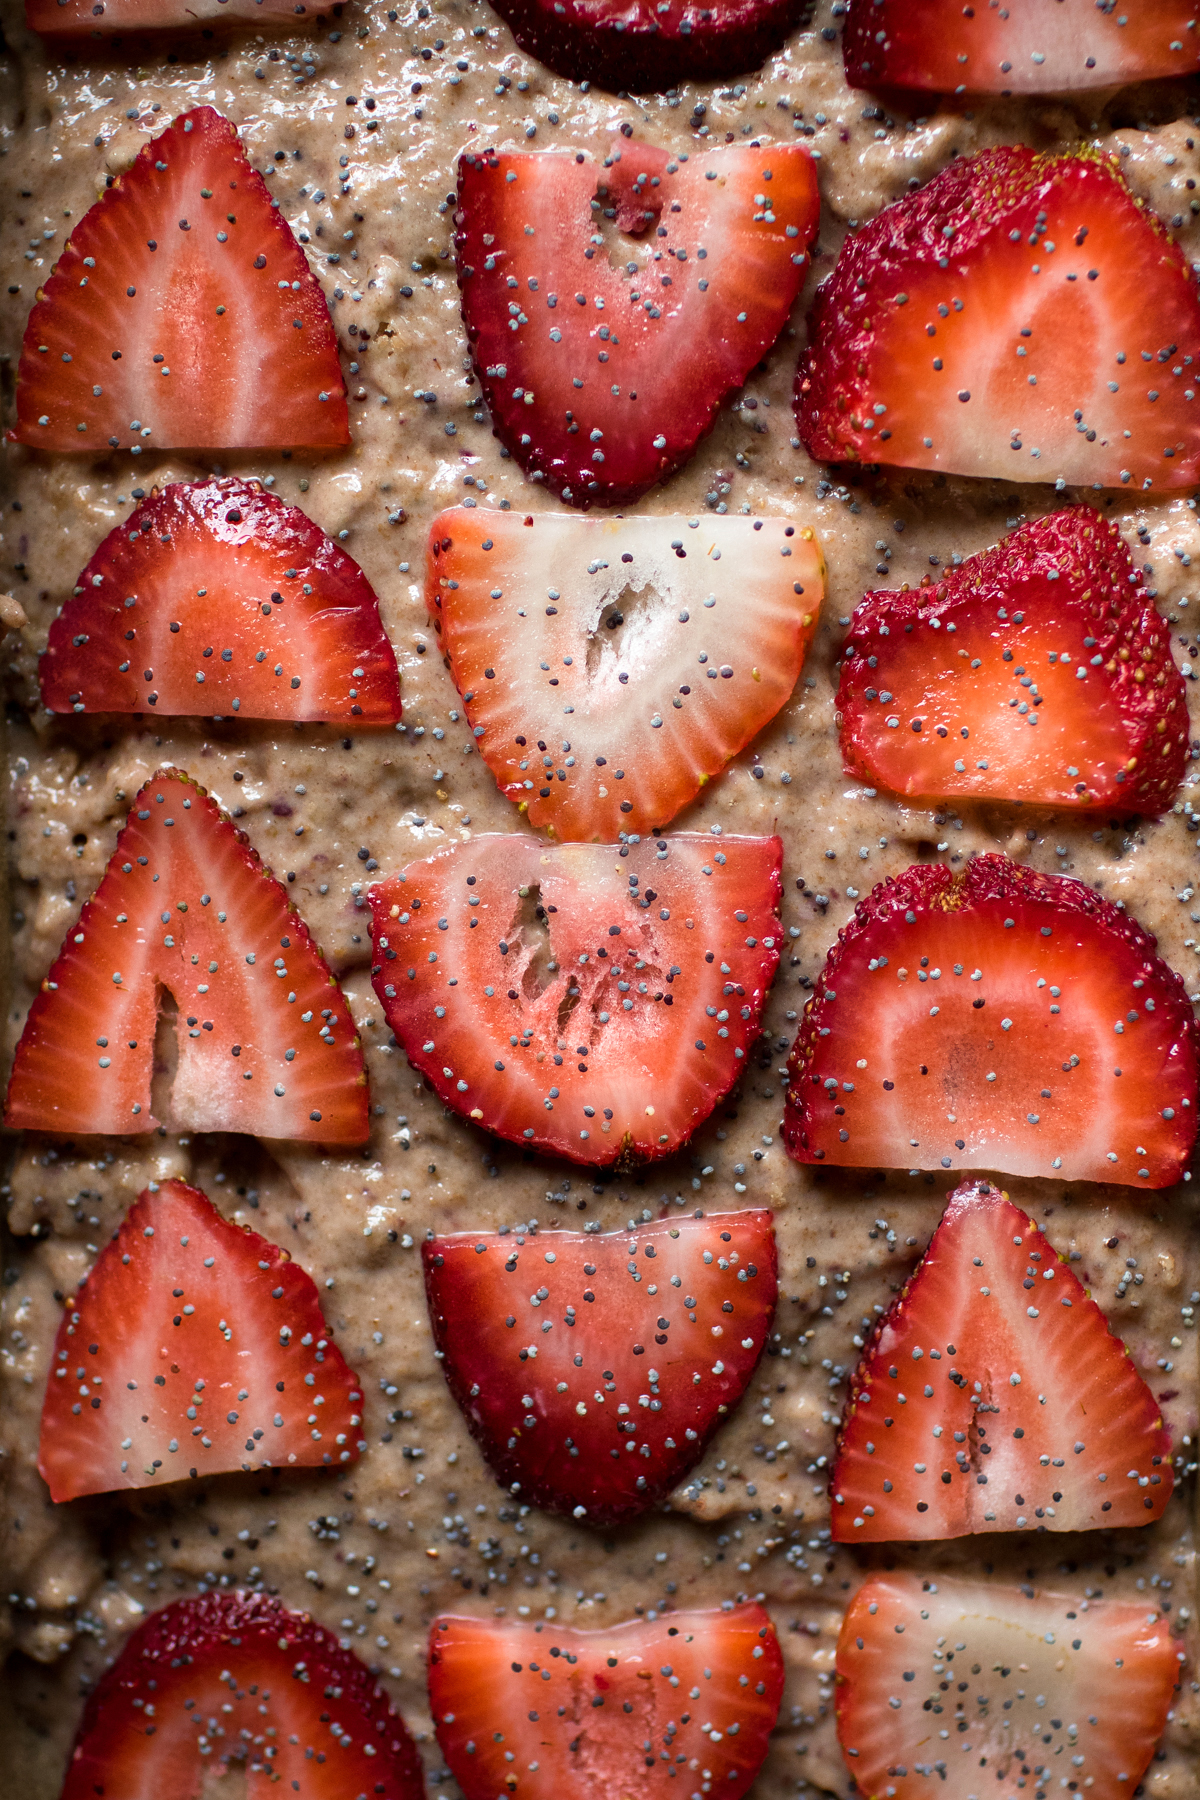
These strawberry rhubarb muffins are the perfect spring treat, made with roasted strawberries and rhubarb a[...]
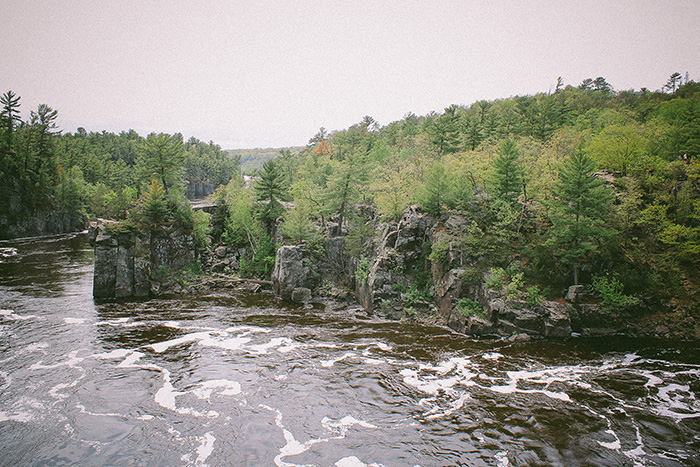
This week's post is coming late as I went up north this past weekend to visit my parent's for Easter. I'm[...]
Earlier this month, I headed down to North Carolina for a food and photography workshop. I had never b[...]
These Rosemary & Garlic Smashed Purple Potatoes are an easy but flavorful side dish perfect for any ty[...]

This Citrus Biscotti with Hibiscus Glaze packs a flavorful citrus punch that pairs perfectly with a cup of[...]
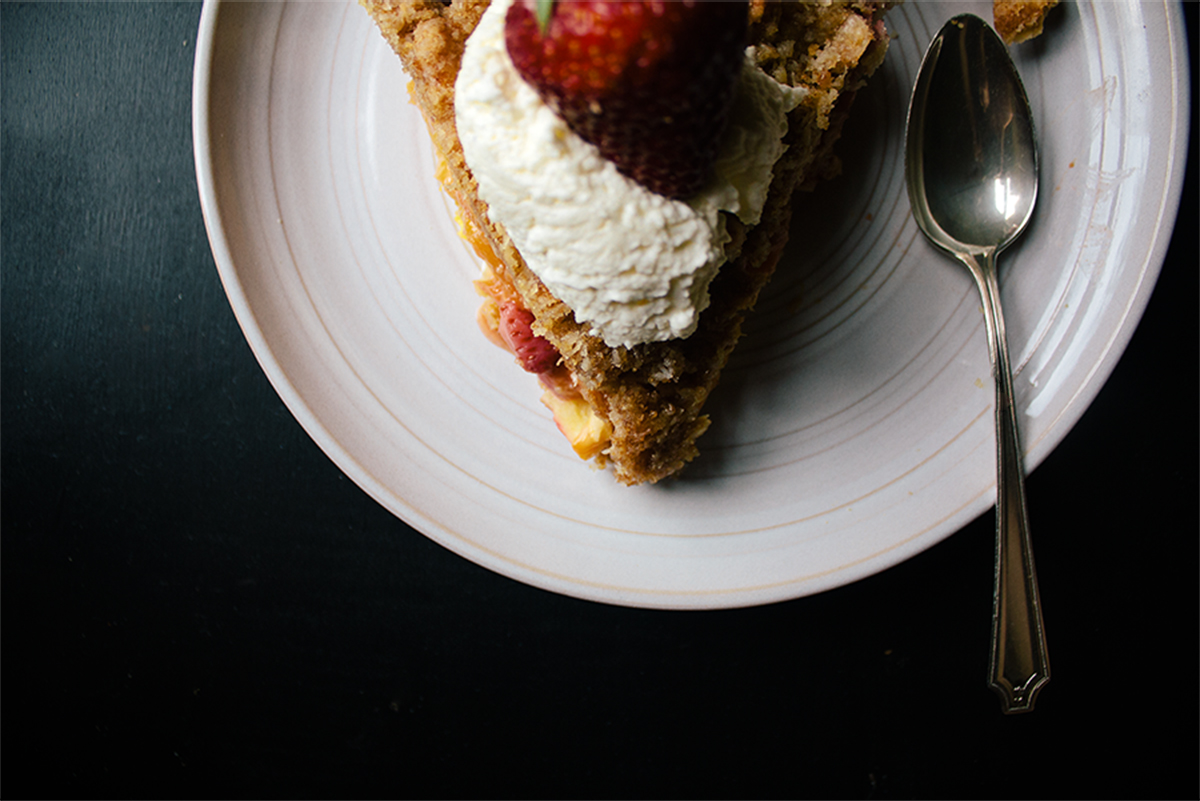
This Mango Strawberry Pie with Coconut Crumb Topping is a tropical flavored dessert worthy of any celebrat[...]

We are mixing it up on VV today with a wonderful guest post from Will Frolic For Food's creator Renee. I a[...]
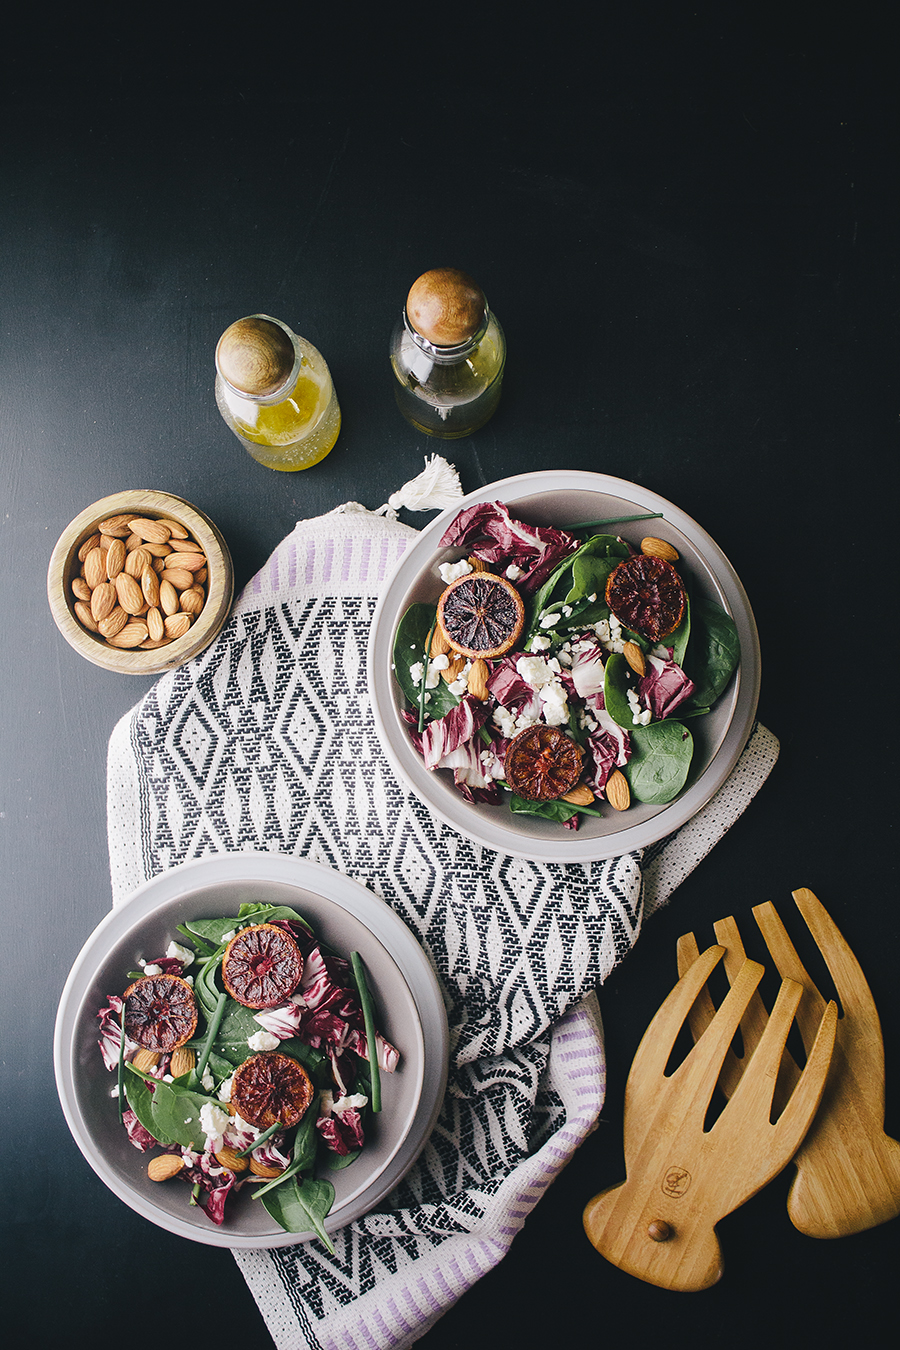
I know, I know. You are all over winter citrus and have moved on to asparagus and ramps. However, I ca[...]
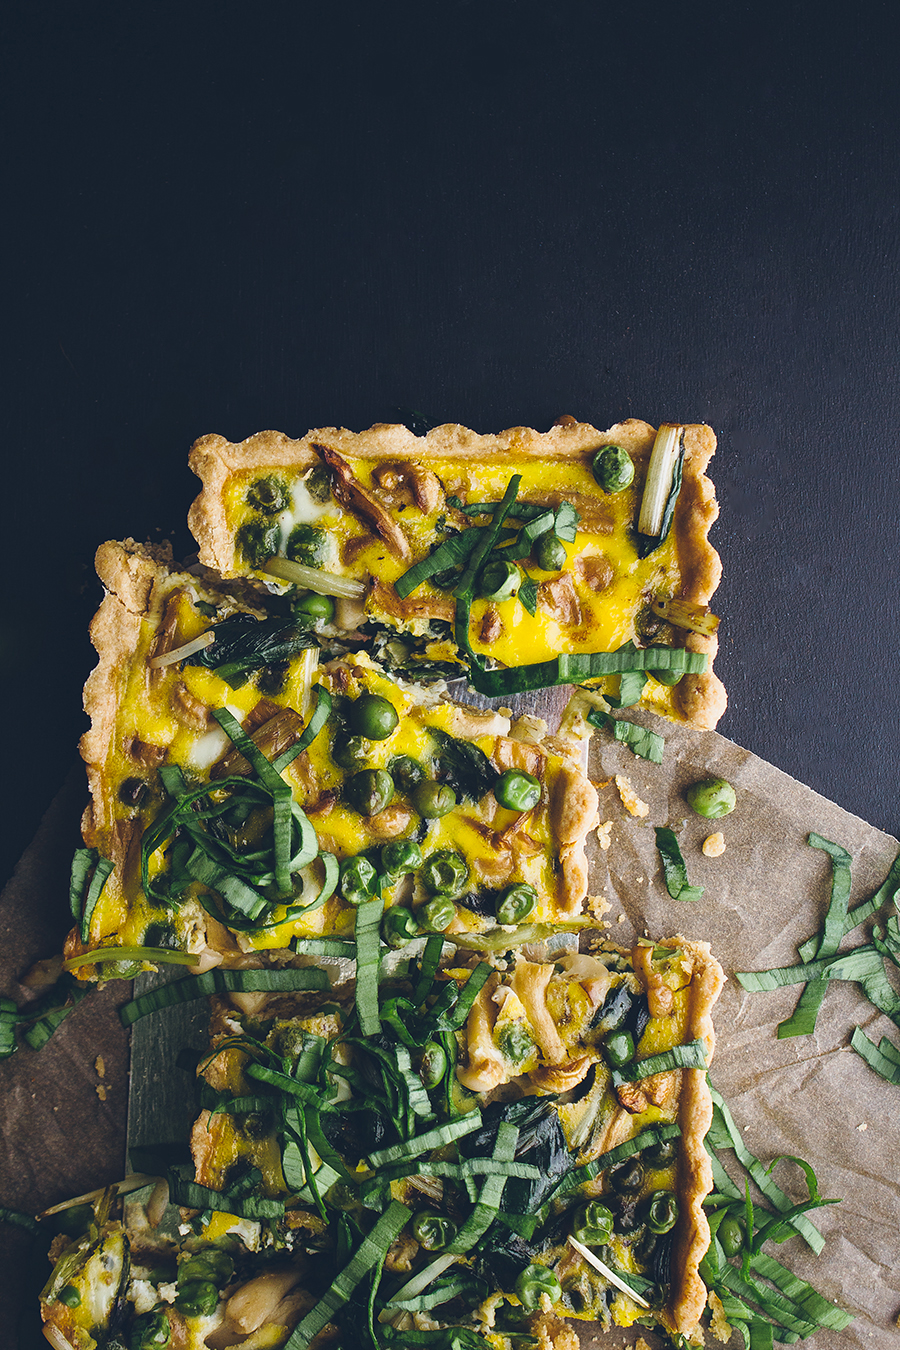
This vegetable quiche recipe has an Asian flair to it. Perfect for weekend brunches and special occasions,[...]
Every year our local radio station puts on an all day music event in the park. To me, it always marks th[...]
Spring is here and I'd be lying if I said I didn't keep busy all winter long while hiding from the polar[...]
Well, we are finally past the 'polar vortex' phase of the year and have officially started m[...]
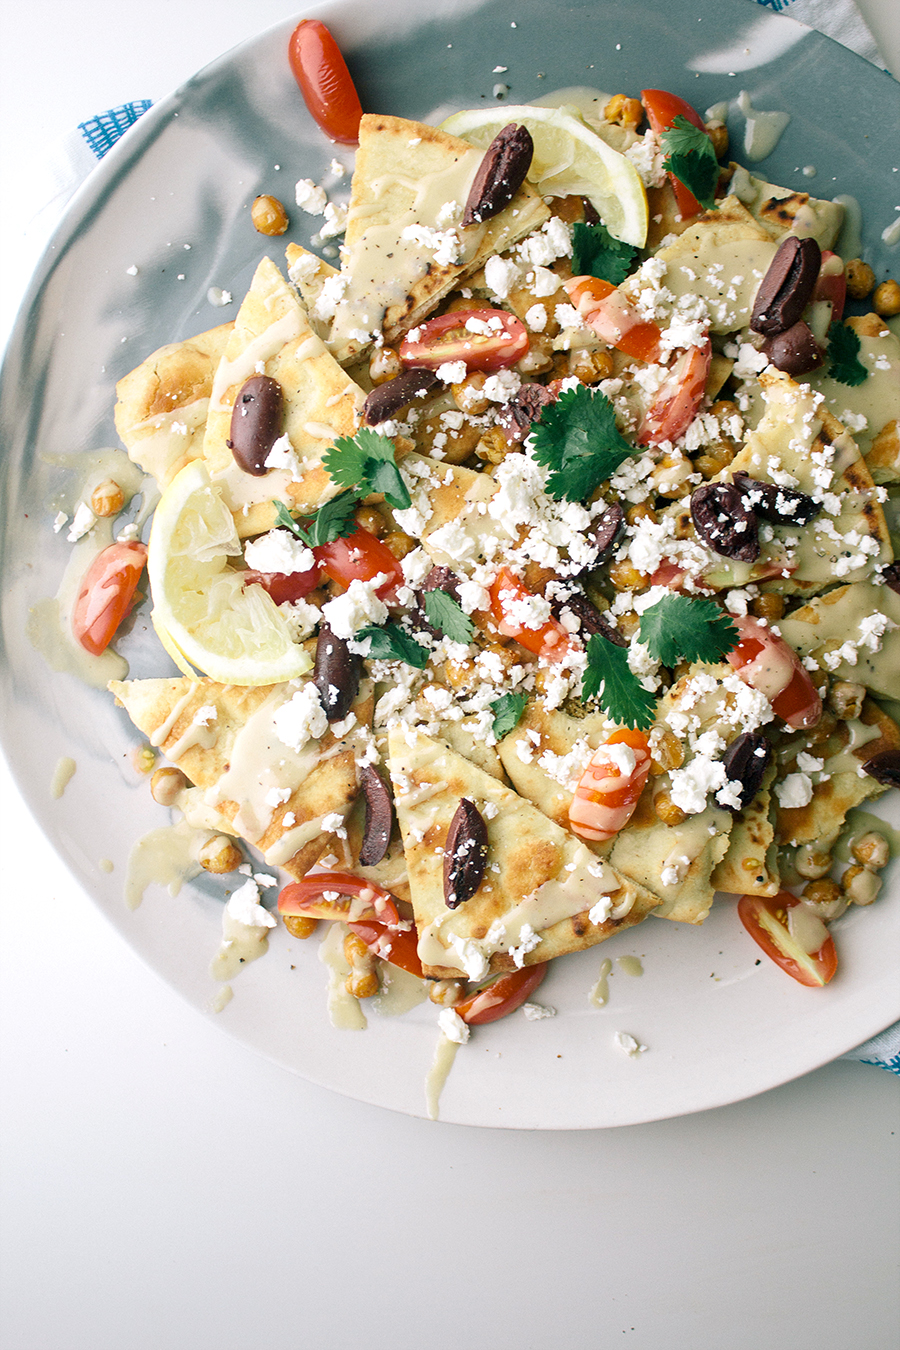
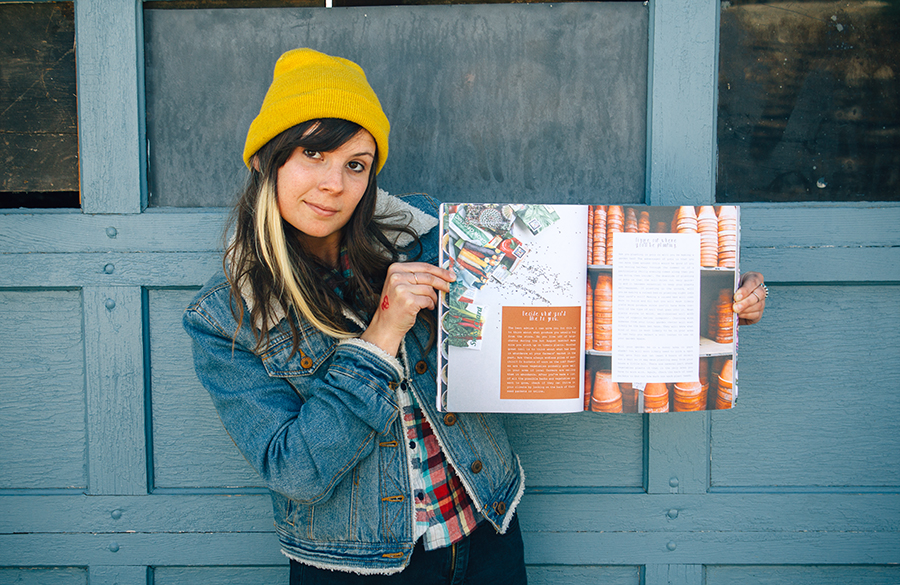
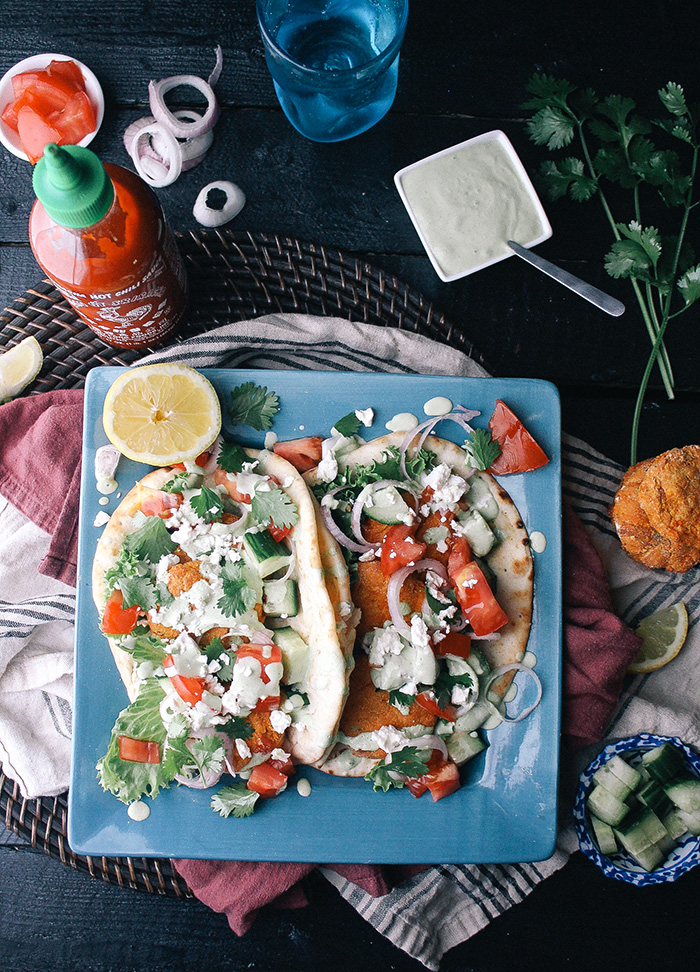
These aren't just any nachos - these are celebratory nachos! These are 'I just got nominated for a Bes[...]
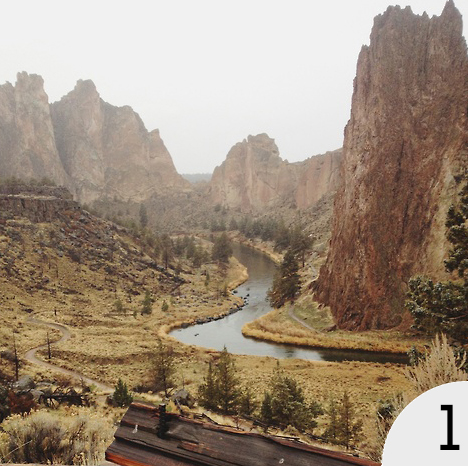
...And time for some inspiring links from around the web: 1. ADVENTURING // Headed to the[...]
I grew up in a town where 'world cuisine' meant heading to a chinese buffet or picking up a deep dish pizza.[...]

1. CRAVING /// Have you seen this Roasted Apricot Buttermilk Ice Cream wit[...]
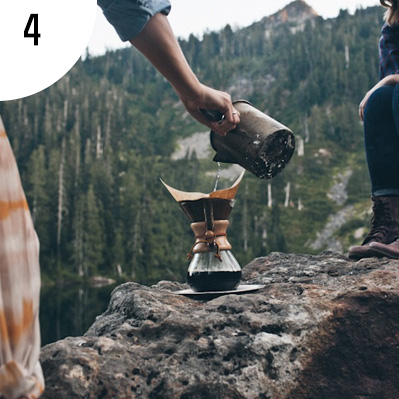
We ditched work last Friday and headed to a cabin in the woods for our long Memorial weekend. Wyatt has fami[...]
...And we're back! After almost a month long break from 'Searchable Saturday's'! Is everyone geared up for t[...]