
So I started my day a bit bummed out. In addition to it being Monday (yuck), I also received some news that my designer working on the new blog layout had some family things come up and she will not be able to follow through on my redesign! It’s a total shame and sort of got me down (I had been looking forward to this redesign since September!). However, after much consideration, I have come to the conclusion I was meant to do this one myself. I started this blog as a creative outlet and for me to hand off one of the biggest parts of the creative process for a blog (designing it!) seems a bit silly. Yes, it’s going to take many hours of drinking ginger-lemon tea and watching youtube videos to figure out how to transfer all my information into a self-hosting site and to learn what the html code is…for well, pretty much everything…. but it will be a rewarding learning experience. I had been feeling in a bit of a blog rut lately and this will be good to step back from my daily posting routine and a chance to get creative on a different level.

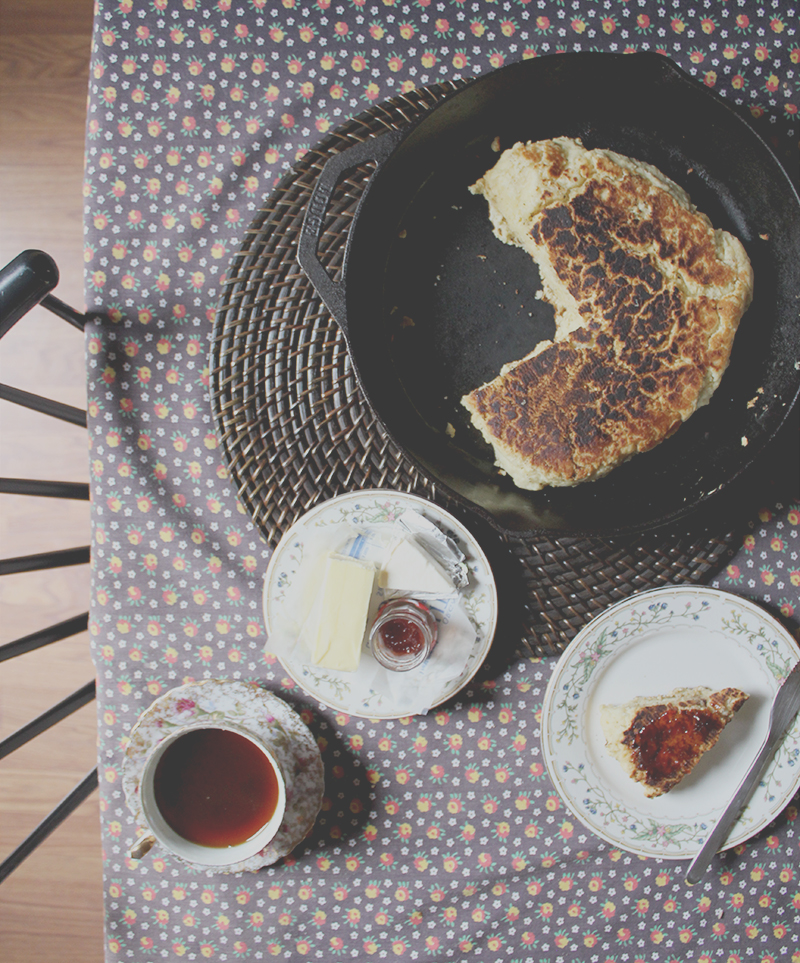
Anyhow, enough about that – how was your weekend? I picked up the What Katie Ate and Homemade Winter (I made those delicious Gingerbread muffins from her last book!) for some weekend inspiration. This recipe for bannock is out of the Homemade Winter book and it was oh so delicious with some butter and strawberry jam. Think a hybrid of a savory scone and crumbly pancake. Got it? Now you want to make some? Okay, cool. Here is the recipe:

Bannock Bread
adapted from Homemade Winter
- 2 cups all purpose flour
- 2 Tablespoons sugar
- 1/2 teaspoon baking powder
- 1/2 teaspoon salt
- 3 Tablespoons butter, cold and sliced
- 1 cup buttermilk (I made my own)
Combine the flour, sugar, baking powder, and salt in a bowl. Next, cut in the butter and slowly add the buttermilk until the mixture is just combined (don’t overmix!).
Heat a skillet over high heat and melt a tablespoon of butter and then turn down to medium-high heat. Form the sticky dough into a large ball and place on the skillet (flatten it a bit but not so much that it’s touching the edges). Let cook on that side for about 5 minutes (turn down the temperature a little bit if it’s cooking too fast – I almost burned mine the first time around) and then flip to cook on the other side for another 5 minutes.
Remove from pan and let cool slightly. Serve with butter and jam or cream cheese or syrup or whatever you can find that looks tasty in your fridge!


4 Comments
Gabby @ the veggie nook
This looks so beautiful and rustic!!
myhealthyohana
Aw, I hope you have a better rest of the day!! That’s awesome that you are going to do the design yourself. I give you a lot of credit, I am totally inept at that, so I am always impressed when people can do those kinds of things!!
A Table in the Sun
When one door closes……another one opens.
Shelly
A Table in the SunGreat way to look at it!